I’m reading Learning Windows Azure by Geoff Webber-Cross, following the examples and got to the chapter where I need to configure a custom domain name for the Azure Web App and upload SSL Certificate. I have not done it before, so it turned out to be an interesting experience.
The author did not mention what domain name registrar he used but he mentioned that he got SSL Certificate from GlobalSign. Since I already had an account with GoDaddy, I decided to buy a domain name and SSL Certificate from it. Another difference from author’s experience is that I’m doing the development in Windows 8 Pro virtual machine (Parallels) on MacBook Pro.
tl;dr
If you do not currently own a domain name – you might want to follow this post to buy it directly in Azure Portal, then this one to obtain and upload SSL Certificate but I had problems following instructions in both posts, hence this post.
Buy Domain Name
As I mentioned, I’m following the examples in the book and already have Web App deployed in Azure and it has a URL of aazurebakerycustomer.azurewebsites.net . As you can see – you can request the page using either HTTP or HTTPS protocols. In the latter case, Azure provides a wildcard SSL Certificate for you. If you click on the green padlock in browser address bar, then select Connection tab and then click on Certificate Information you will see that the SSL Certificate belongs to Microsoft.

It is time to get your own. But before that you need to buy a domain name.
On GoDaddy web site navigate to Domains | Domain Search, select the name that you like (I’ve got testwebapp.com), buy it, and then go to Domains | Manage My Domains, select the domain name and you will end up on Domain Details page. From there you need to go to DNS ZONE FILE page. This page displays your default resource records. We will be interested in A (Host) and CName (Alias) records.
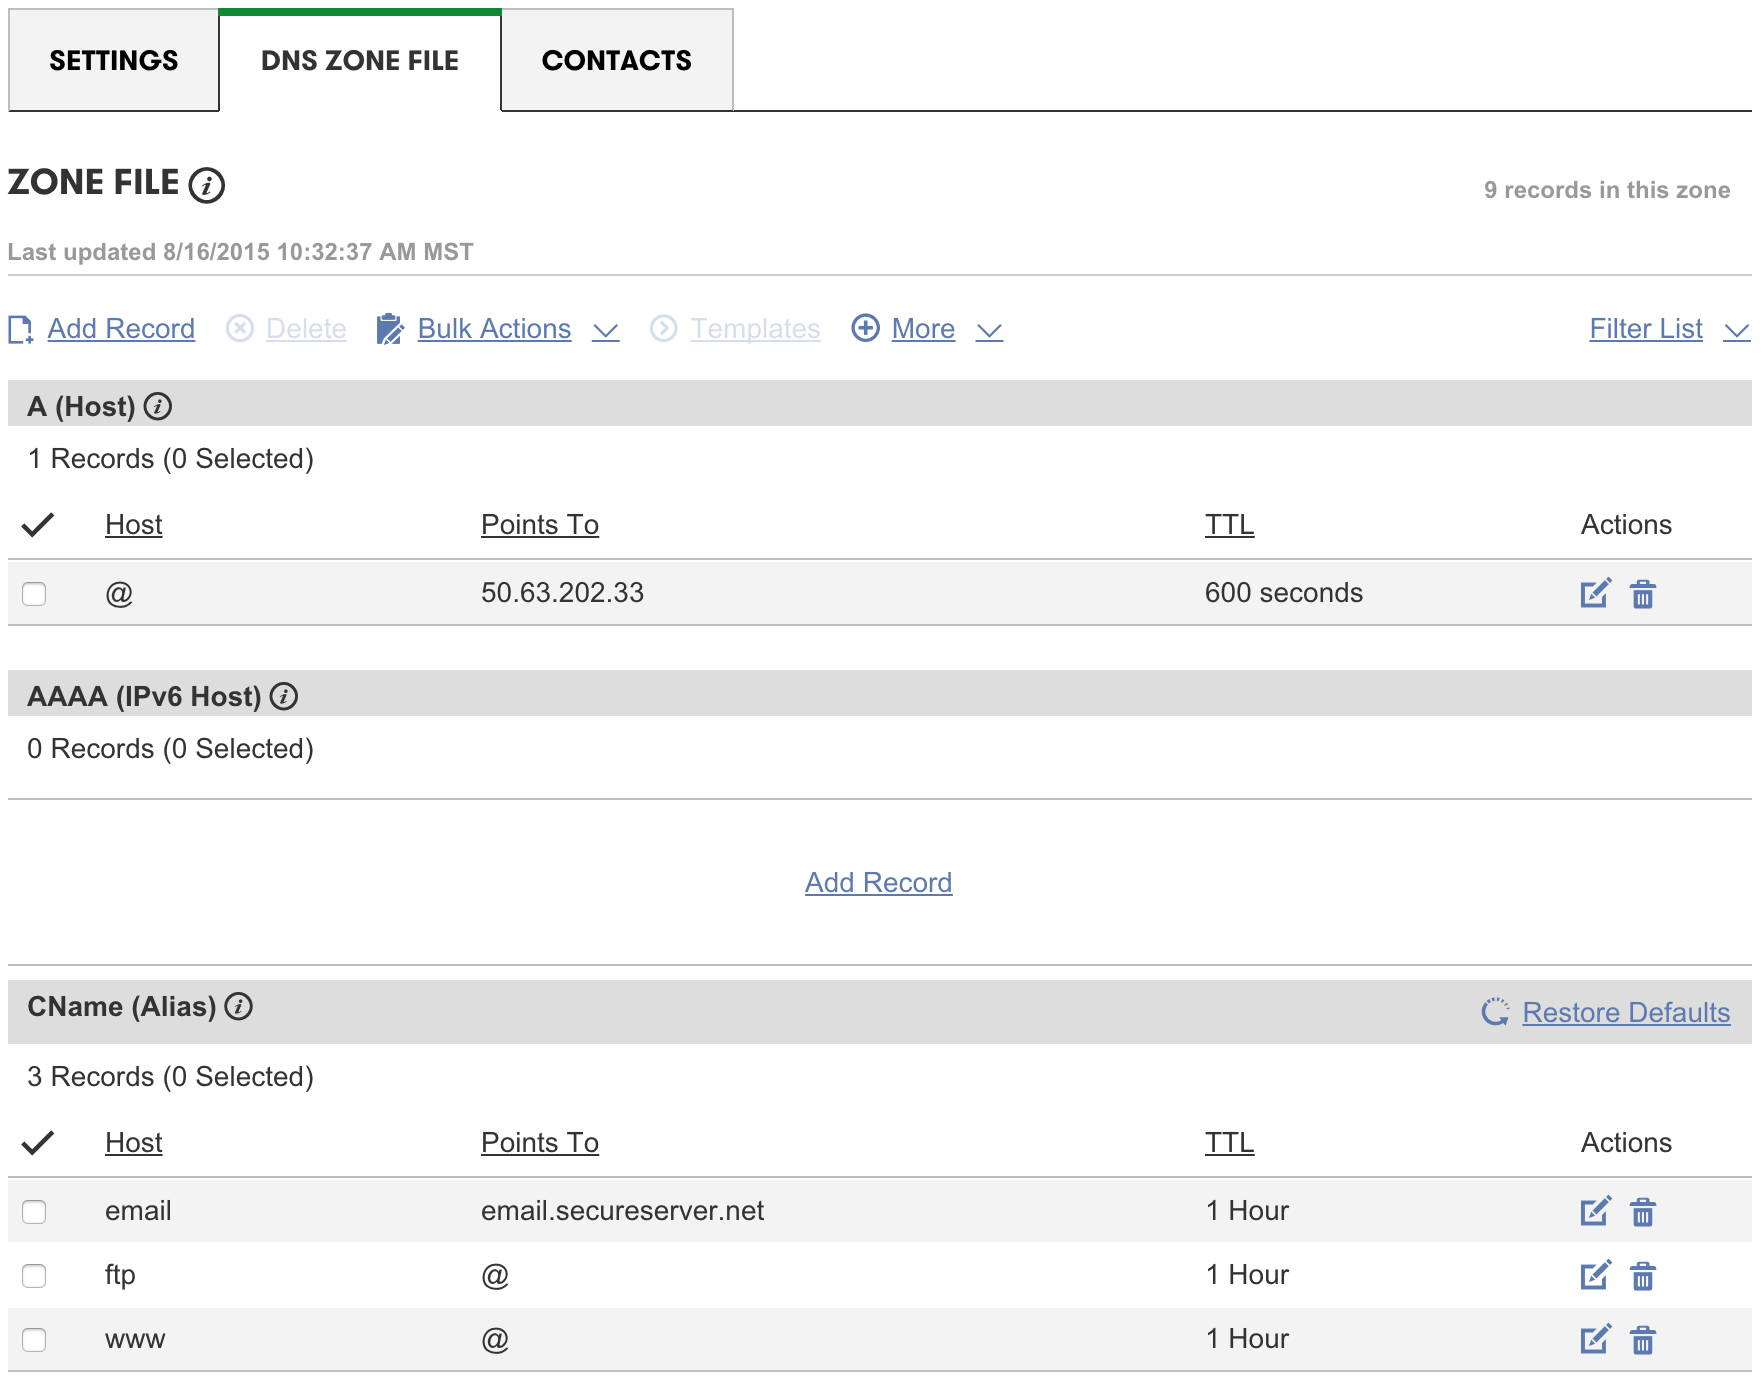
In short, A (Host) record points a domain name to IP address and CName (Alias) record points one subdomain to another.
In the A-record section we see that the root domain (the @ symbol, which is synonymous to the domain I bought, i.e. testwebapp.com) is currently pointing to the IP address of the web page that is parked for us by GoDaddy.
If you open a Terminal or Command Prompt window and type
nslookup testwebapp.com
you will see
Non-authoritative answer:
Name:	testwebapp.com
Address: 50.63.202.33
In the CName record section we see three default records which map common subdomains. We do not care about email and ftp subdomains, but we do about www. The last record says, that www subdomain is mapped to root domain (@), in other words it means that http://www.testwebapp.com is mapped to testwebapp.com. Let’s check:
nslookup www.testwebapp.com

Non-authoritative answer:
www.testwebapp.com	canonical name = testwebapp.com.
Name:	testwebapp.com
Address: 50.63.202.33
So, http://www.testwebapp.com maps to testwebapp.com using CName record, and then testwebapp.com maps to IP address 50.63.202.33 using A record.
Configure A- and CName-records in Domain Name Registrar
Currently the custom domain name testwebapp.com points to a parked web page provided by GoDaddy, but we need it to point to Azure Web App. To do that we need to know the IP address of that app.
NOTE: your app needs to be in a Standard App Service Plan!
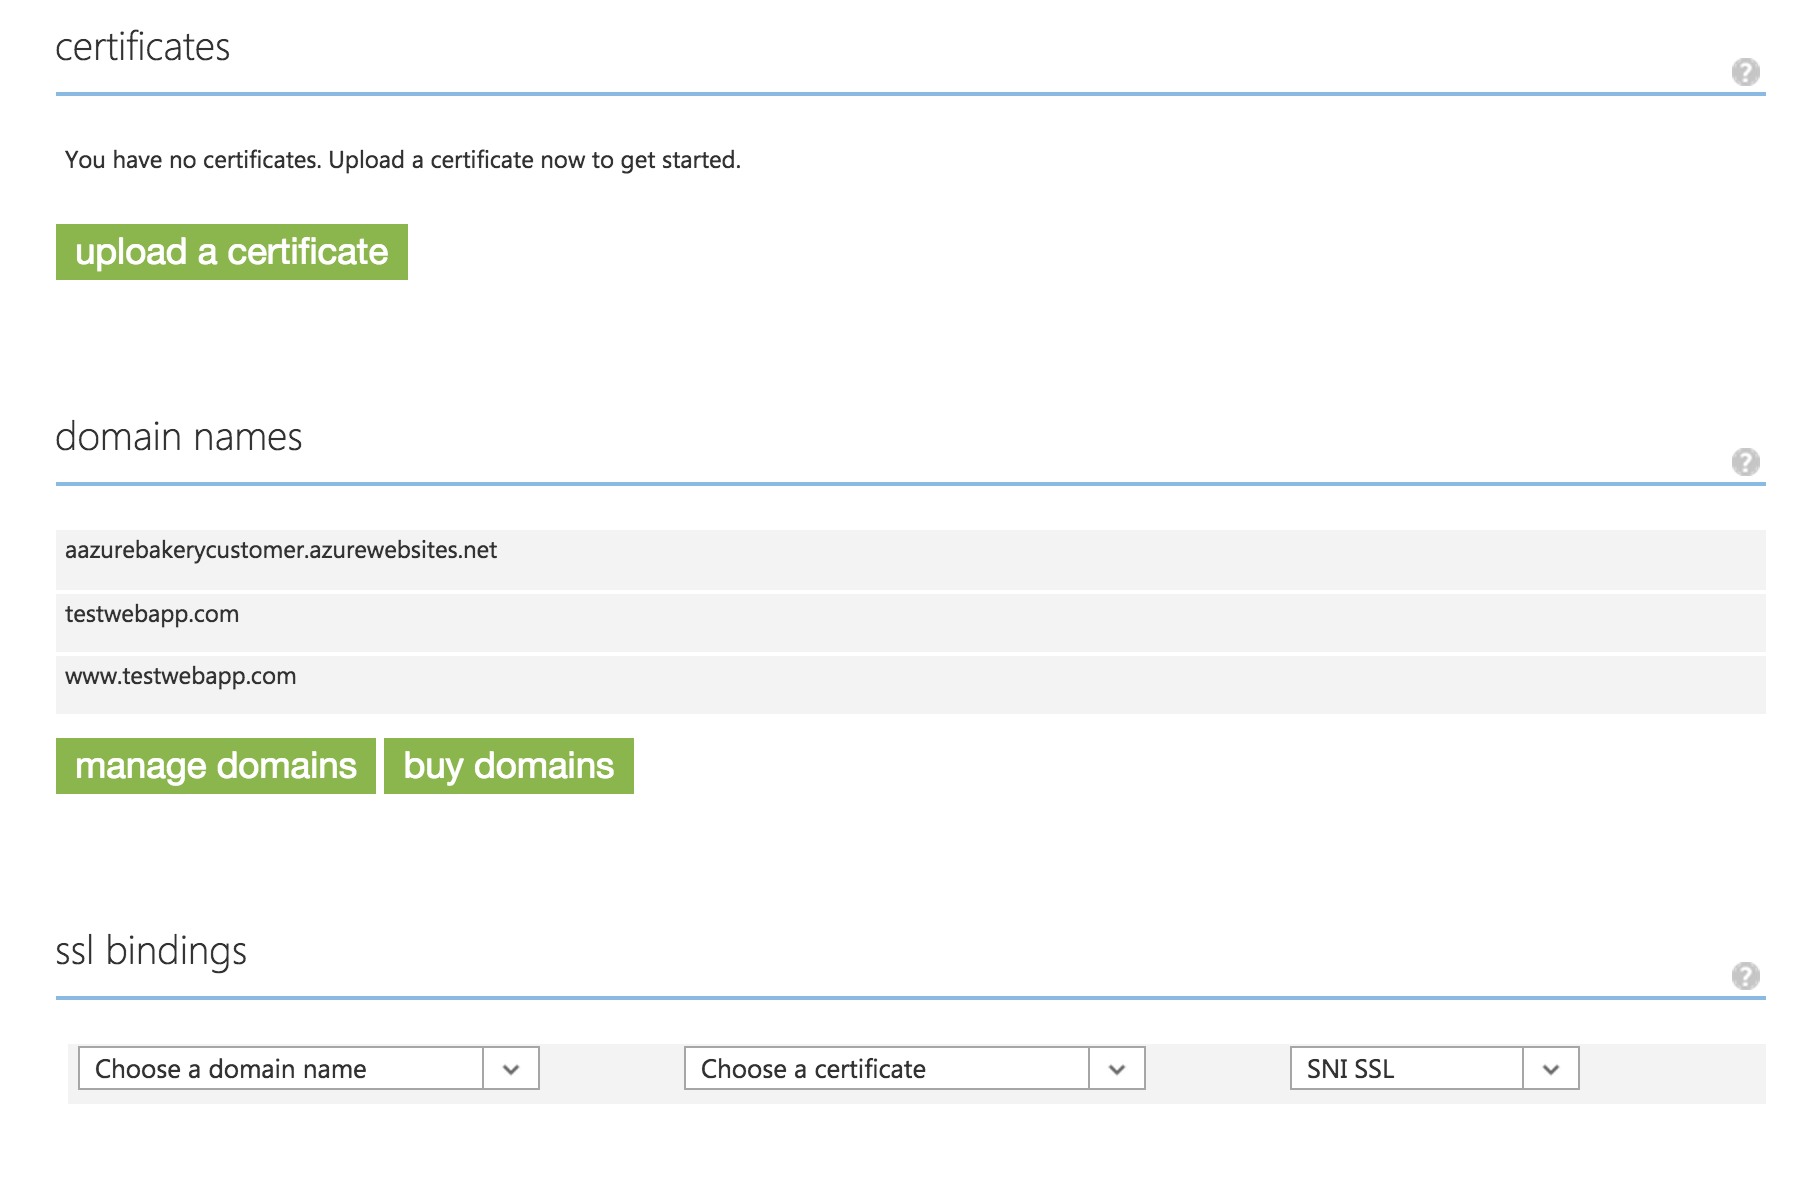
In Azure Portal navigate to the Web App and select CONFIGURE. This page displays the SSL Certificates, domain names and SSL bindings.
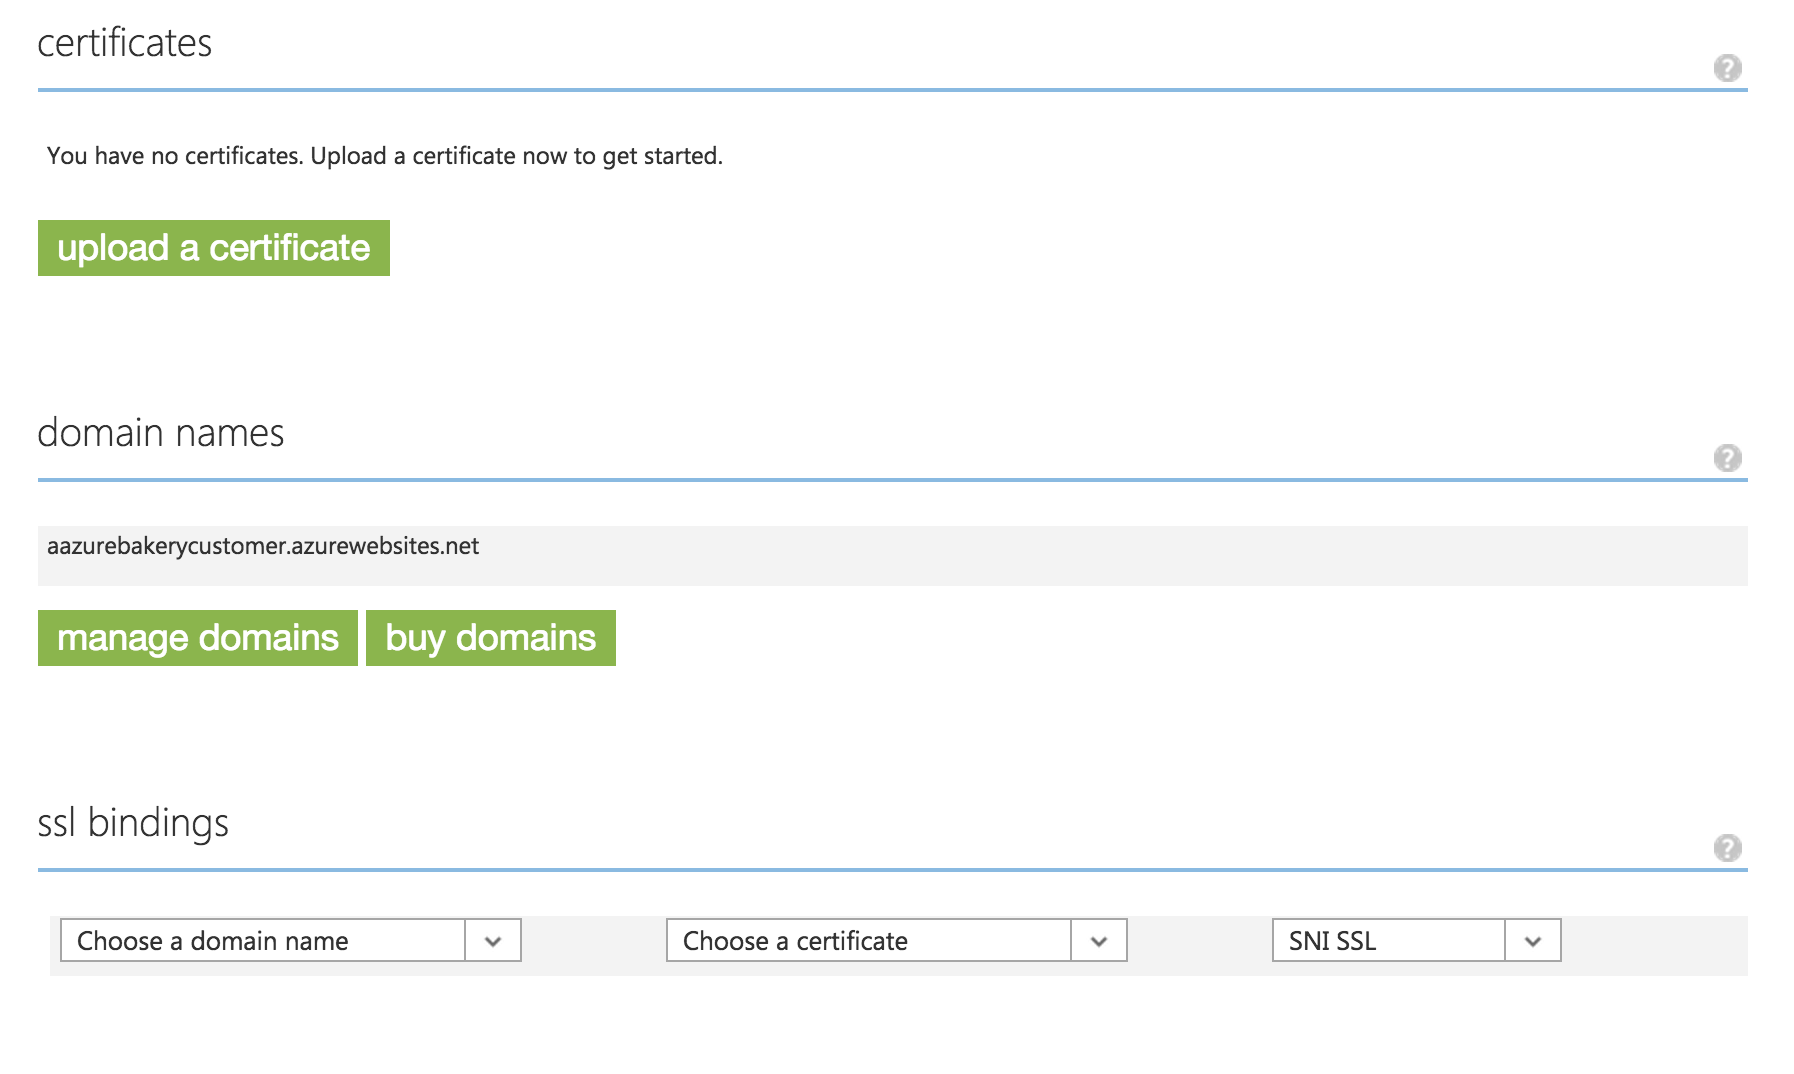
Currently, the page displays only one domain name that you’ve got when I created the Web App – aazurebakerycustomer.azurewebsites.net.
Hit manage domains button to see the IP address assigned to the app.

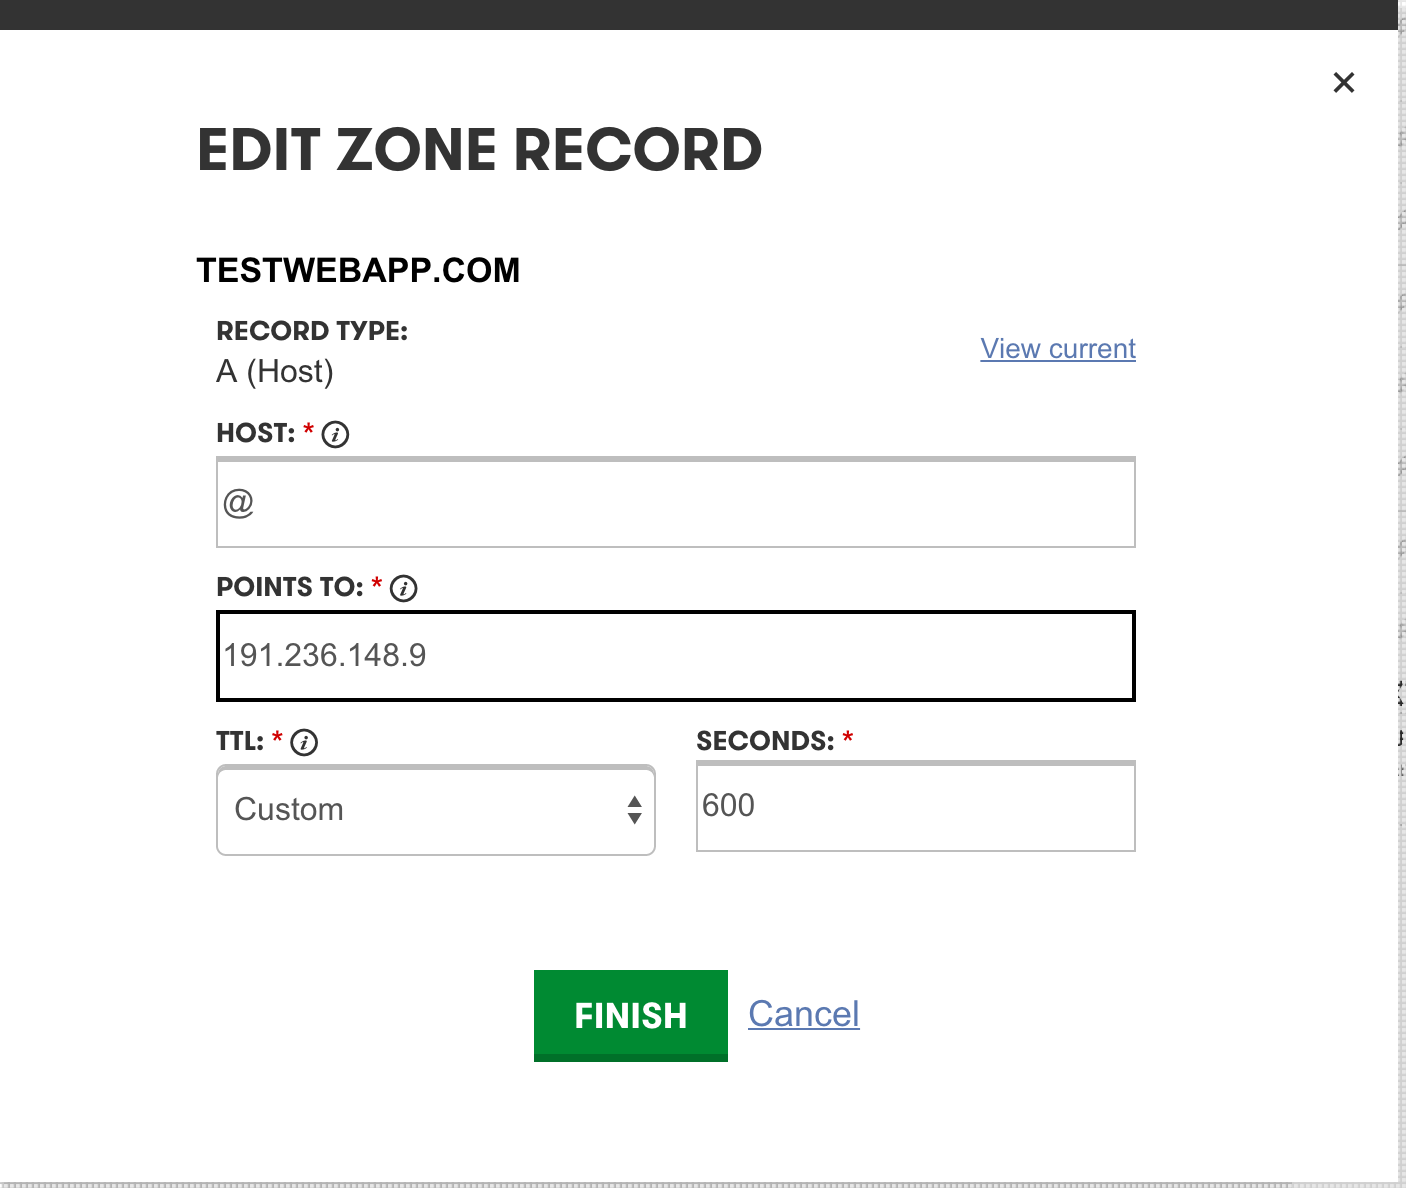
From this page we see that we need to use the IP address of 191.236.148.9 when configuring our A record.
This is the point where I started having problems. I followed the instruction to a tee, but in the end still could not make www subdomain to redirect to the root domain. I.e. when I would type http://www.testwebapp.com instead of navigating to my Web App, the browser would give me 404 – Page Not Found error. I started experimenting with different settings and finally made it working. In the end I had to modify the original A- and CName-records and create a new CName-record:
First, I re-mapped the original A-record for root domain (@) (i.e., testwebapp.com) from GoDaddy’s parked web page to the IP address of the Web App (191.236.148.9)
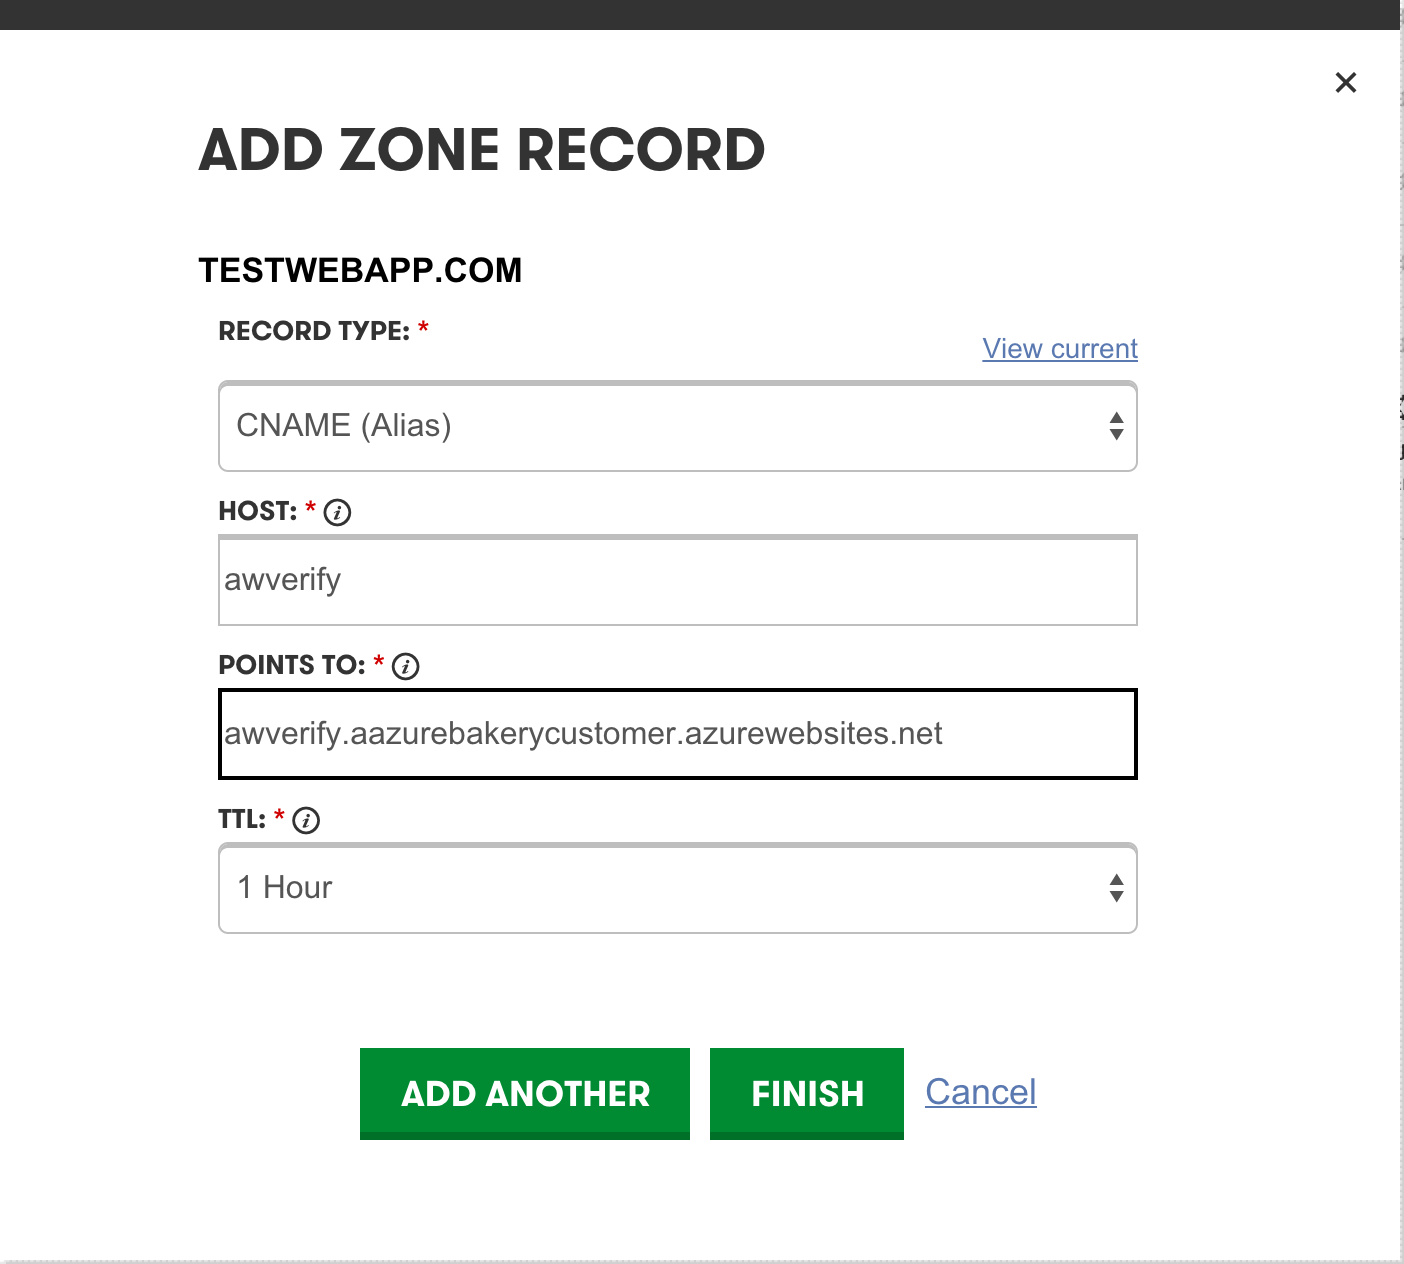
Second, I created a new CName-record for Azure verification. I mapped awverify subdomain to awverify.aazurebakerycustomer.azurewebsites.net
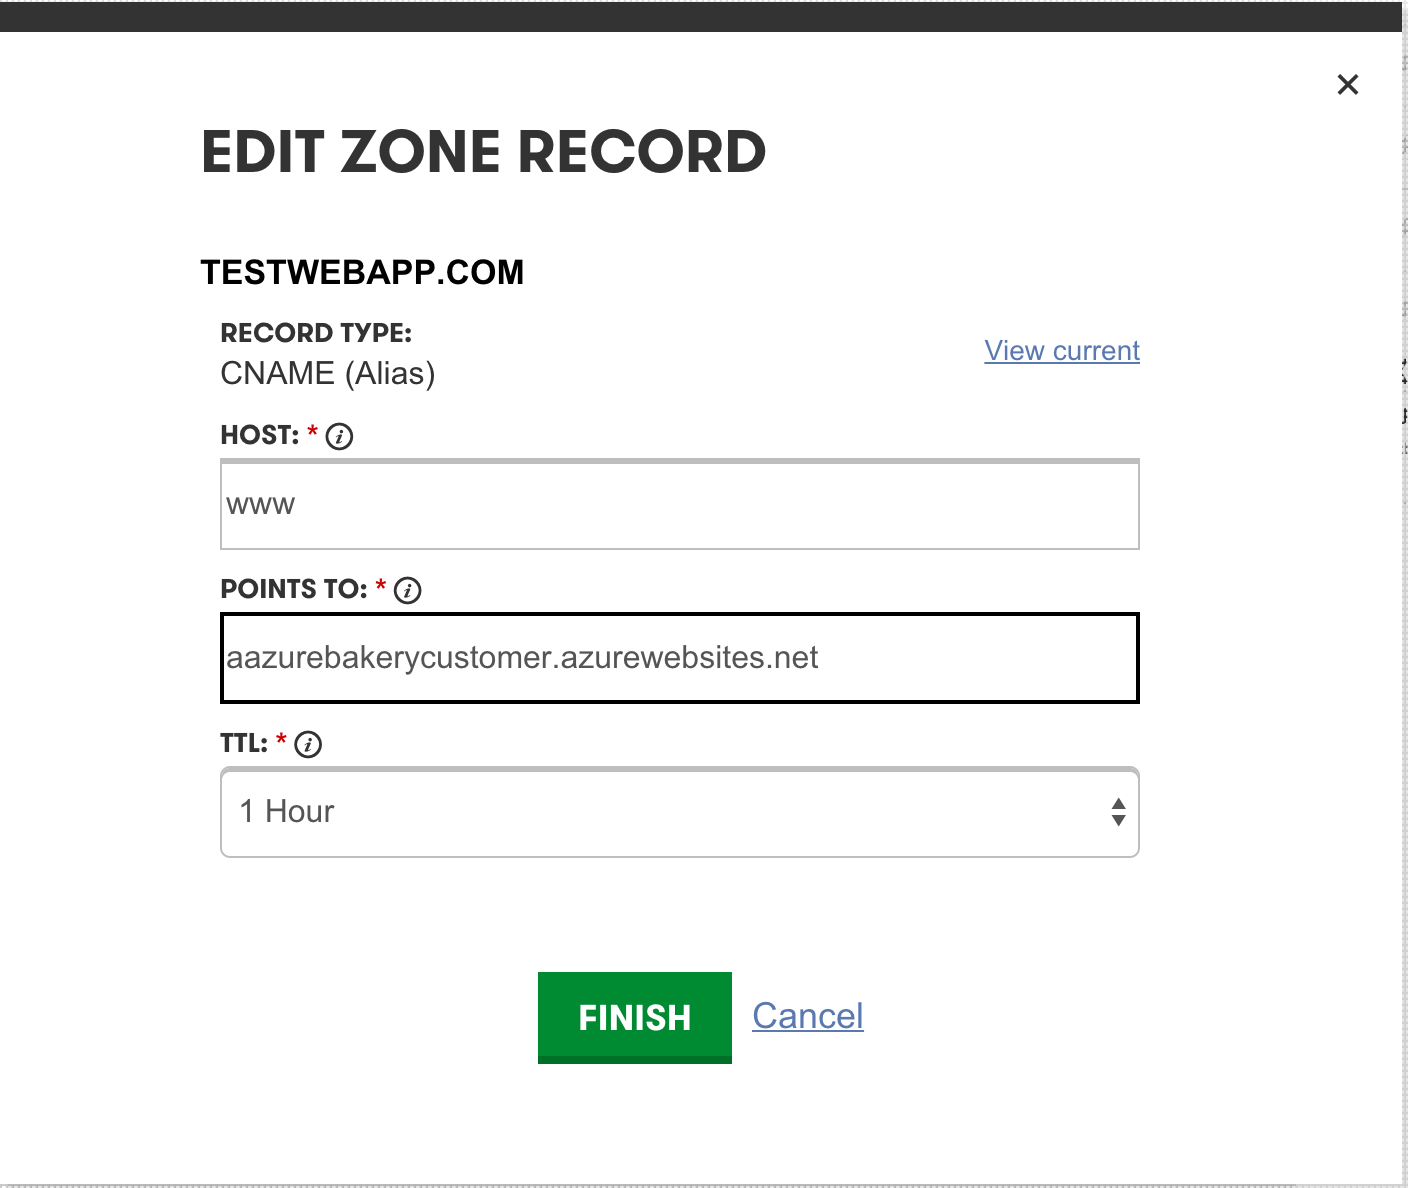
Third, I re-mapped the original CName-record for www subdomain. I changed “POINTS TO” mapping from root domain (@) to aazurebakerycustomer.azurewebsites.net. This resolved the problem with 404 error navigating to http://www.testwebapp.com
So, in the end I ended up with these A- and CName- records:
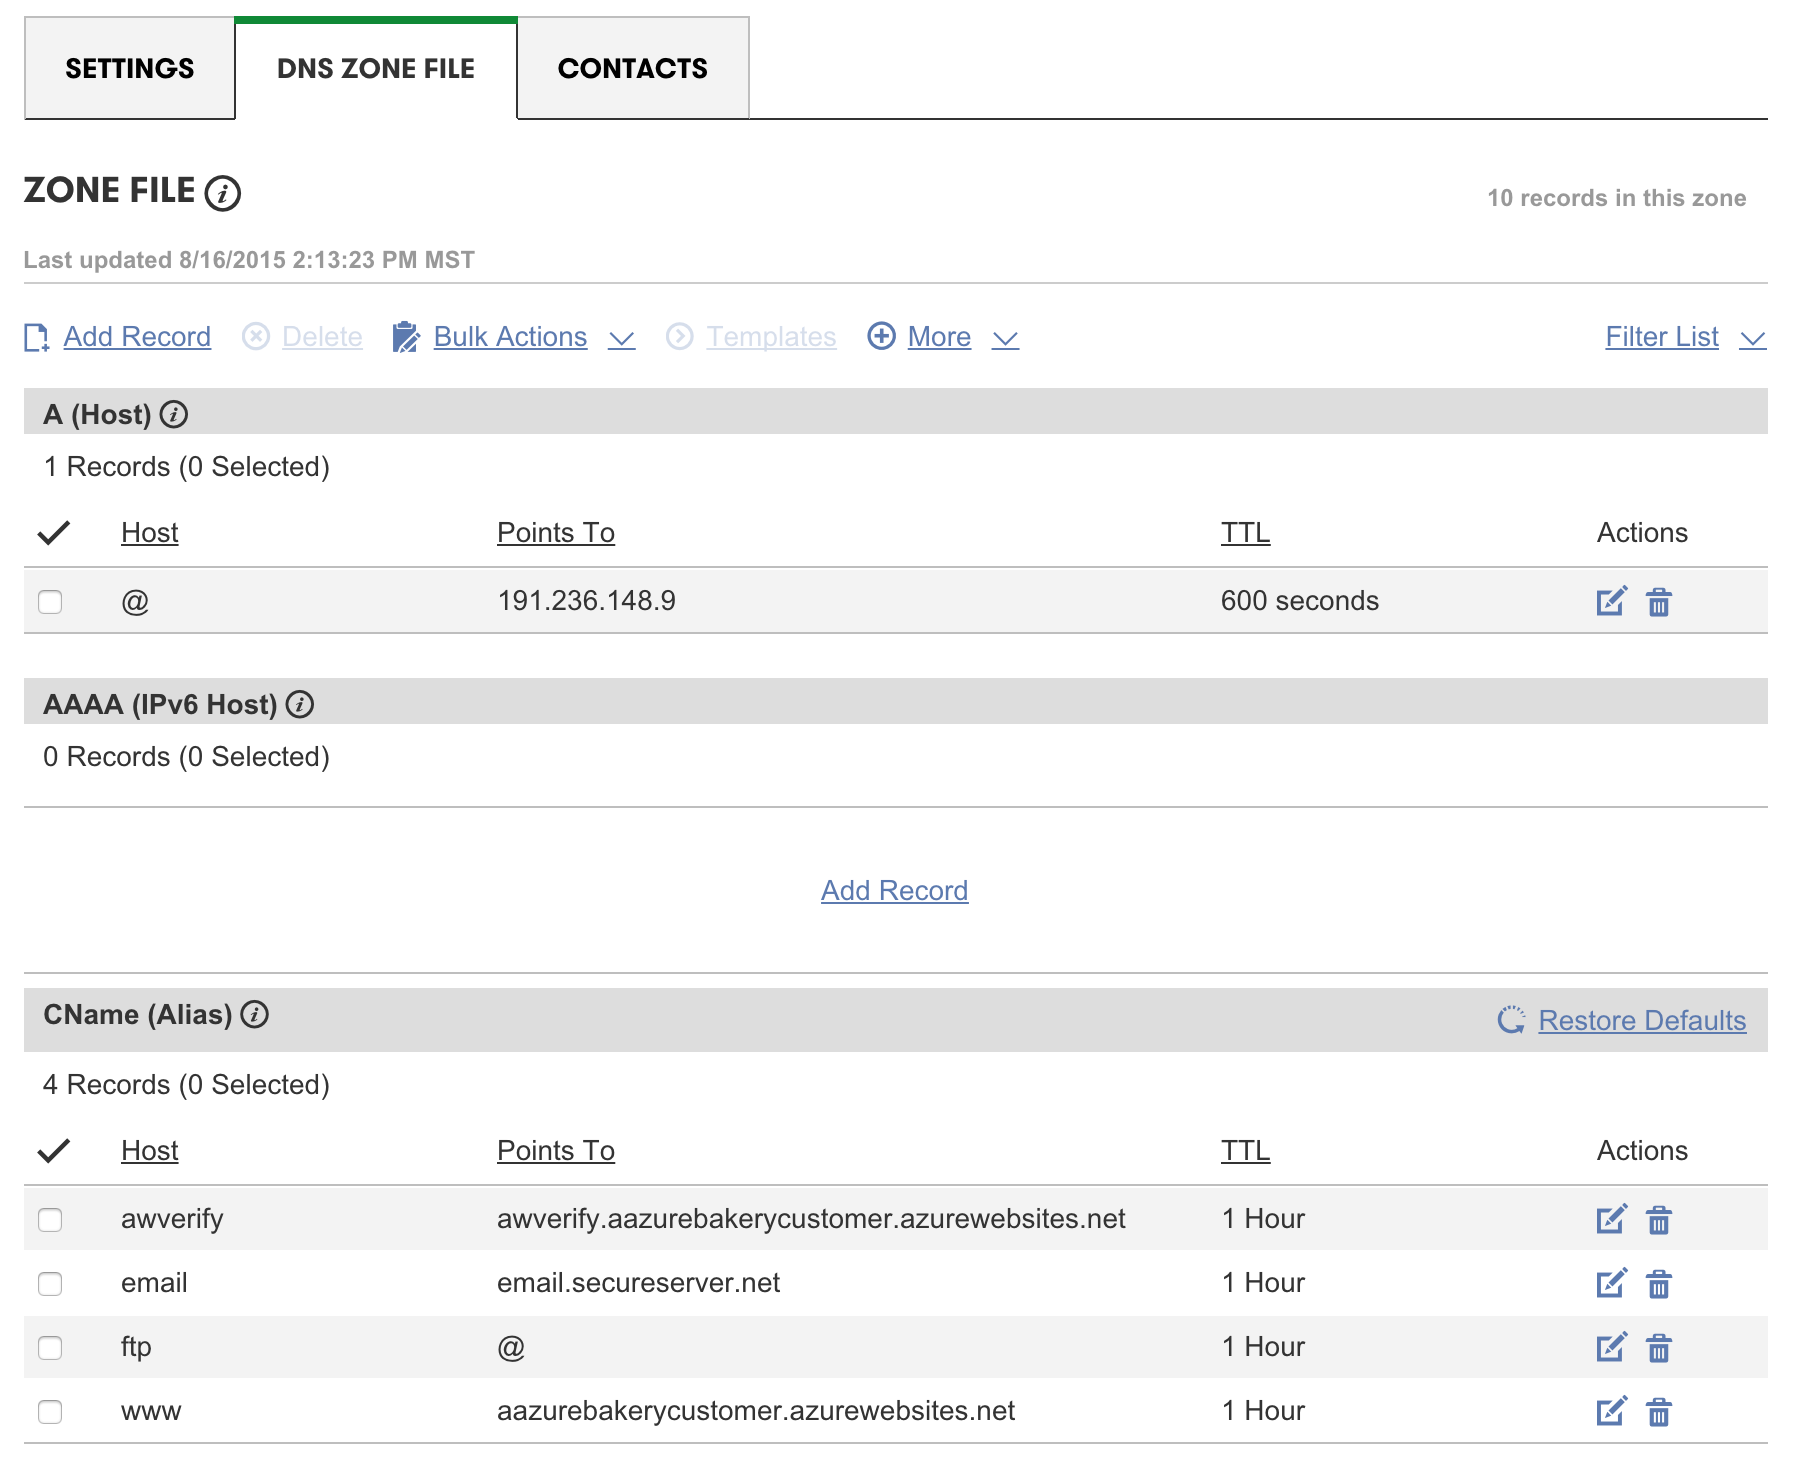
After a few minutes I did the following checks:
nslookup testwebapp.com

Non-authoritative answer:
Name:	testwebapp.com
Address: 191.236.148.9
and
nslookup www.testwebapp.com

Non-authoritative answer:
www.testwebapp.com	canonical name = aazurebakerycustomer.azurewebsites.net.
aazurebakerycustomer.azurewebsites.net	canonical name = waws-prod-ch1-013.vip.azurewebsites.windows.net.
waws-prod-ch1-013.vip.azurewebsites.windows.net	canonical name = waws-prod-ch1-013.cloudapp.net.
Name:	waws-prod-ch1-013.cloudapp.net
Address: 191.236.148.9
which confirmed that DNS records have been propagated.
Configure Domain Names in Azure Portal
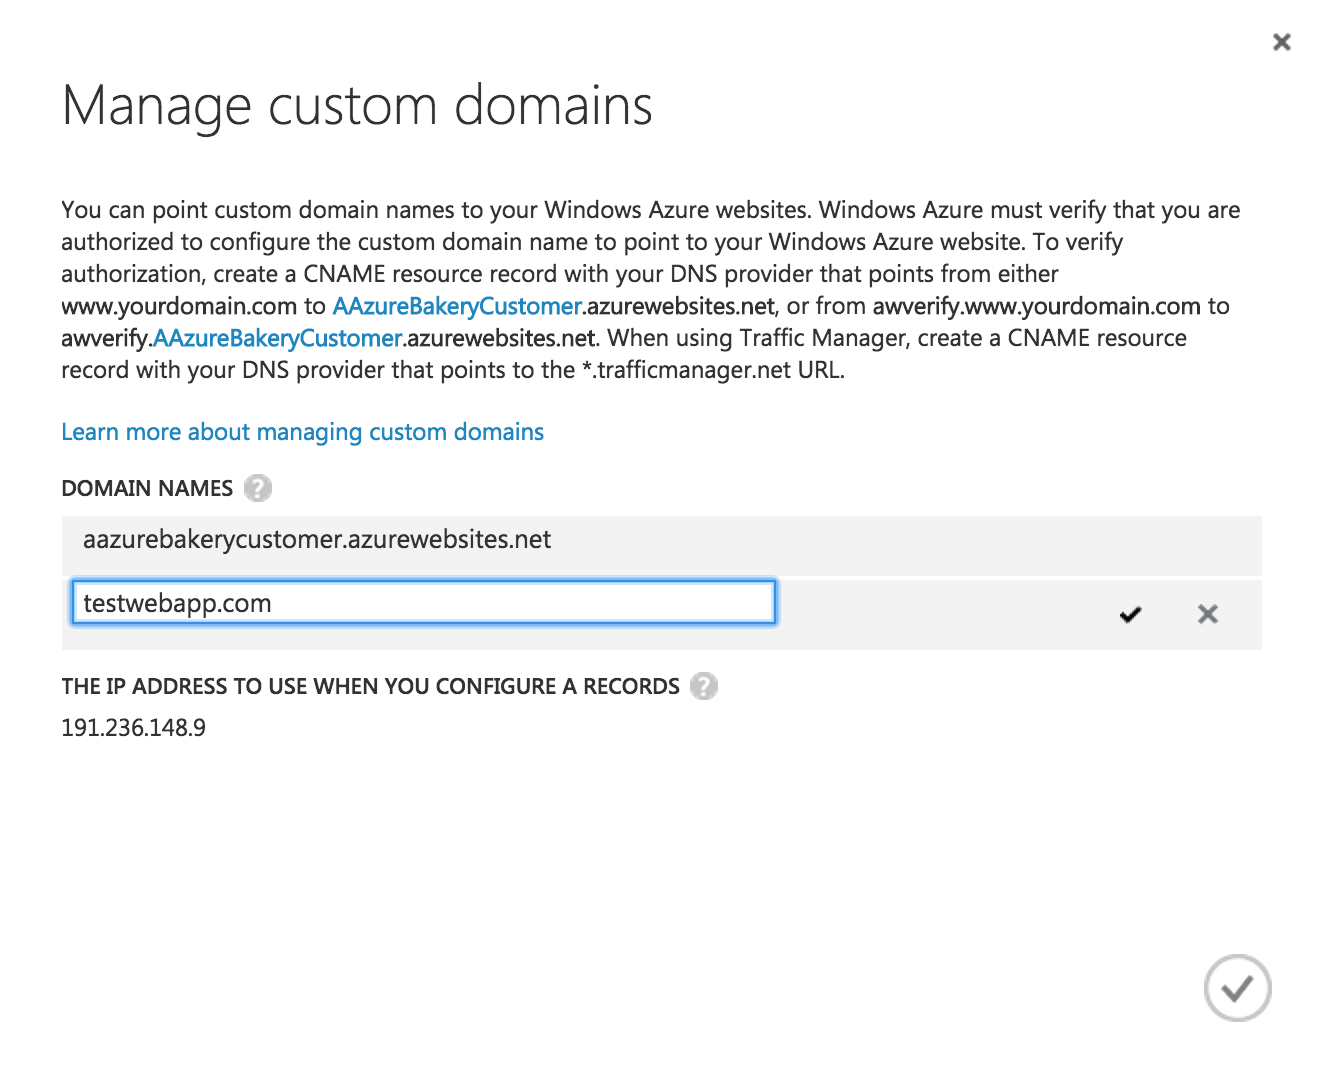
Now it’s time to go back to Azure Portal and configure the domain names. Go to CONFIGURE page and in domain names section hit manage domains button.
First, add testwebapp.com (there will be a green check mark to the right of the name, but I missed it while taking a pic)
Then http://www.testwebapp.com (yay! green check mark!)
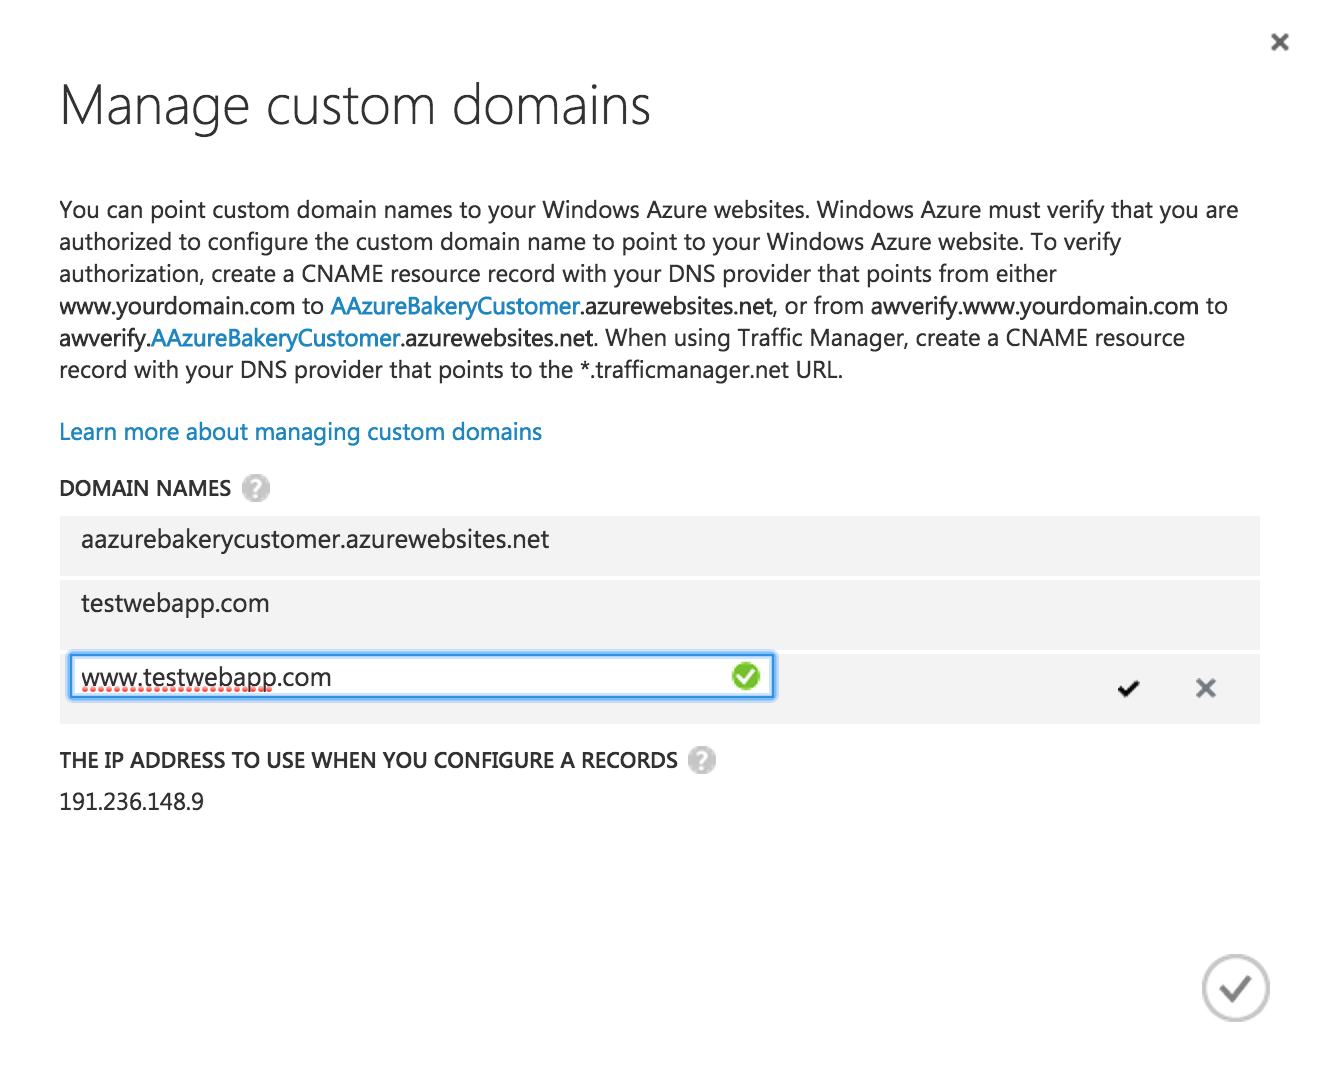
In the end I had the following settings for domain names:
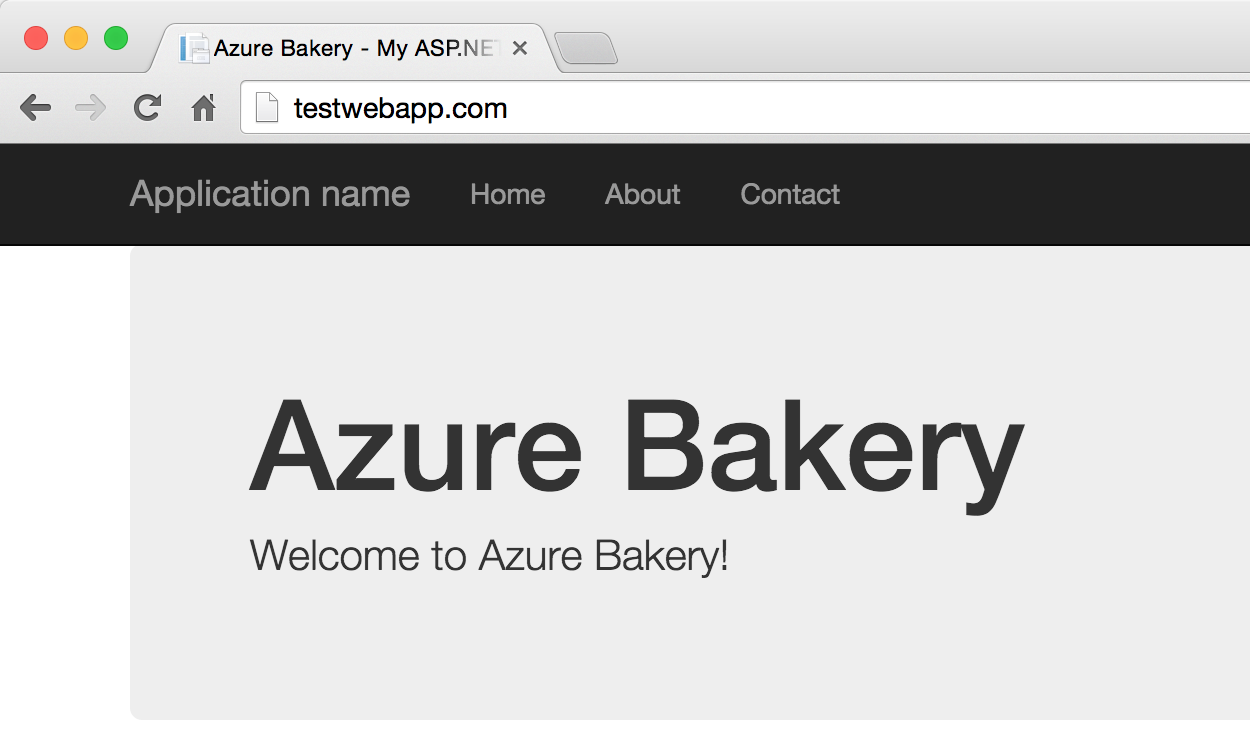
Now, if you navigate to either root domain testwebapp.com
or www subdomain http://www.testwebapp.com
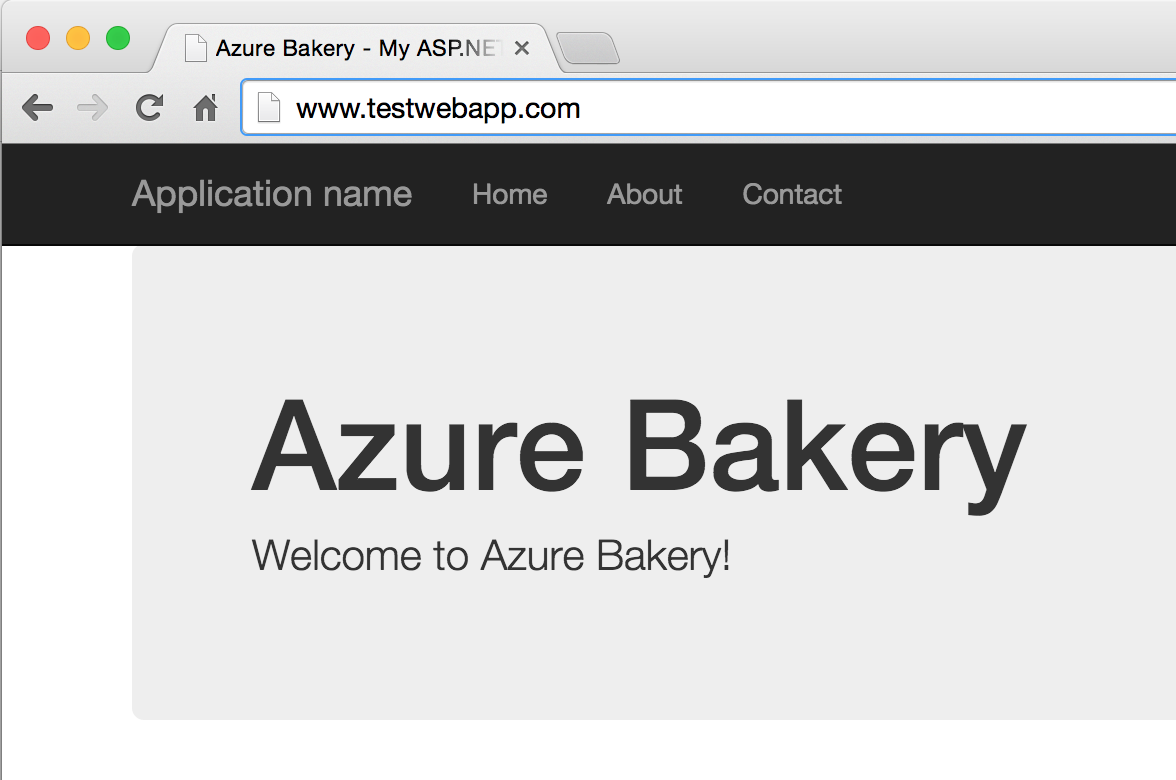
you will hit the Azure Web App. Now it is time to deal with SSL Certificate.
Buy SSL Certificate
On GoDaddy web site navigate to Hosting & SSL | SSL Certificates. On this page you can buy SSL Certificate that secures one website, UCC/SAN SSL Certificate that secures up to 100 websites or Wildcard SSL Certificate that secures one website and all of its subdomains. We need the first one – that secures just one site. After you purchase it – it’s time to generate a Certificate Signing Request file.
Generate a Certificate Signing Request (.CSR) File
The above mentioned post lists a number of ways you can generate CSR file. I initially started with option using Certreq.exe in Windows 8 Pro virtual machine (Parallels) but GoDaddy would not accept the resulting CSR saying it has an error. I’m not sure if it had to do something with the fact that I was generating CSR in a VM.
Next, because I’m using MacBook Pro I decided to try the third option – generating CSR with OpenSSL bypassing the option with IIS. OS X has OpenSSL preinstalled. If you want to use it on Windows machine, you need to download and install it since Windows does not come with it.
In Terminal type the following command and provide answers. The Certificate Authority (CA) will validate that you are the owner of the domain name the SSL Certificate you are requesting for.
openssl req -new -nodes -newkey rsa:2048 -keyout testwebapp.com.key
-out testwebapp.com.csr
On this step you do not actually need to provide a challenge password.
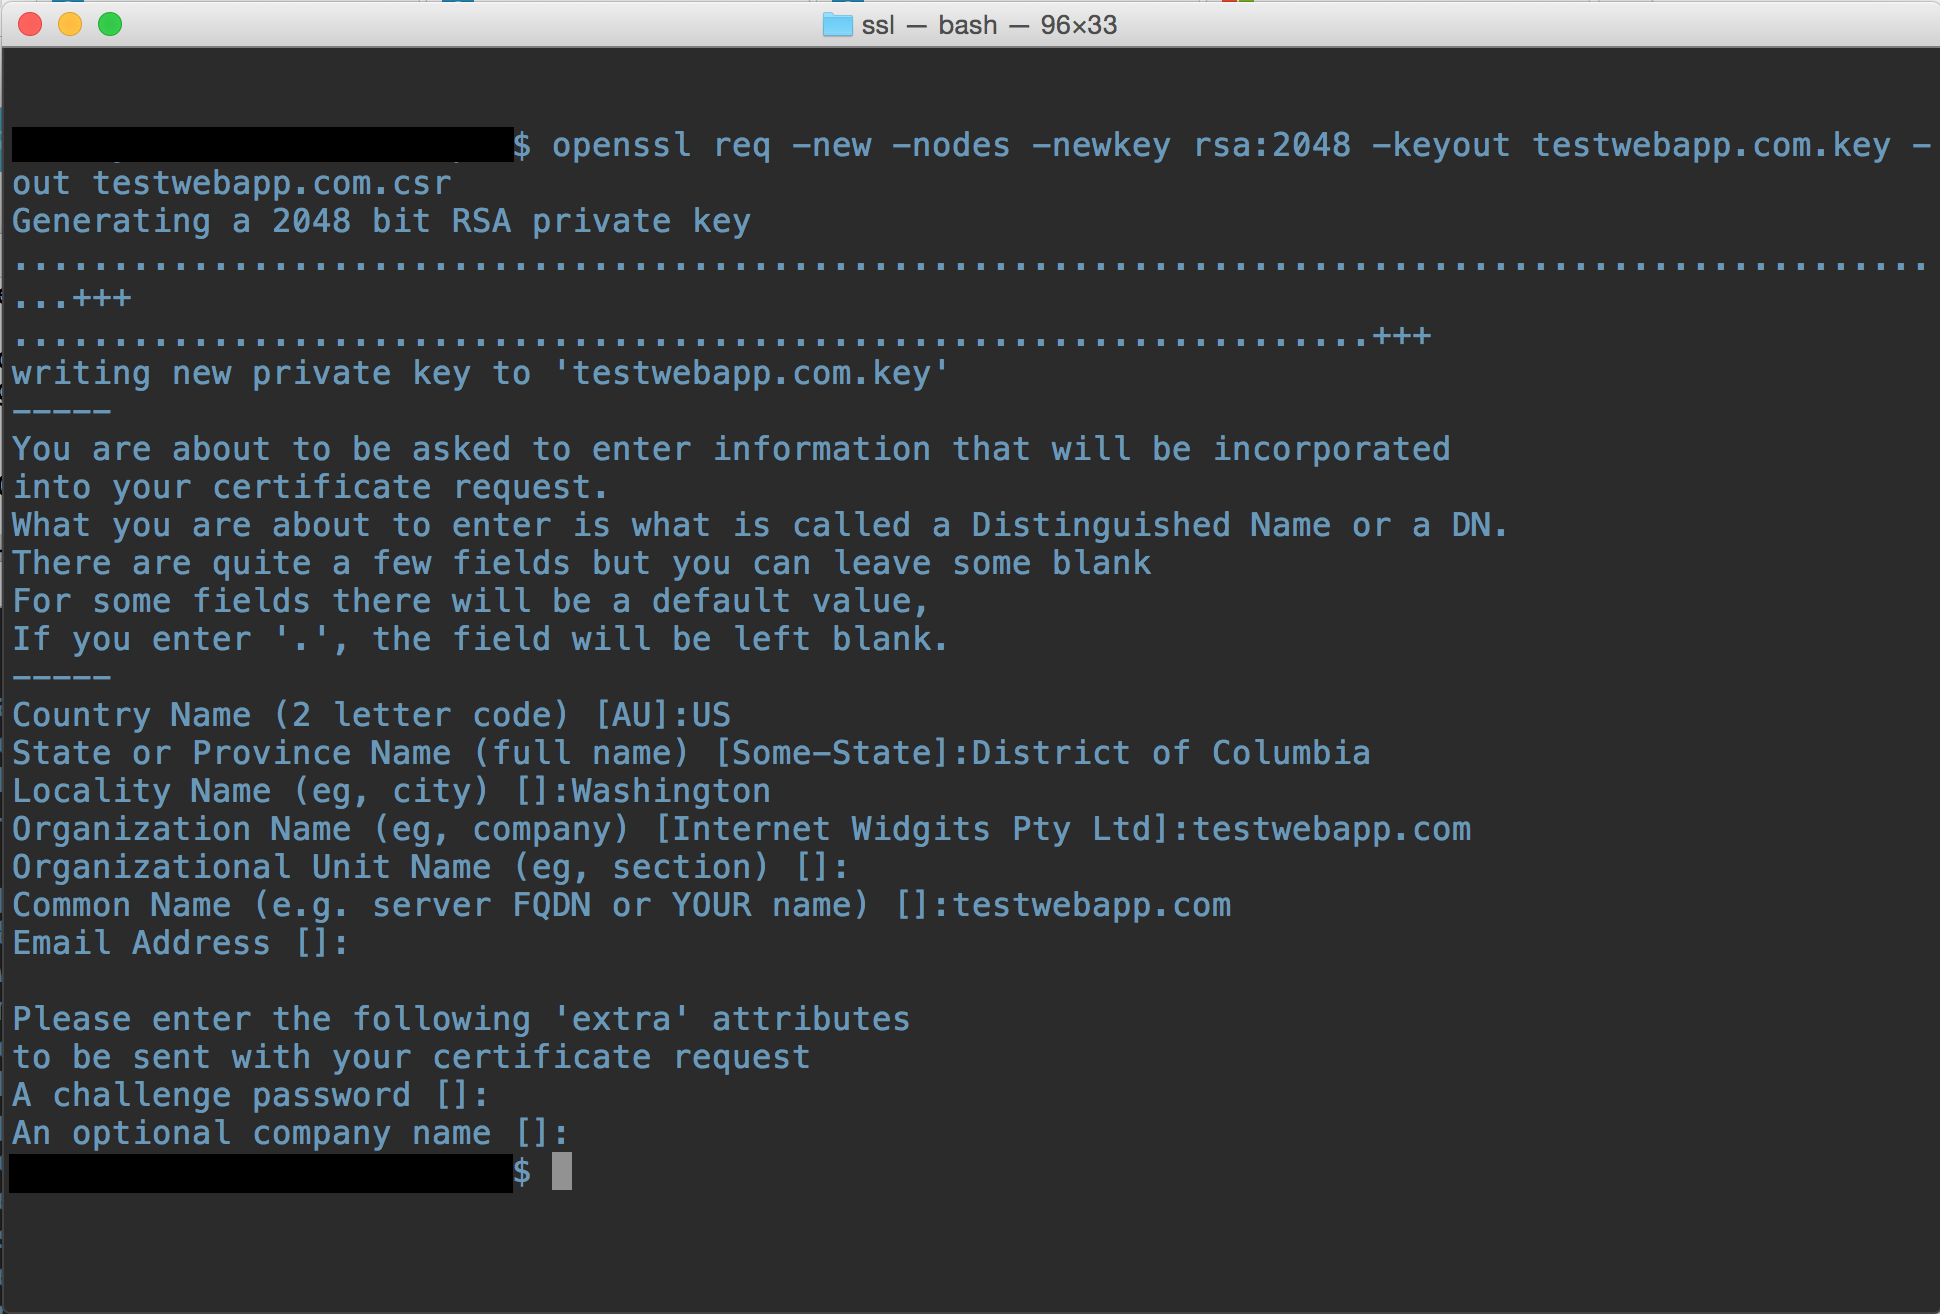
You will get two files – testwebapp.com.key and testwebapp.com.csr.
The .CSR file is a text file and looks like this:
-----BEGIN CERTIFICATE REQUEST-----
MIIDJDCCAgwCCQCpCY4o1LBQuzANBgkqhkiG9w0BAQUFADBUMQswCQYDVQQGEwJV
UzELMAkGA1UECBMCV0ExEDAOBgNVBAcTB1JlZG1vbmQxEDAOBgNVBAsTB0NvbnRv
c28xFDASBgNVBAMTC2NvbnRvc28uY29tMB4XDTE0MDExNjE1MzIyM1oXDTE1MDEx
NjE1MzIyM1owVDELMAkGA1UEBhMCVVMxCzAJBgNVBAgTAldBMRAwDgYDVQQHEwdS
ZWRtb25kMRAwDgYDVQQLEwdDb250b3NvMRQwEgYDVQQDEwtjb250b3NvLmNvbTCC
ASIwDQYJKoZIhvcNAQEBBQADggEPADCCAQoCggEBAN96hBX5EDgULtWkCRK7DMM3
enae1LT9fXqGlbA7ScFvFivGvOLEqEPD//eLGsf15OYHFOQHK1hwgyfXa9sEDPMT
3AsF3iWyF7FiEoR/qV6LdKjeQicJ2cXjGwf3G5vPoIaYifI5r0lhgOUqBxzaBDZ4
xMgCh2yv7NavI17BHlWyQo90gS2X5glYGRhzY/fGp10BeUEgIs3Se0kQfBQOFUYb
ktA6802lod5K0OxlQy4Oc8kfxTDf8AF2SPQ6BL7xxWrNl/Q2DuEEemjuMnLNxmeA
Ik2+6Z6+WdvJoRxqHhleoL8ftOpWR20ToiZXCPo+fcmLod4ejsG5qjBlztVY4qsC
AwEAATANBgkqhkiG9w0BAQUFAAOCAQEAVcM9AeeNFv2li69qBZLGDuK0NDHD3zhK
Y0nDkqucgjE2QKUuvVSPodz8qwHnKoPwnSrTn8CRjW1gFq5qWEO50dGWgyLR8Wy1
F69DYsEzodG+shv/G+vHJZg9QzutsJTB/Q8OoUCSnQS1PSPZP7RbvDV9b7Gx+gtg
7kQ55j3A5vOrpI8N9CwdPuimtu6X8Ylw9ejWZsnyy0FMeOPpK3WTkDMxwwGxkU3Y
lCRTzkv6vnHrlYQxyBLOSafCB1RWinN/slcWSLHADB6R+HeMiVKkFpooT+ghtii1
A9PdUQIhK9bdaFicXPBYZ6AgNVuGtfwyuS5V6ucm7RE6+qf+QjXNFg==
-----END CERTIFICATE REQUEST-----
You need to copy in the clipboard entire content of the file, including —–BEGIN CERTIFICATE REQUEST—– and —–END CERTIFICATE REQUEST—–
Submit Certificate Signing Request
On GoDaddy web site navigate to Hosting & SSL | Manage SSL Certificates. In the SSL Certificates section you will see your new SSL Certificate, click Manage button and paste the content of the .CSR file in the form. Make sure that the Common Name shows the domain name you chosen, in my case it was testwebapp.com . I was actually not been able to achieve this result with .CSR generated with Certreq.exe.
After you submit the form with Certificate Signing Request, GoDaddy will perform a number of validations but in the end you will receive an email informing you that the SSL Certificate was issued and you will see the following page:
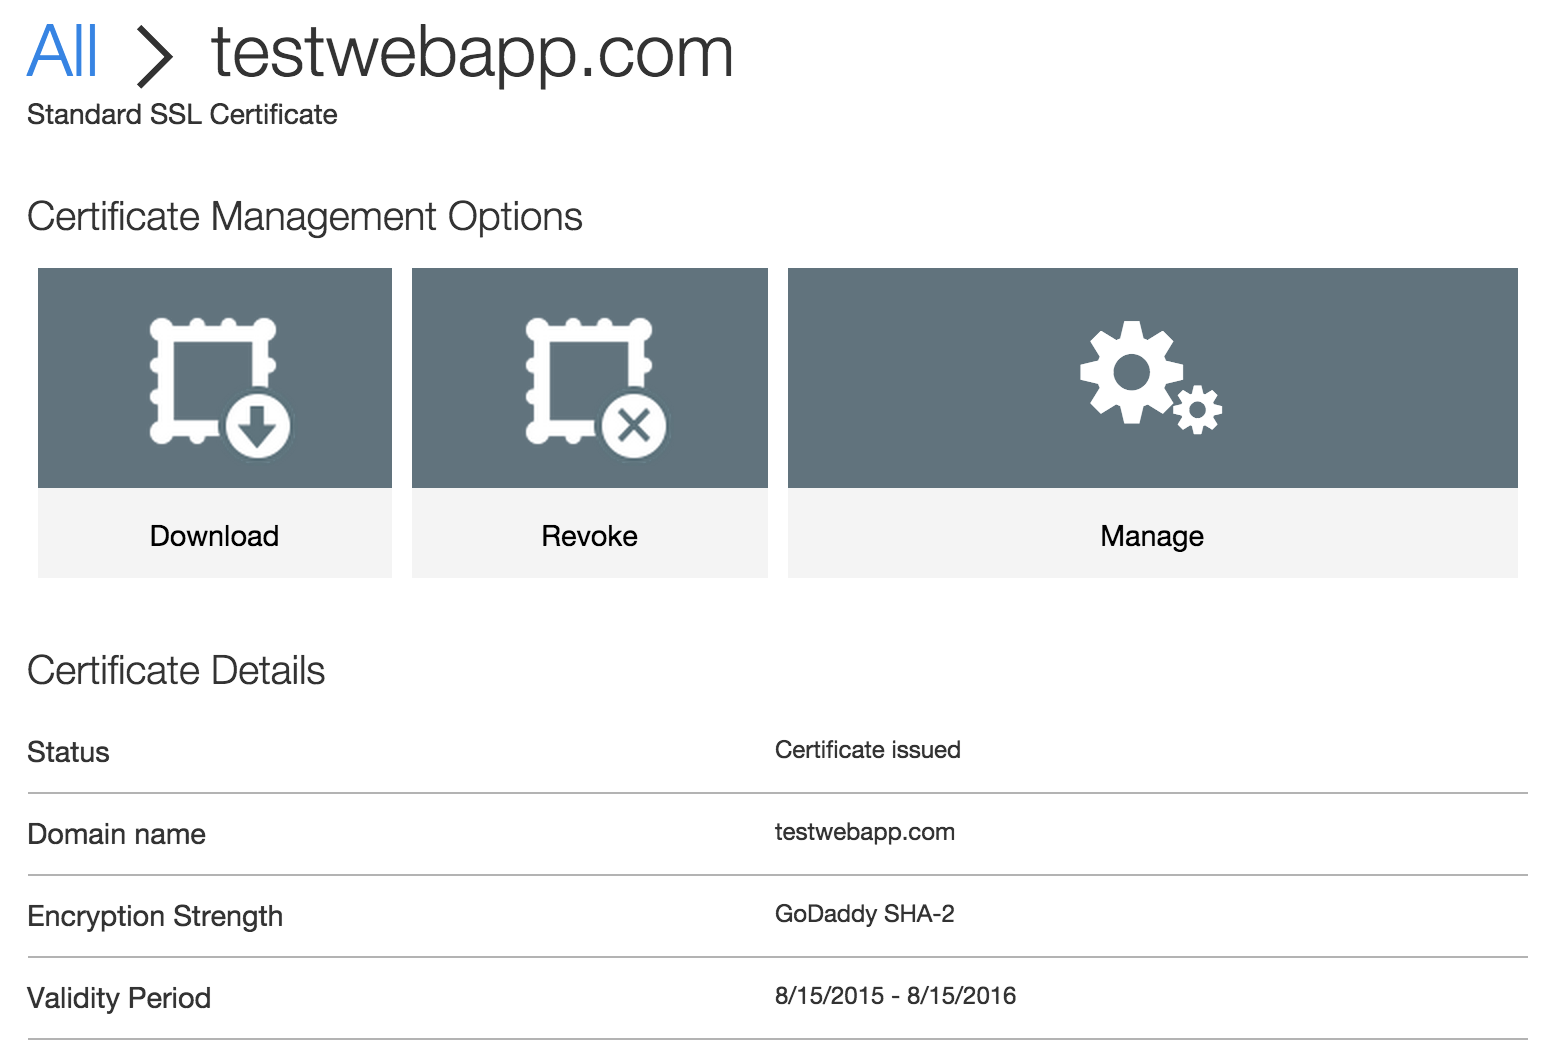
Hit Download button and you will be taken to a new page.
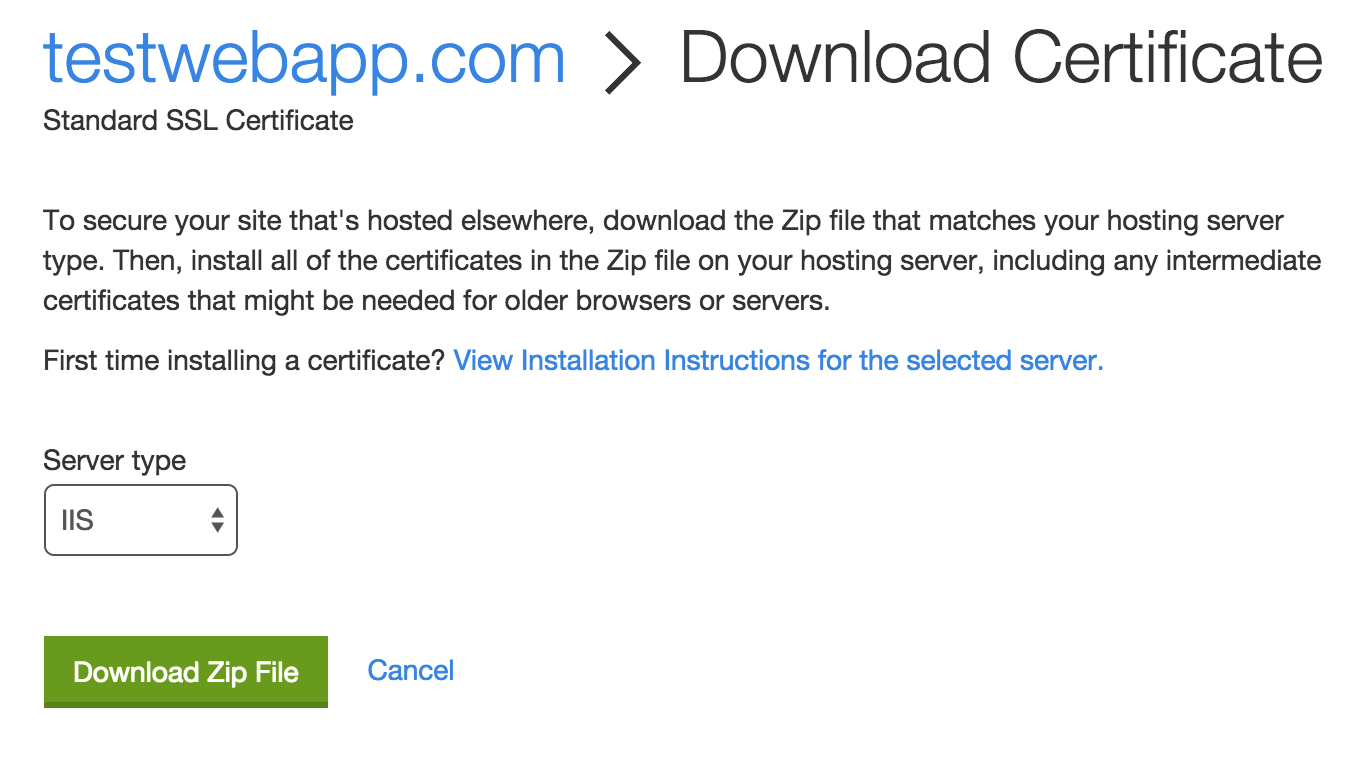
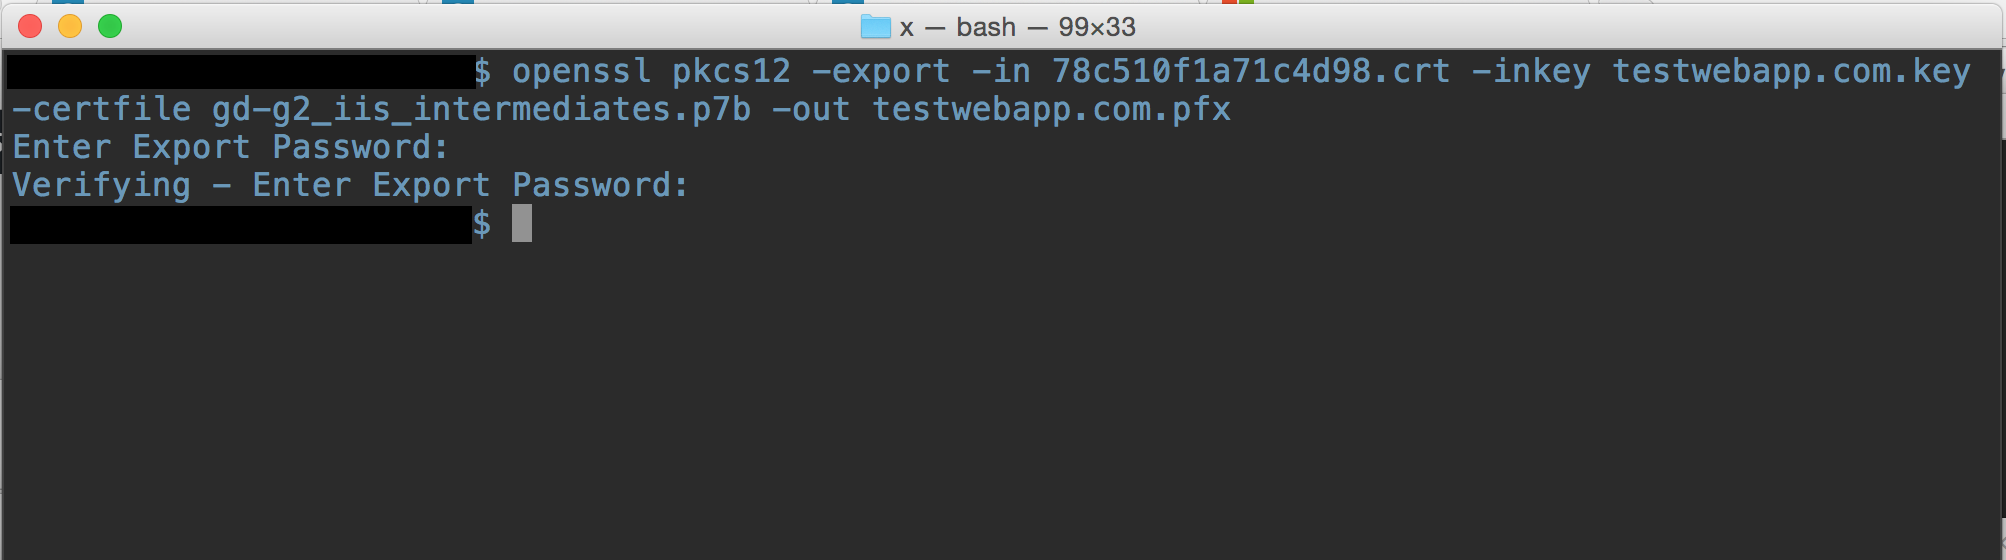
Select IIS as Server type and hit Download Zip File. The ZIP file contains two files – .CRT and .P7B. Copy those two file to the same directory where your .KEY file is and run the following command to convert a CRT certificate to a PFX certificate:
openssl pkcs12 -export -in 78c510f1a71c4d98.crt -inkey testwebapp.com.key
-certfile gd-g2_iis_intermediates.p7b -out testwebapp.com.pfx
This time you need to provide the password – you will need it again while uploading the .PFX certificate into Azure Web App.
Upload .PFX Certificate in Azure Portal
Go back to Azure Portal and in certificates section hit upload a certificate button.

After a few seconds you will see that the certificate has been successfully uploaded.

Assign SSL Bindings in Azure Portal
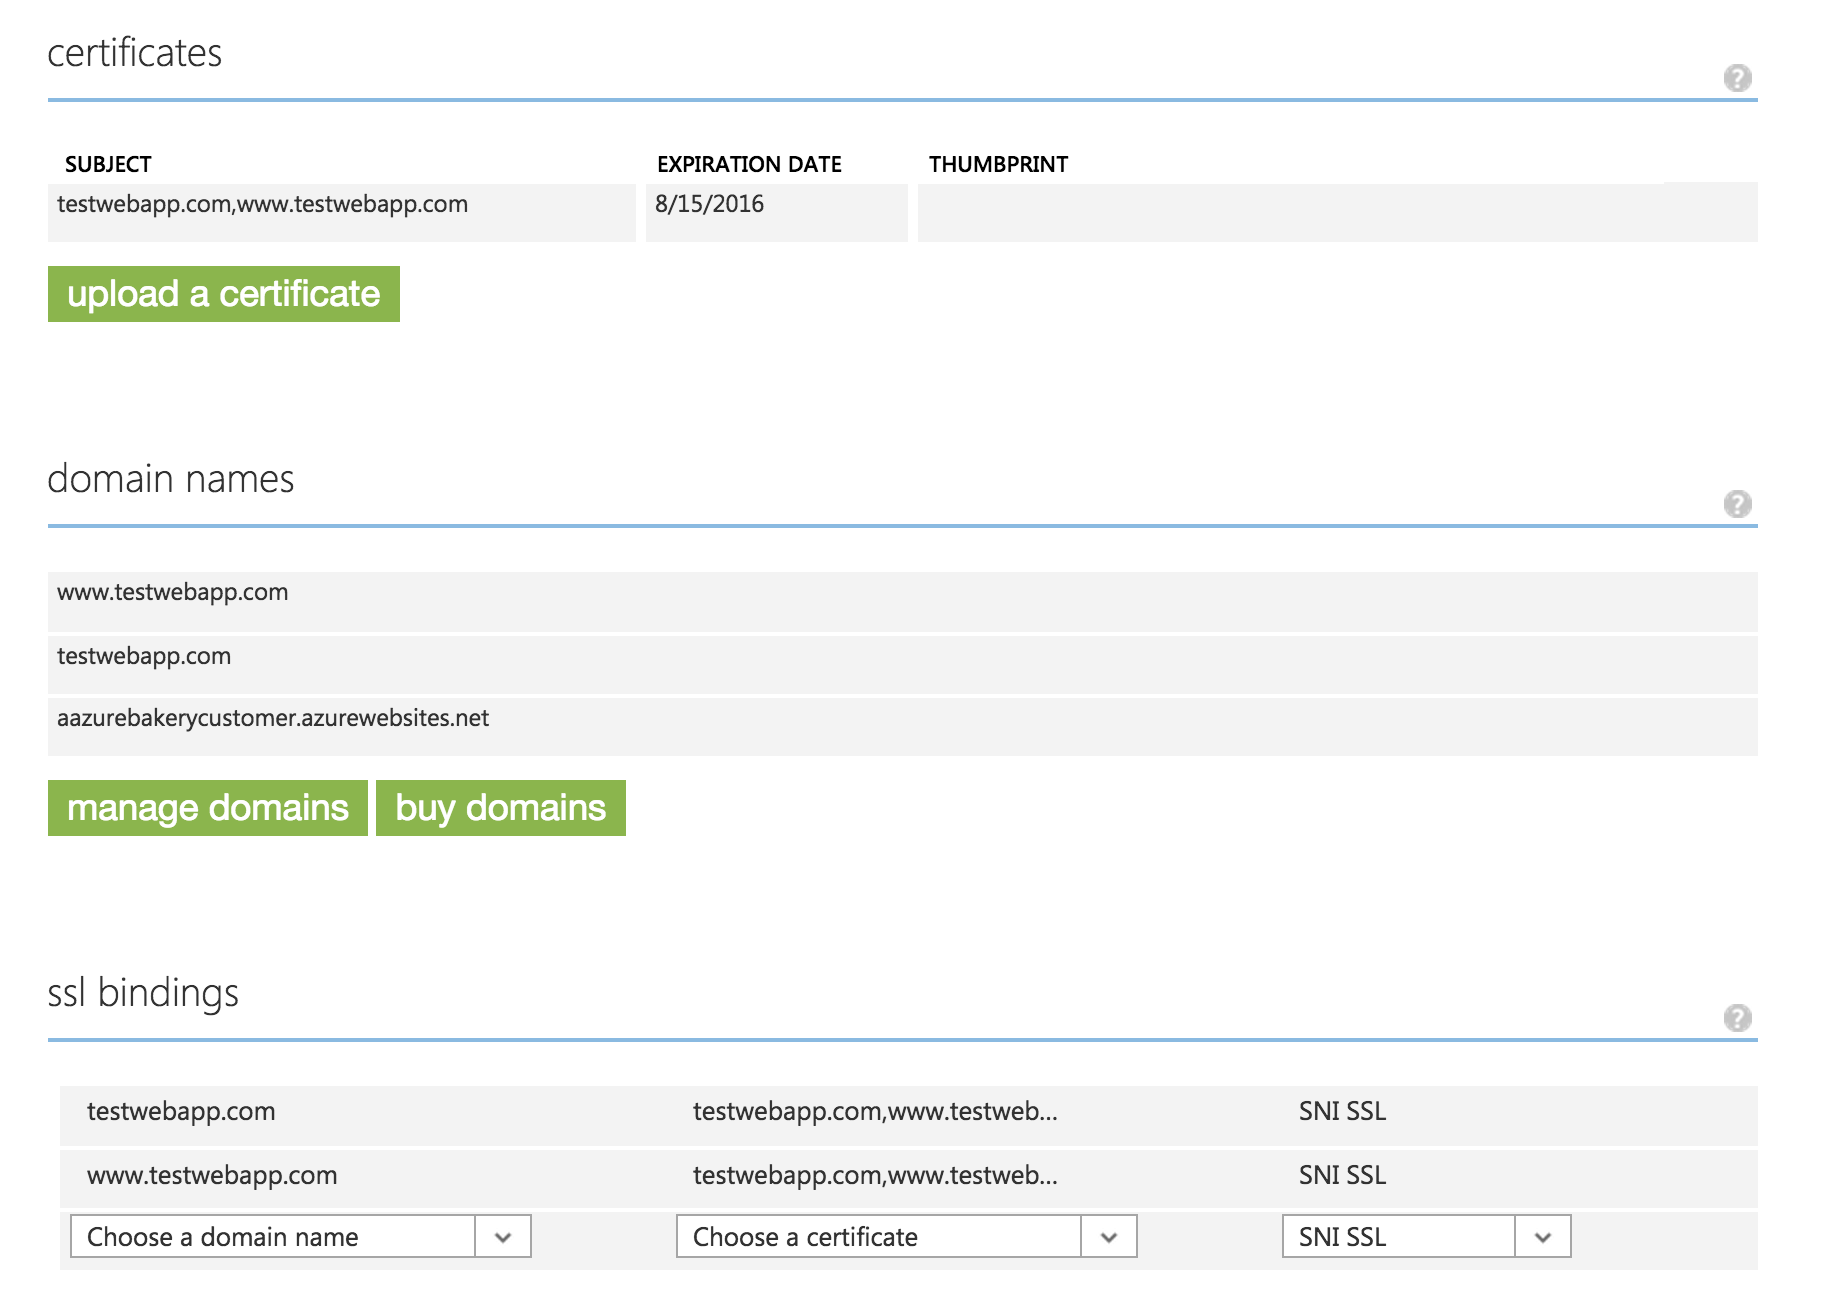
In the ssl bindings section first select root domain – testwebapp.com, chose the uploaded SSL Certificate and keep SNI SSL type. Repeat for the www subdomain. Then hit SAVE button. In the end your settings will look like this
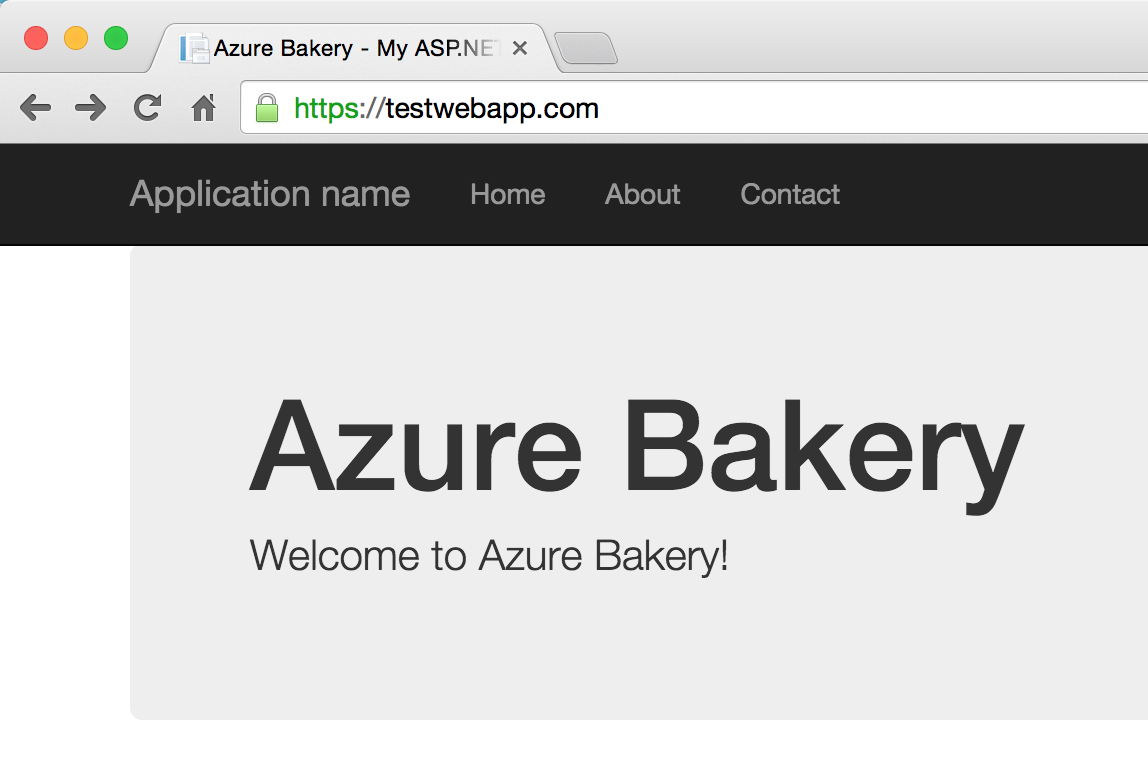
Now, if you navigate to either root domain https://testwebapp.com
or www subdomain https://www.testwebapp.com
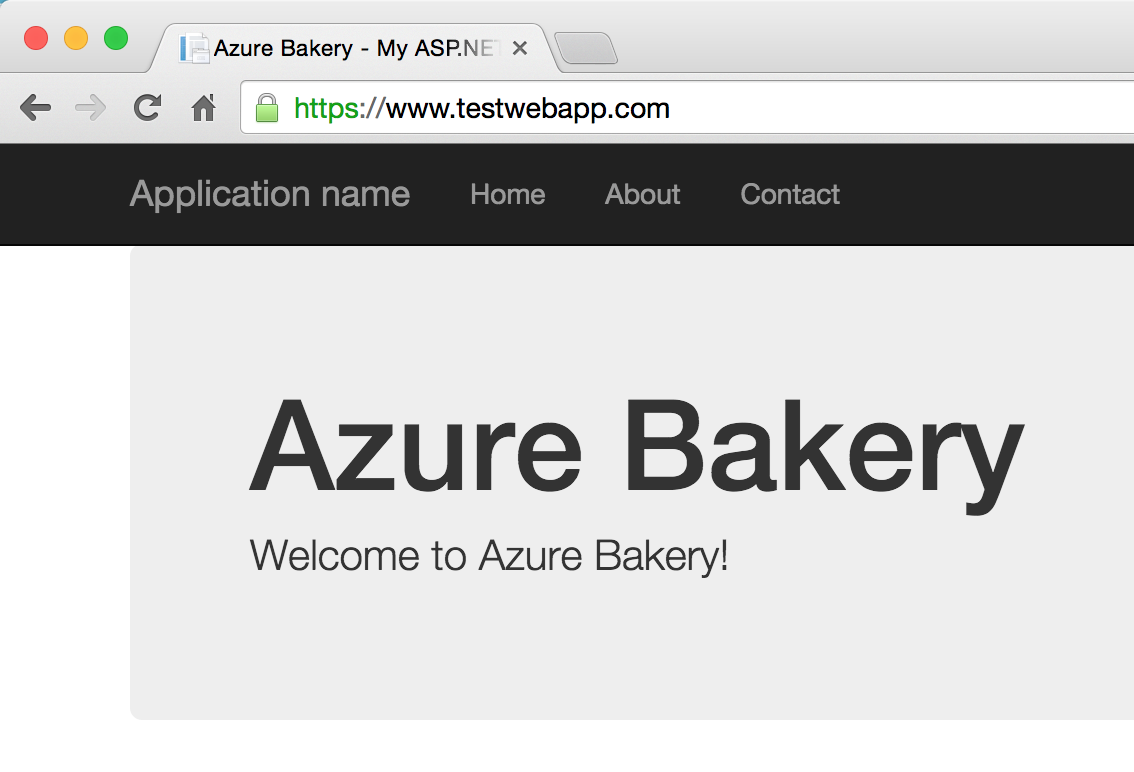
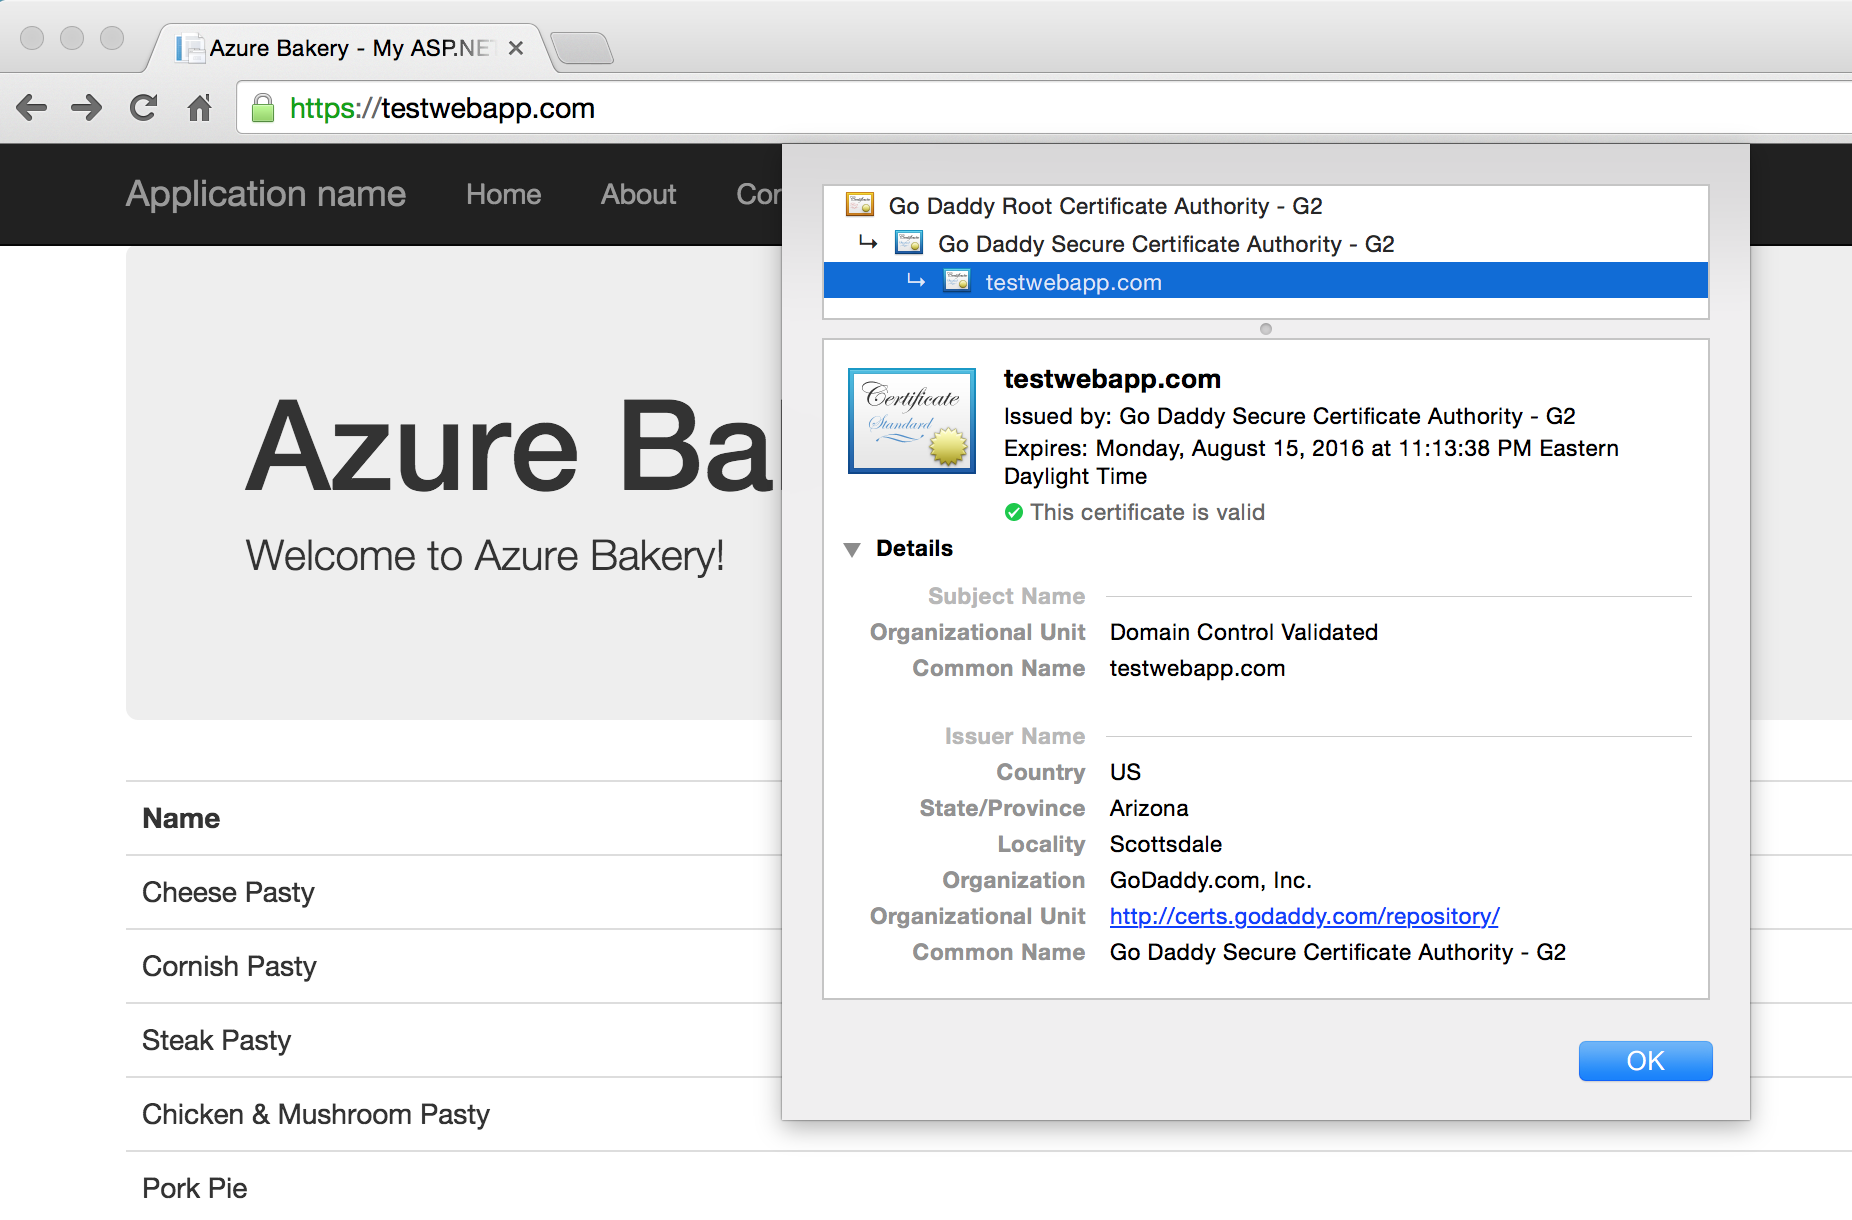
using HTTPS protocol you will see a padlock in the browser’s address bar. The Certificate Information dialog now confirms that the SSL Certificate was issued for testwebapp.com.
Voilà!
Enforce HTTPS on your Azure Web App
The last thing we need to do is to add RequireHttps filter to controller actions where secured communication is needed.

[…] I wanted to get more familiar with it. Fortunately I already had Web App running on Azure that was configured with custom domain name and SSL certificate. It turned out to be a perfect continuation from the previous […]