I have recently finished watching excellent Pluralsight course Getting Started with CloudFlare™ Security by Troy Hunt and got so intrigued by it that I wanted to get more familiar with it. Fortunately I already had Web App running on Azure that was configured with custom domain name and SSL certificate. It turned out to be a perfect continuation from the previous post.
So, what is so special about CloudFlare? Here’s a short list of fascinating features that were of particular interest to me that are available in free and paid plans.
CloudFlare makes site safer by:
- Enabling SSL Support for your site
- Redirecting visitors to HTTPS/SSL
- Offering HTTP Strict Transport Security (HSTS)
- Protecting against DDoS attacks
- Protecting against XSS and SQL injection attacks
- Protecting against content scrapers or content thieves
- Protecting against bandwidth thieves
- Reducing spam comments
- Limiting content from suspicious visitors
CloudFlare makes site faster by:
- Providing CDN services
- Offering custom caching options
- Improving a web page’s window.onload time
- Minifying HTML, CSS and JavaScript files
- Providing Always On functionality
As a side benefit, making your site faster improves its web search ranking.
These are just few awesome features provided by CloudFlare. The full list can be found on Overview page.
CloudFlare clams that
“The combination of these systems means that we can protect sites from malicious visitors by stopping them before they even get to the origin web server, save over 60% of the bandwidth that a site would otherwise have to pay for, save over 65% of the requests that would otherwise have to be handled by a site, and cut in half average page load times. In order to make performance even better, we also do web content optimization.”
Other interesting features that CloudFlare provides are:
- Enhancing your web site with apps, such as New Relic Browser
- Mobile Redirect
Keep in mind, that CloudFlare currently supports WebSockets for Enterprise customers only, but will be available for other plan levels in the future.
Now, that we’ve covered the benefits of CloudFlare it is time to roll up the sleeves and get some hands-on experience.
Making Web App More Secure… for FREE
I’ll start with additional SSL support. CloudFlare provides the following SSL options:
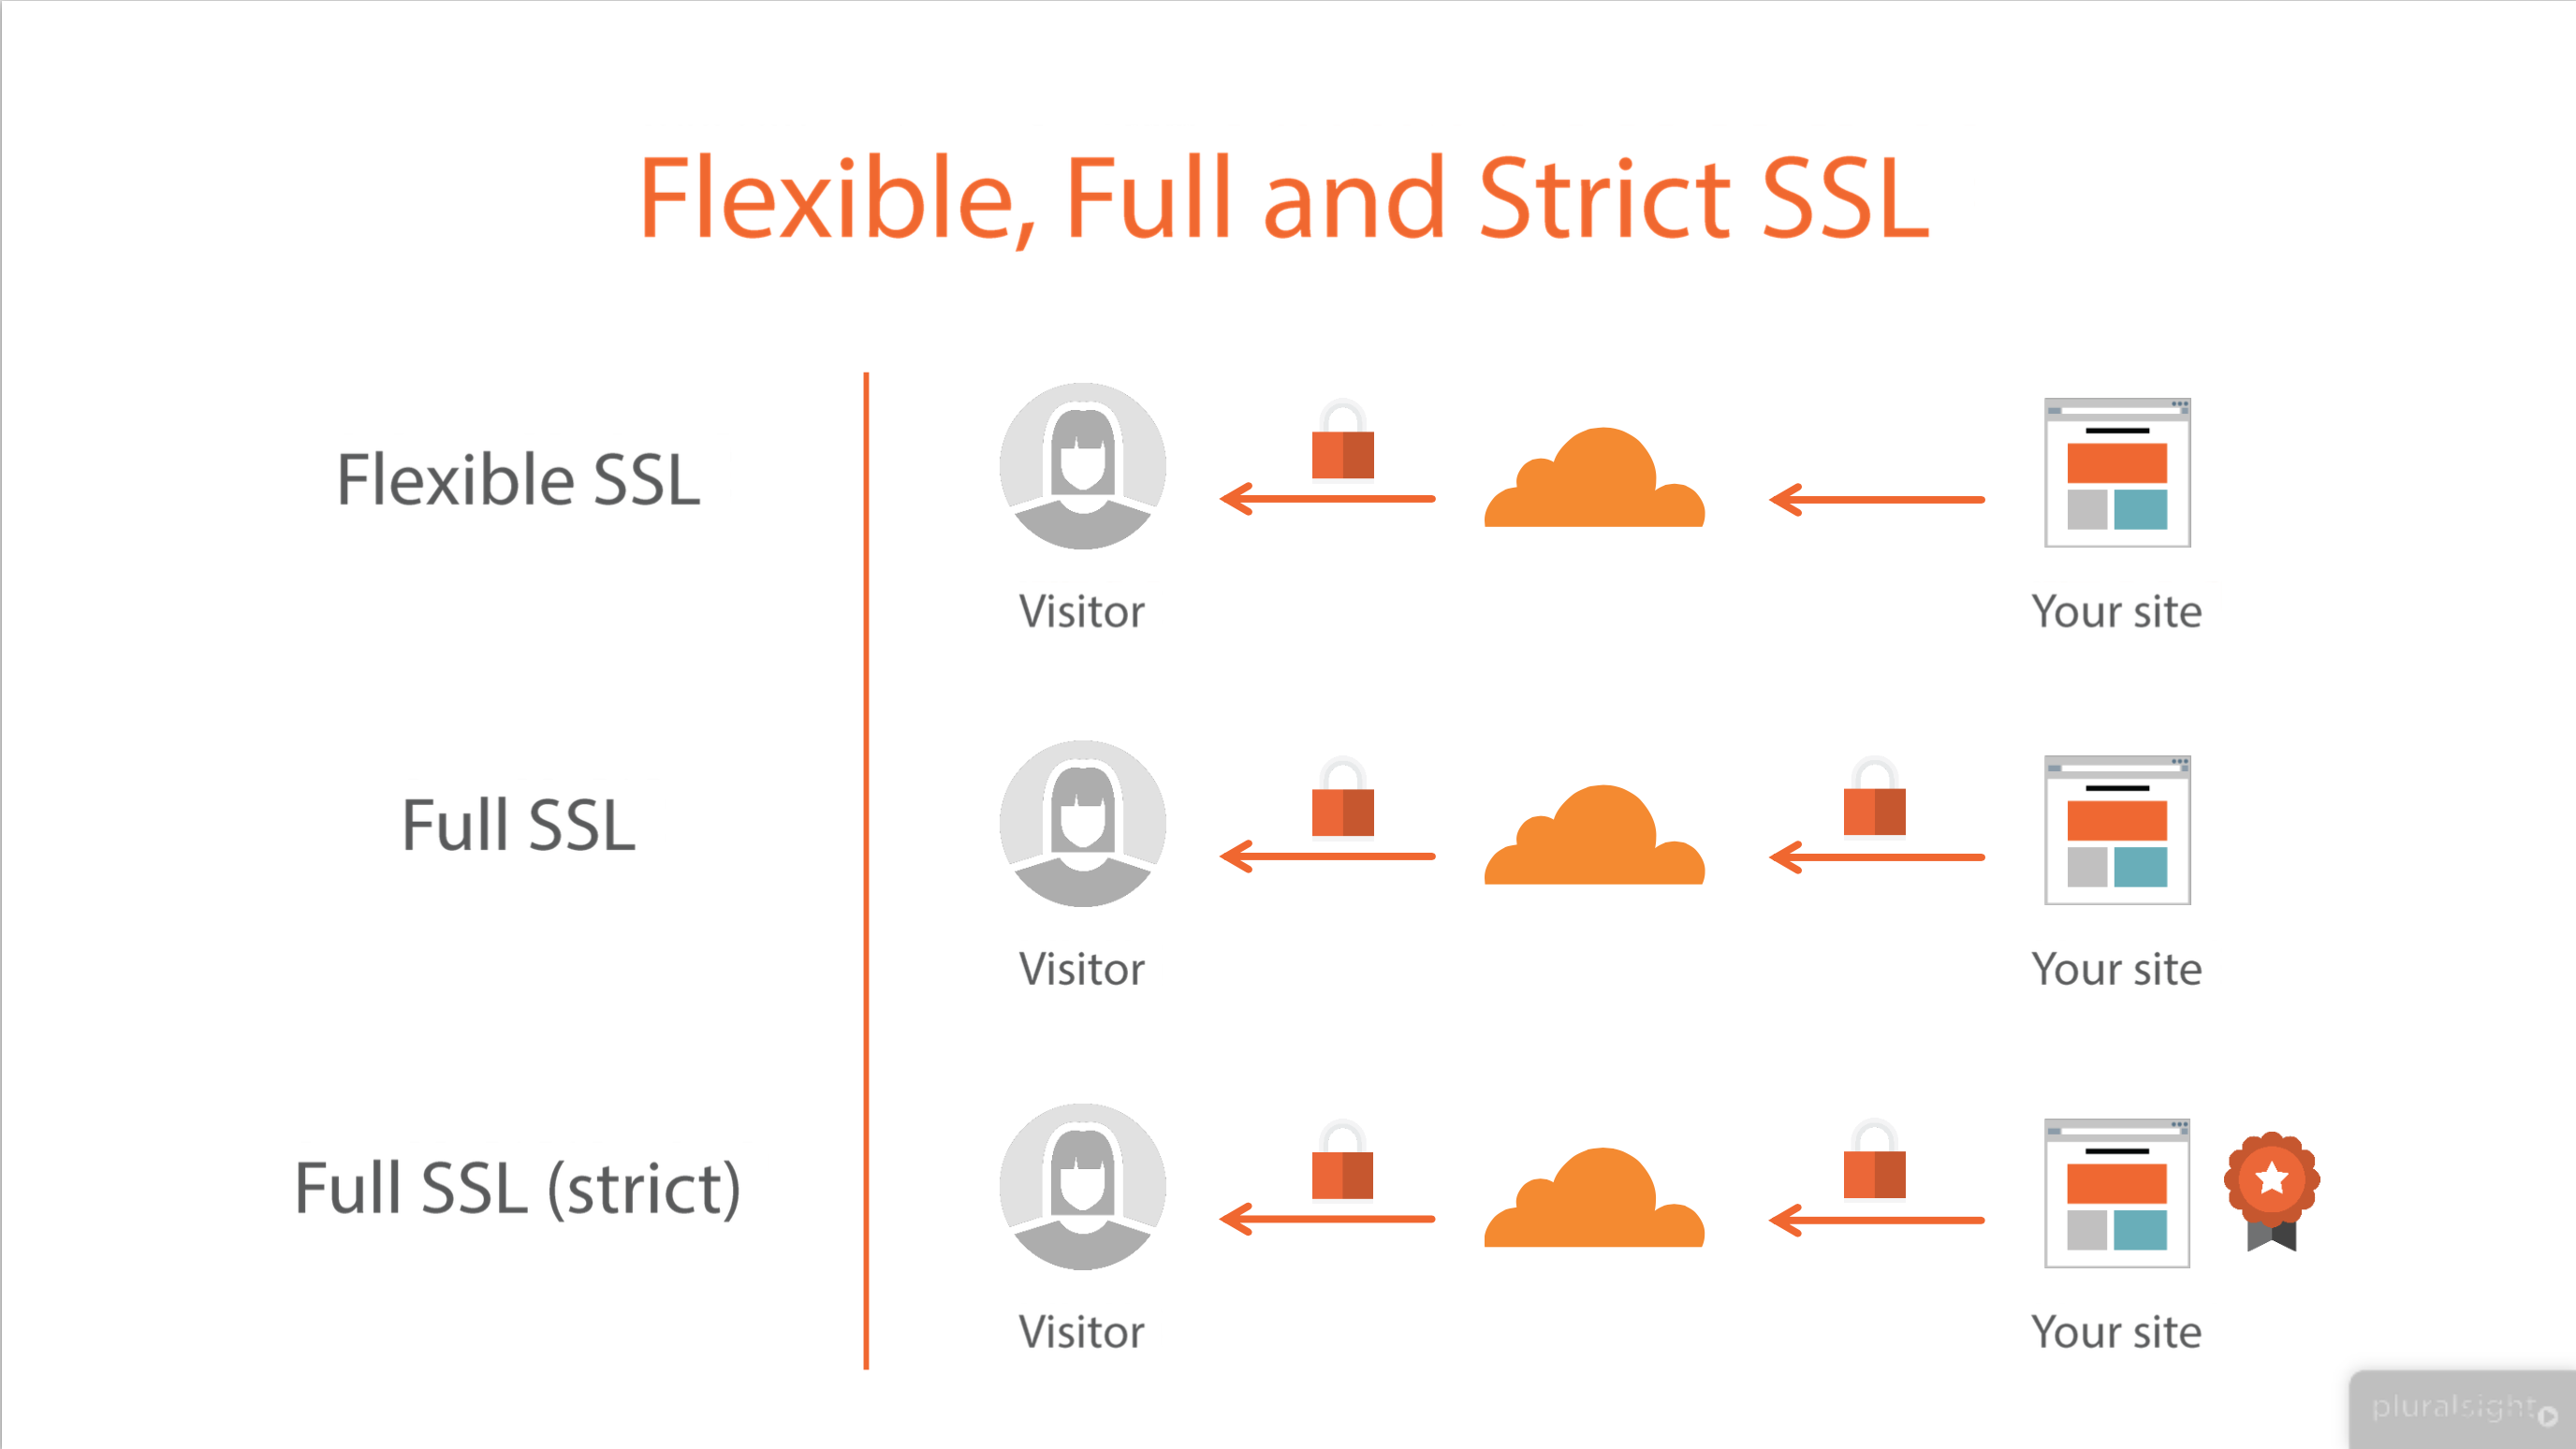
- Flexible SSL – connection is encrypted between the user and CloudFlare, but not between CloudFlare and your site
- Full SSL – connection is encrypted between the user and CloudFlare and between CloudFlare and your site. This option requires an SSL certificate installed on your site. You may use self-signed SSL certificate, but in this case CloudFlare will not attempt to validate it.
- Full SSL (strict) – connection is encrypted between the user and CloudFlare and between CloudFlare and your site. This option requires a valid SSL certificate installed on your site. The certificate must be signed by a trusted certificate authority and have not expired.
Here’s a great support article explaining these options in great detail.
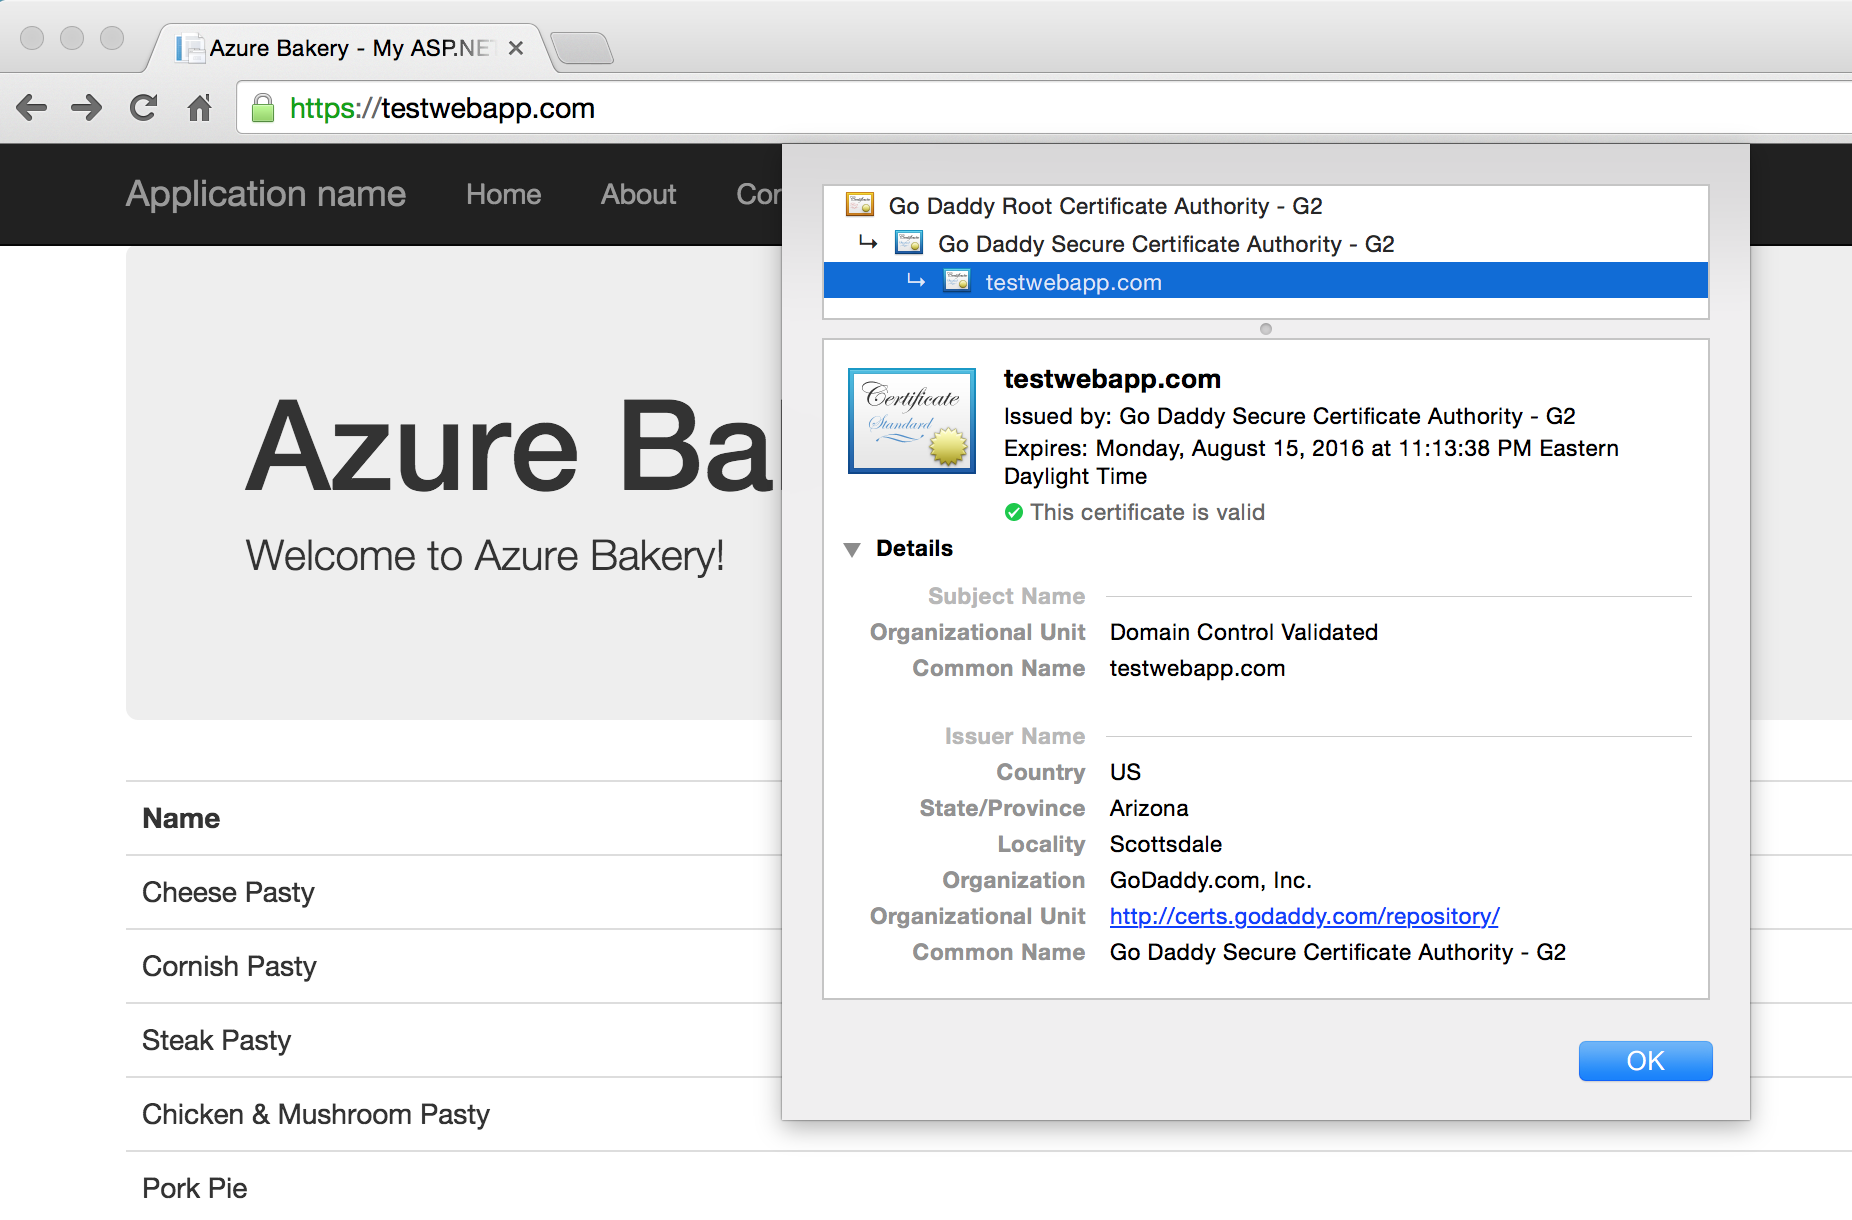
As I mentioned, I already have Web App deployed on Azure. It is configured with a custom domain and SSL certificate issued by GoDaddy Secure Certificate Authority. So, in my case I will be implementing Full SSL (strict). I did pay for that SSL certificate. If you want completely free protection – use Flexible SSL or Full SSL with self-signed SSL certificate.
Initial SSL Report
Let’s see what kind of SSL Report we get from Qualys SSL Labs. After providing my domain name in about a minute I got the following report:
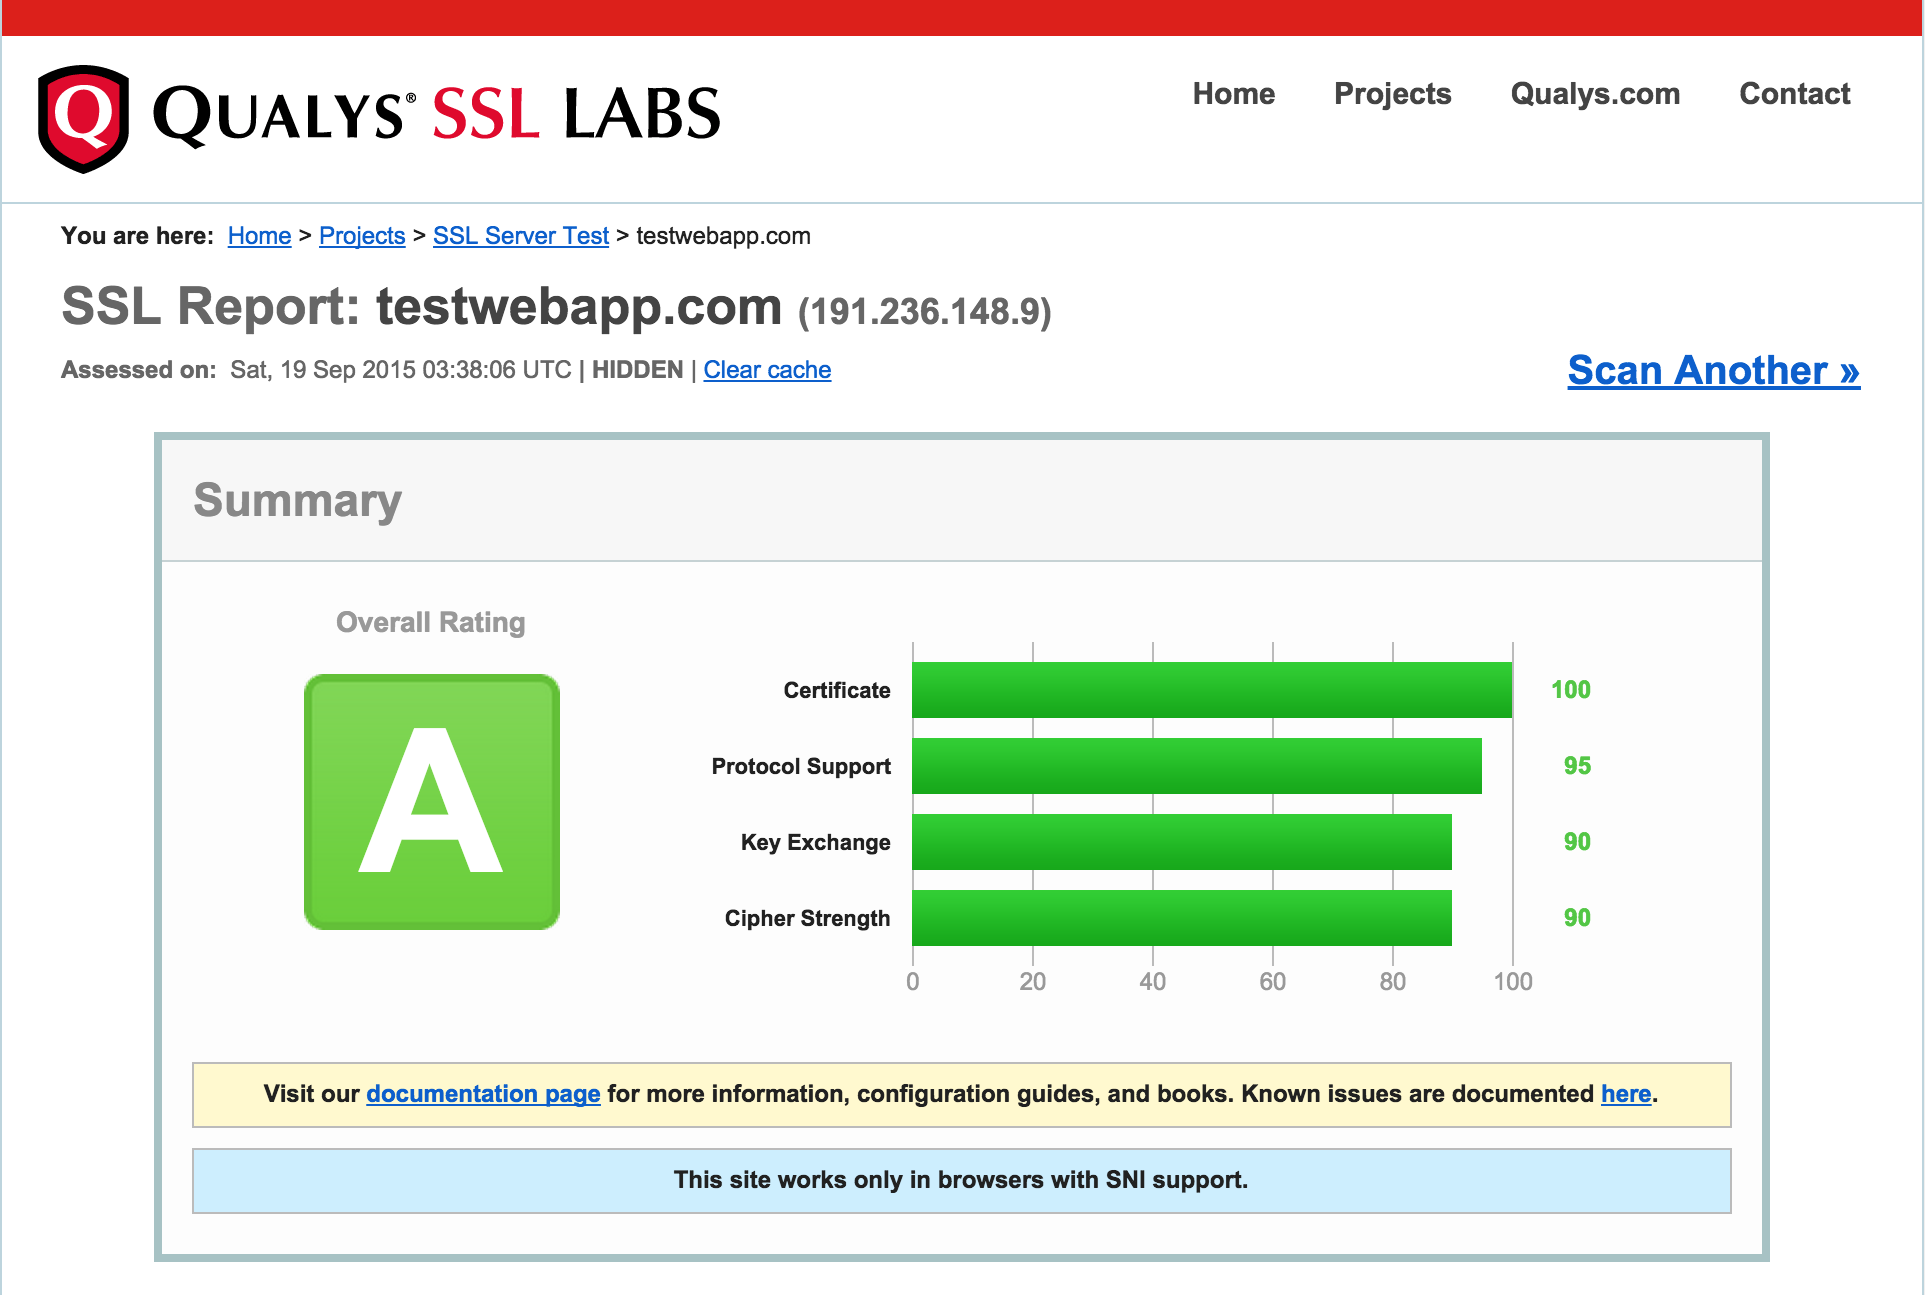
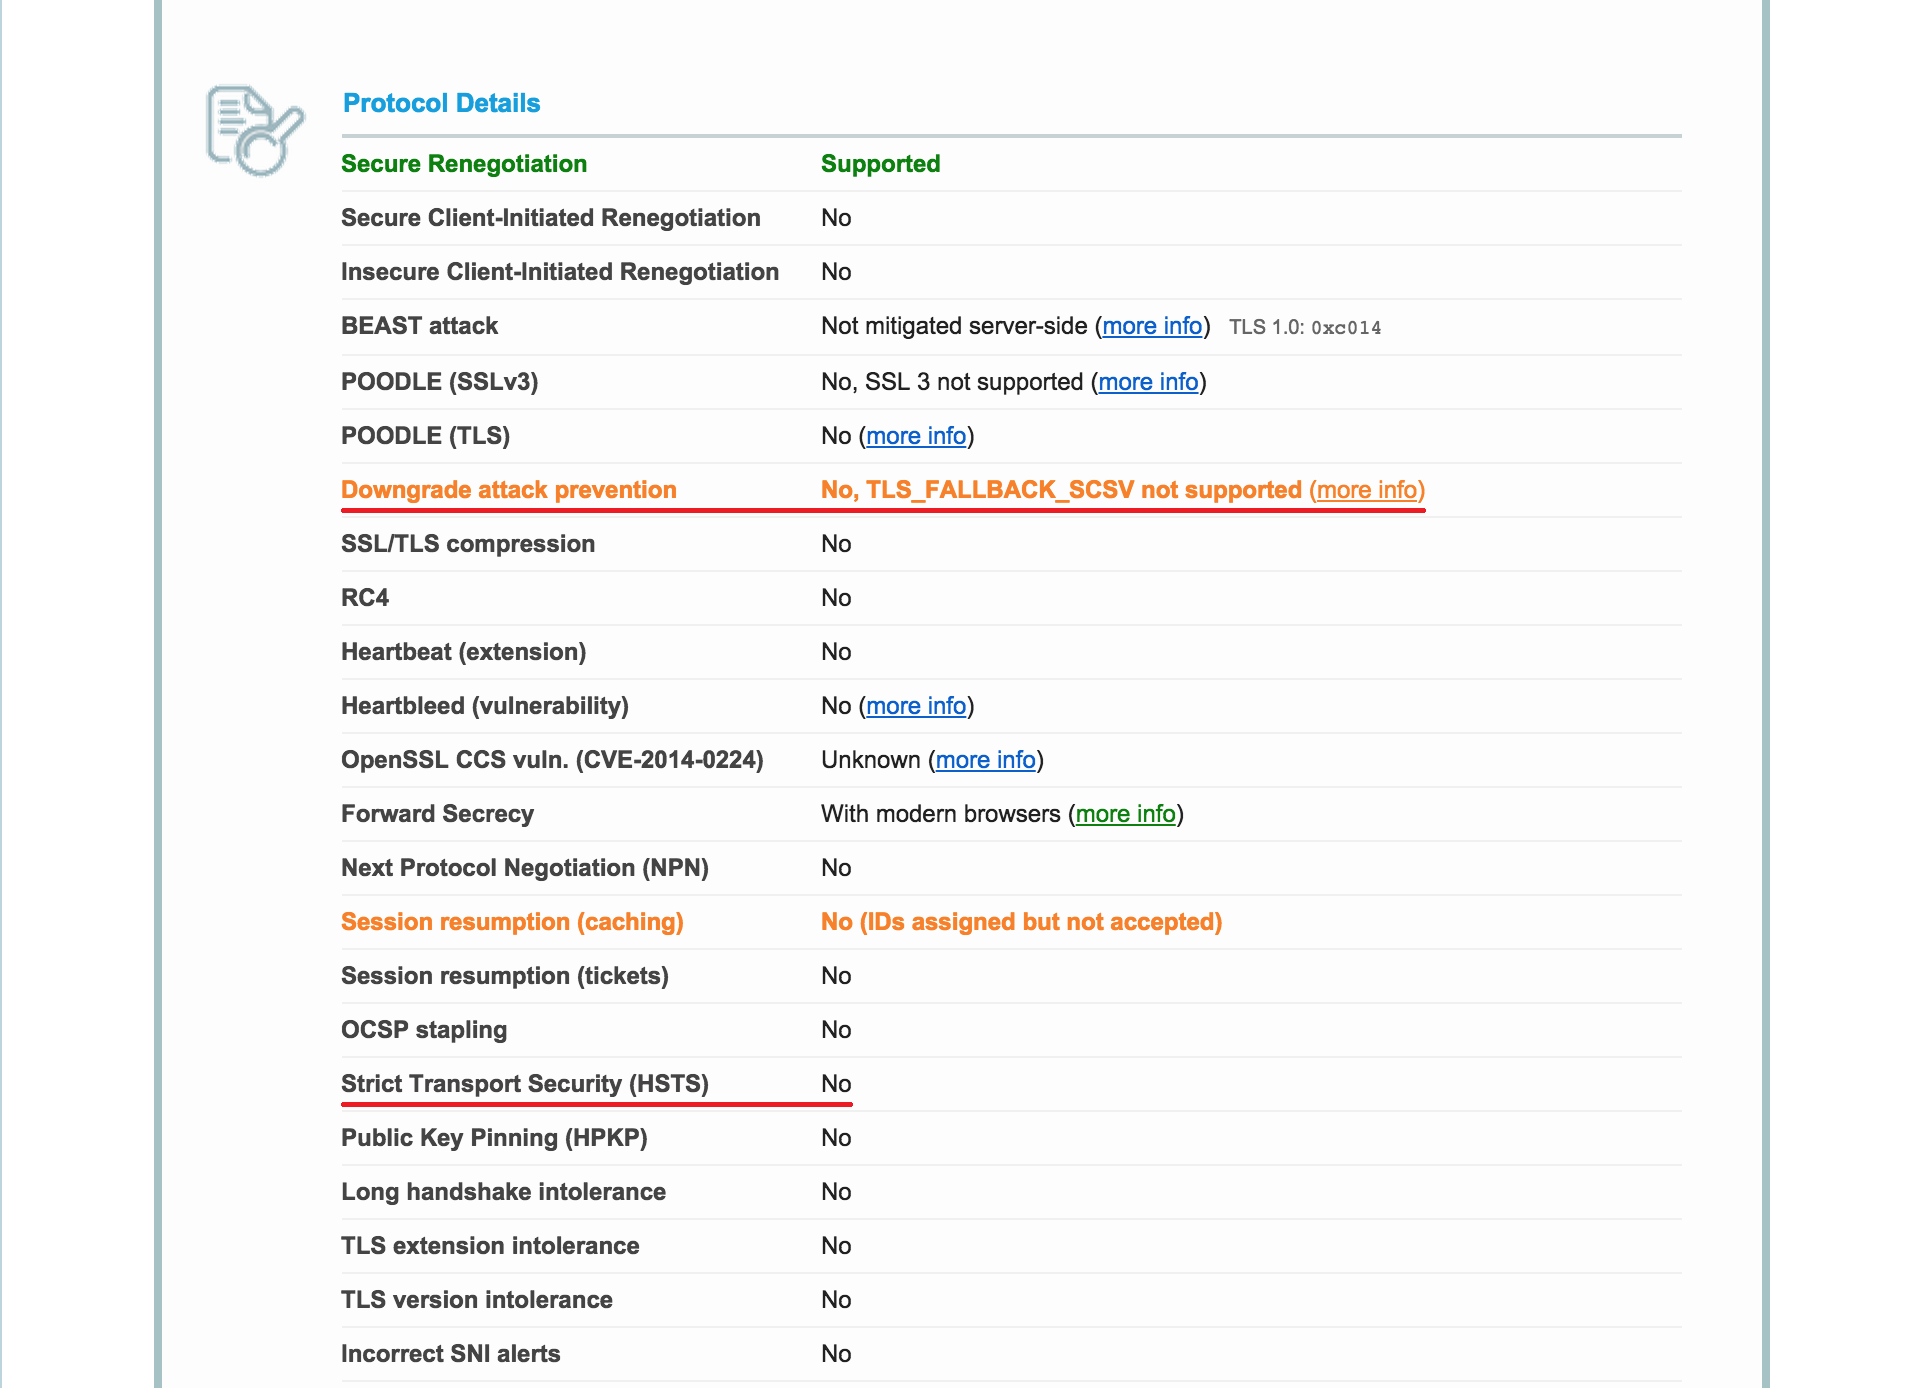
The site got Overall Rating A mostly because it only works in browsers with SNI support and it does not have adequate Downgrade Attack Prevention. Also, the web server does not provide HSTS (HTTP Strict Transport Security).
Special note regarding divulging the IP address of your website. If you intend to protect your website with CloudFlare against DDoS attacks you should not reveal its IP address. Otherwise it defeats the purpose – attackers will be hitting your (origin) website IP address bypassing CloudFlare. In my case – I have a test Web App and do not care if it becomes a victim of DDoS attack. After I finish reading the book – I’ll take it down anyway.
Here is a set of general website security guidelines that CloudFlare recommends:
- Do not rate-limit or throttle requests from CloudFlare IP addresses.
- Make sure you are seeing original visitor IP addresses in your logs.
- Remove all DNS records you are not using.
- Run email on separate server/service.
- After moving site to CloudFlare, change server IP address(es).
- Review Threat Control settings.
- Check WAF settings.
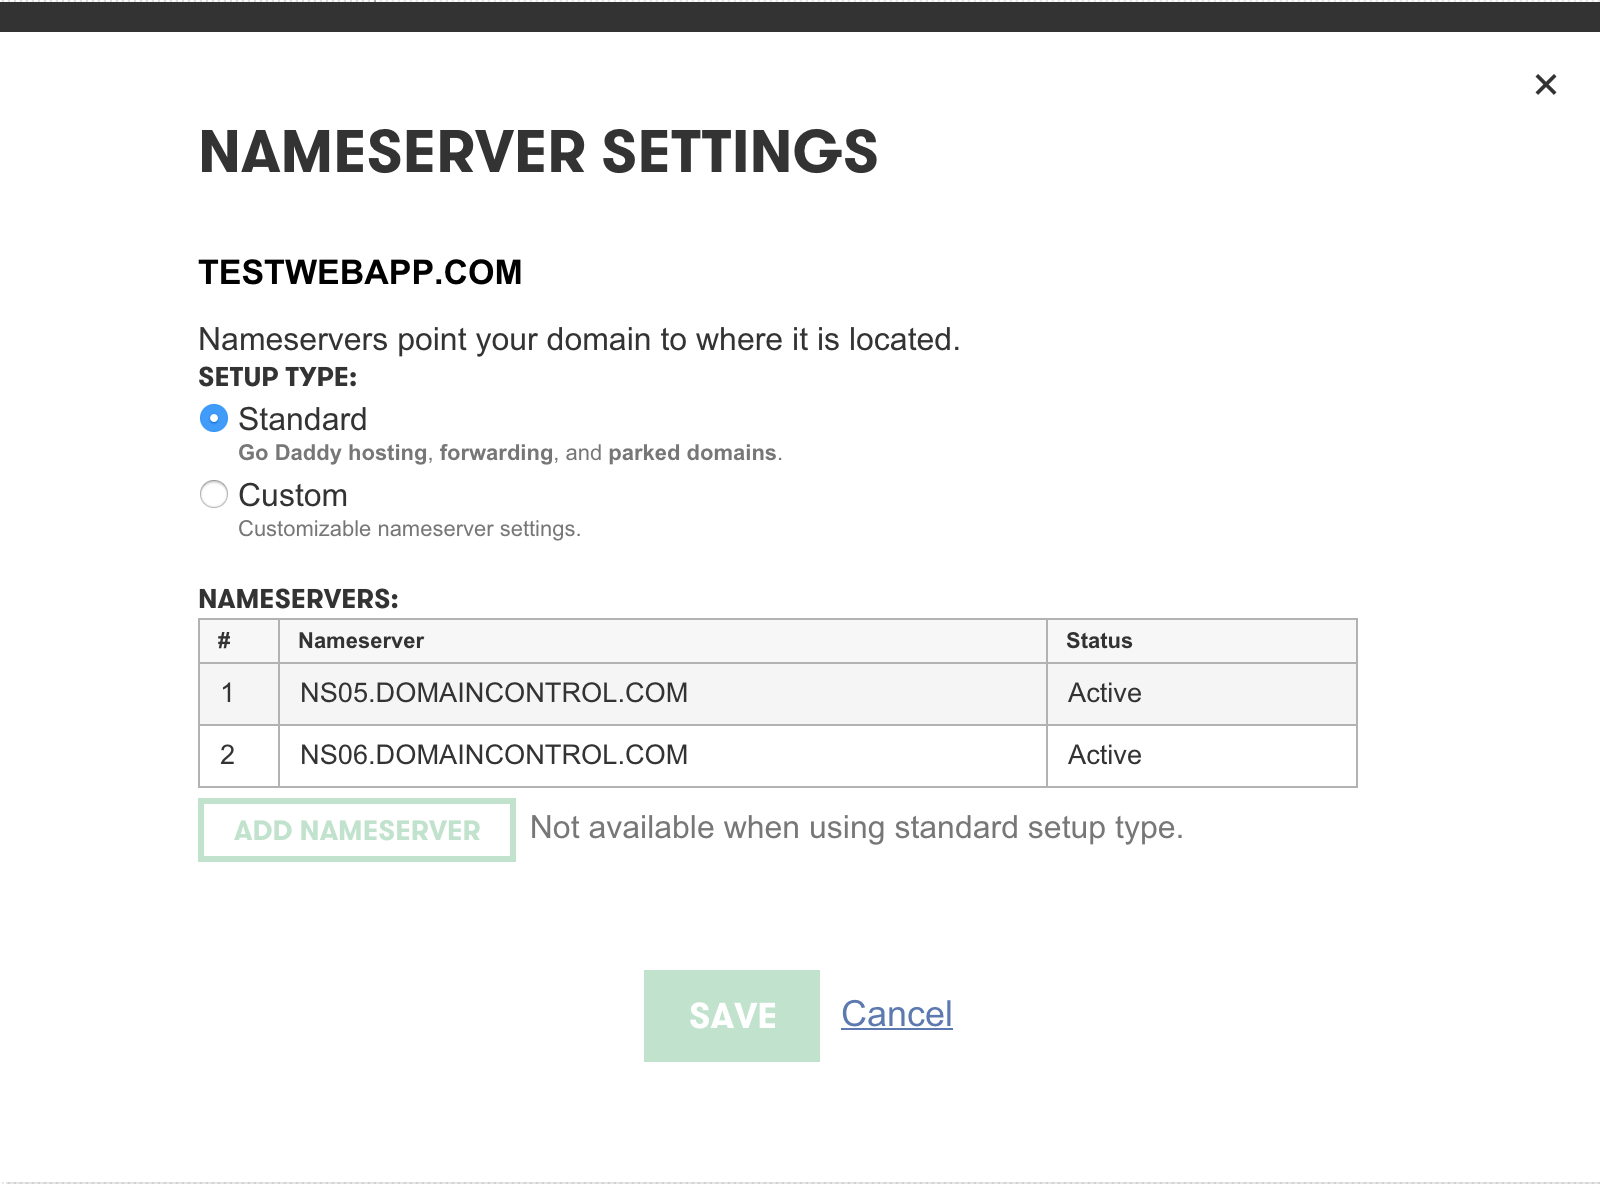
Reviewing Current Nameserver Settings
Here are my nameserver settings at GoDaddy. These are the only settings I will need to change.
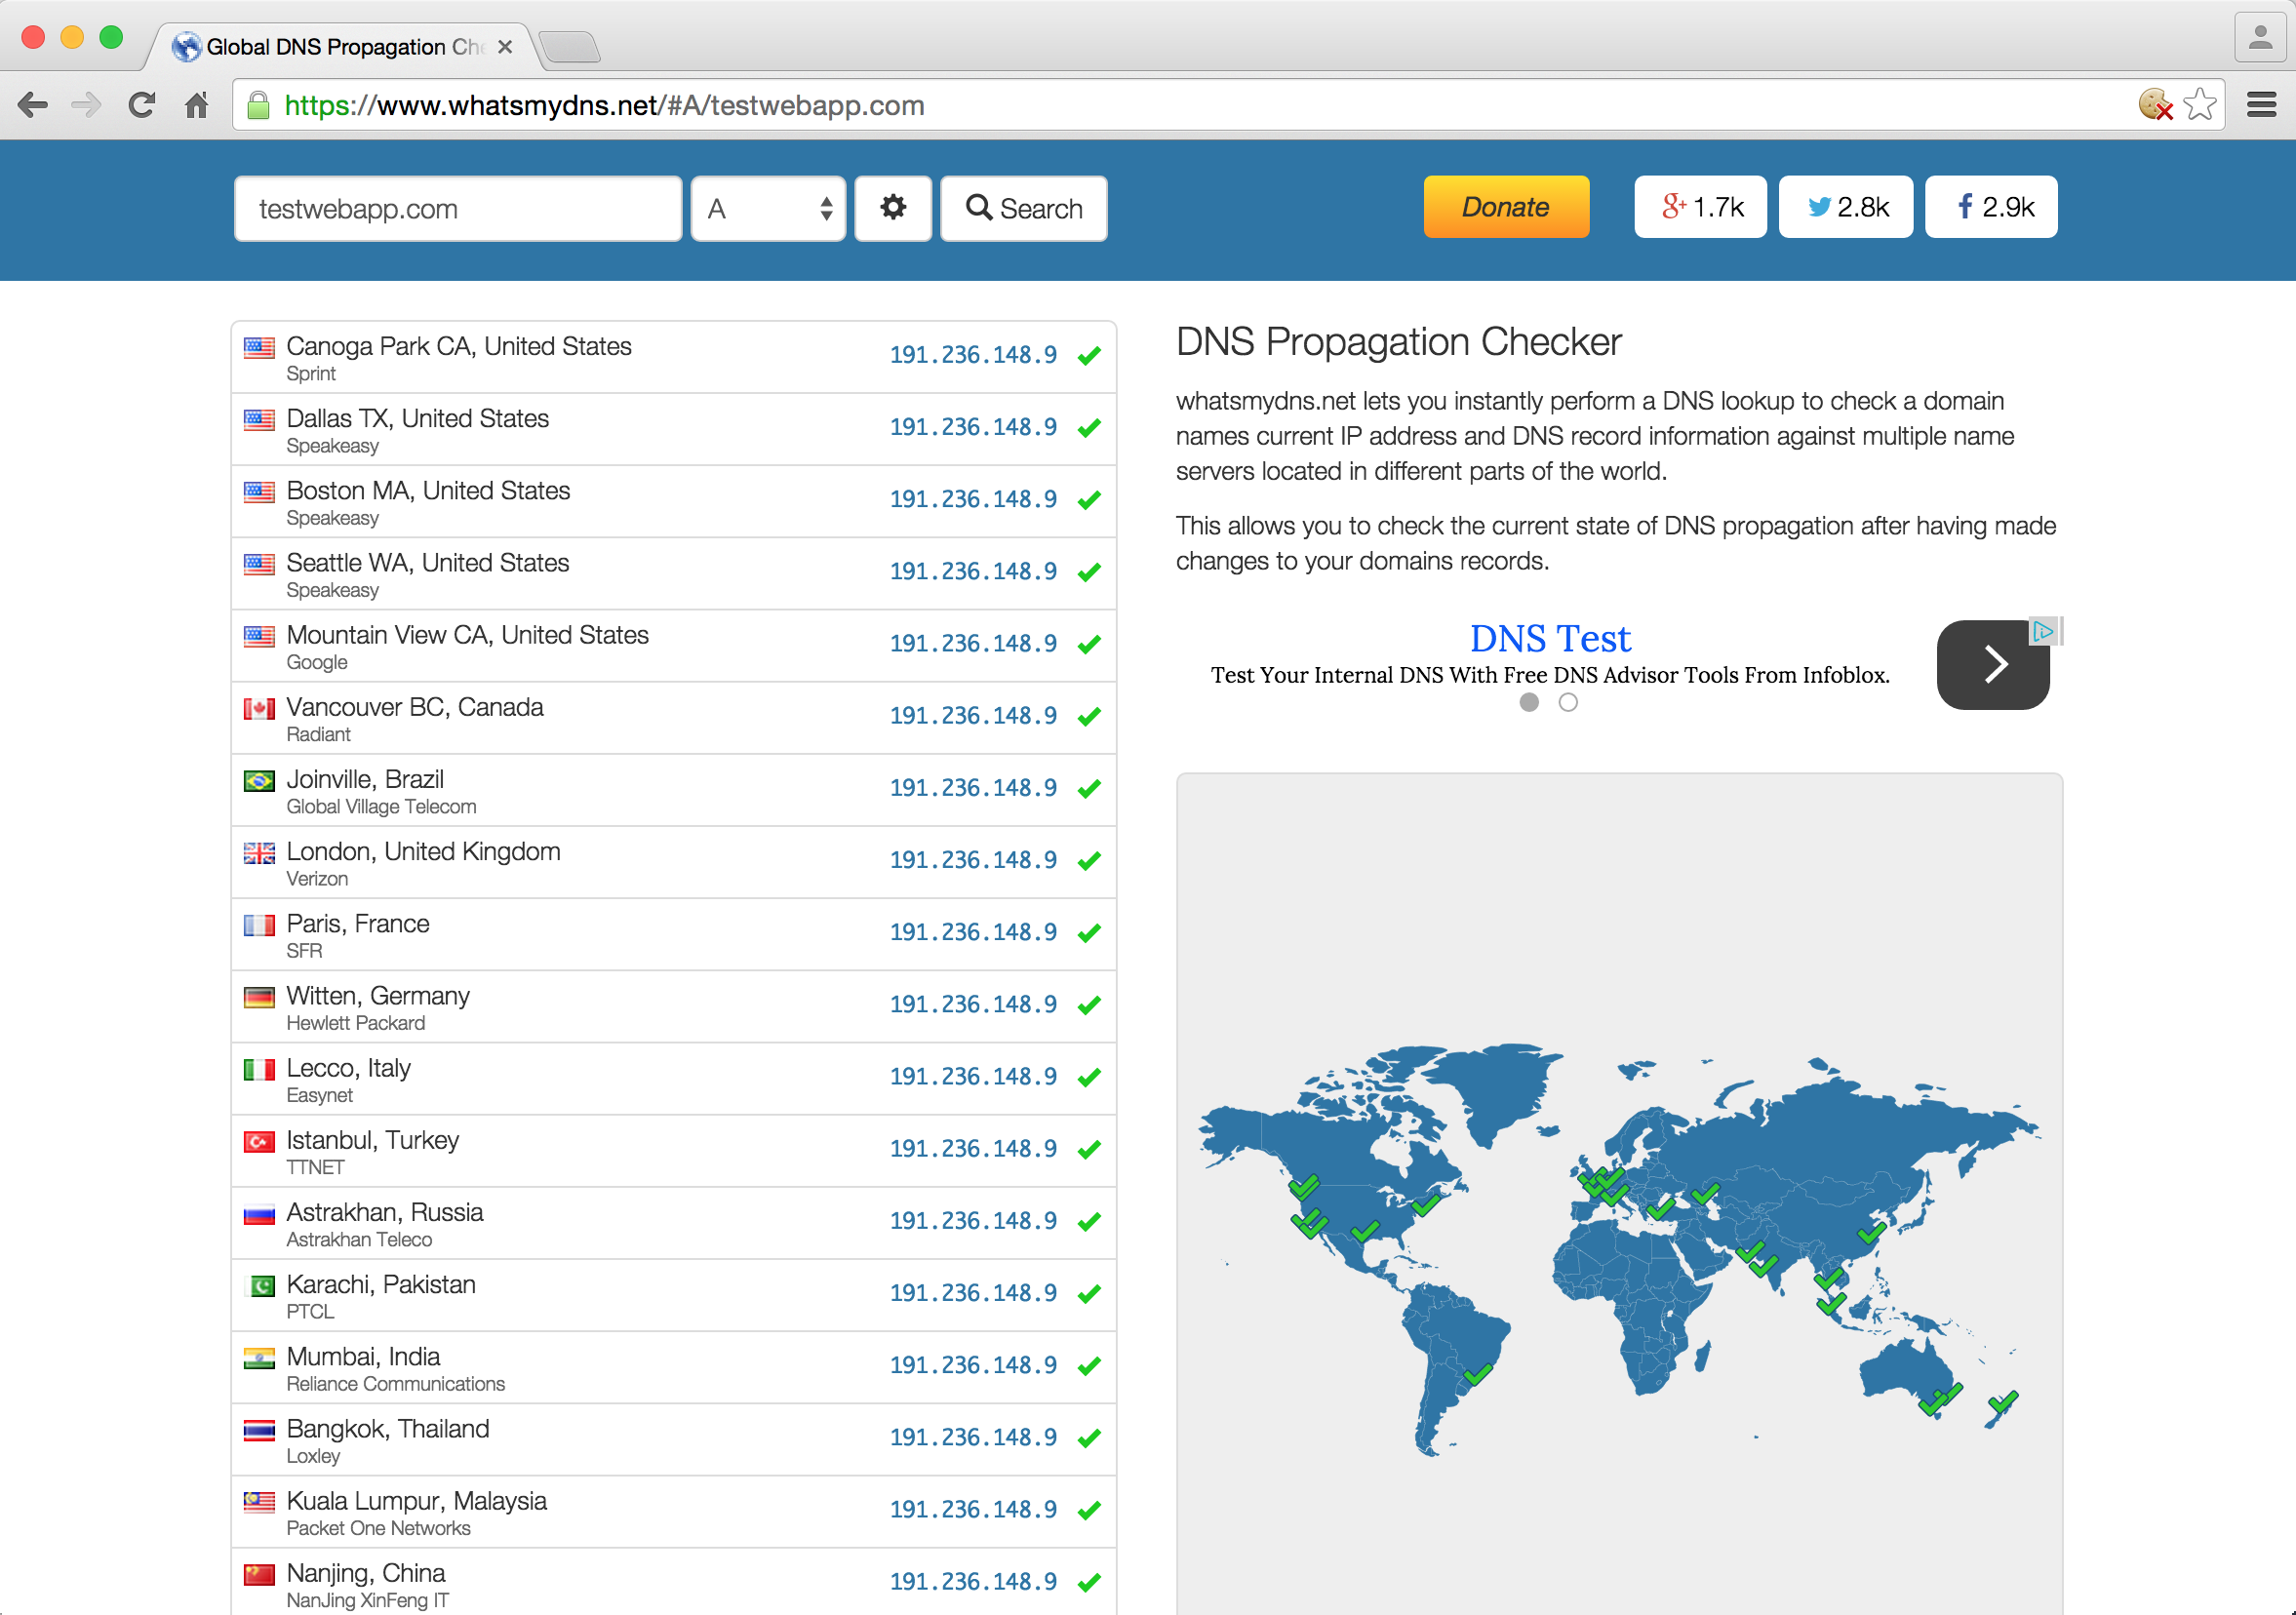
Reviewing Current DNS Propagation
Let’s go to whatsmydns.net website and check current. DNS propagation.
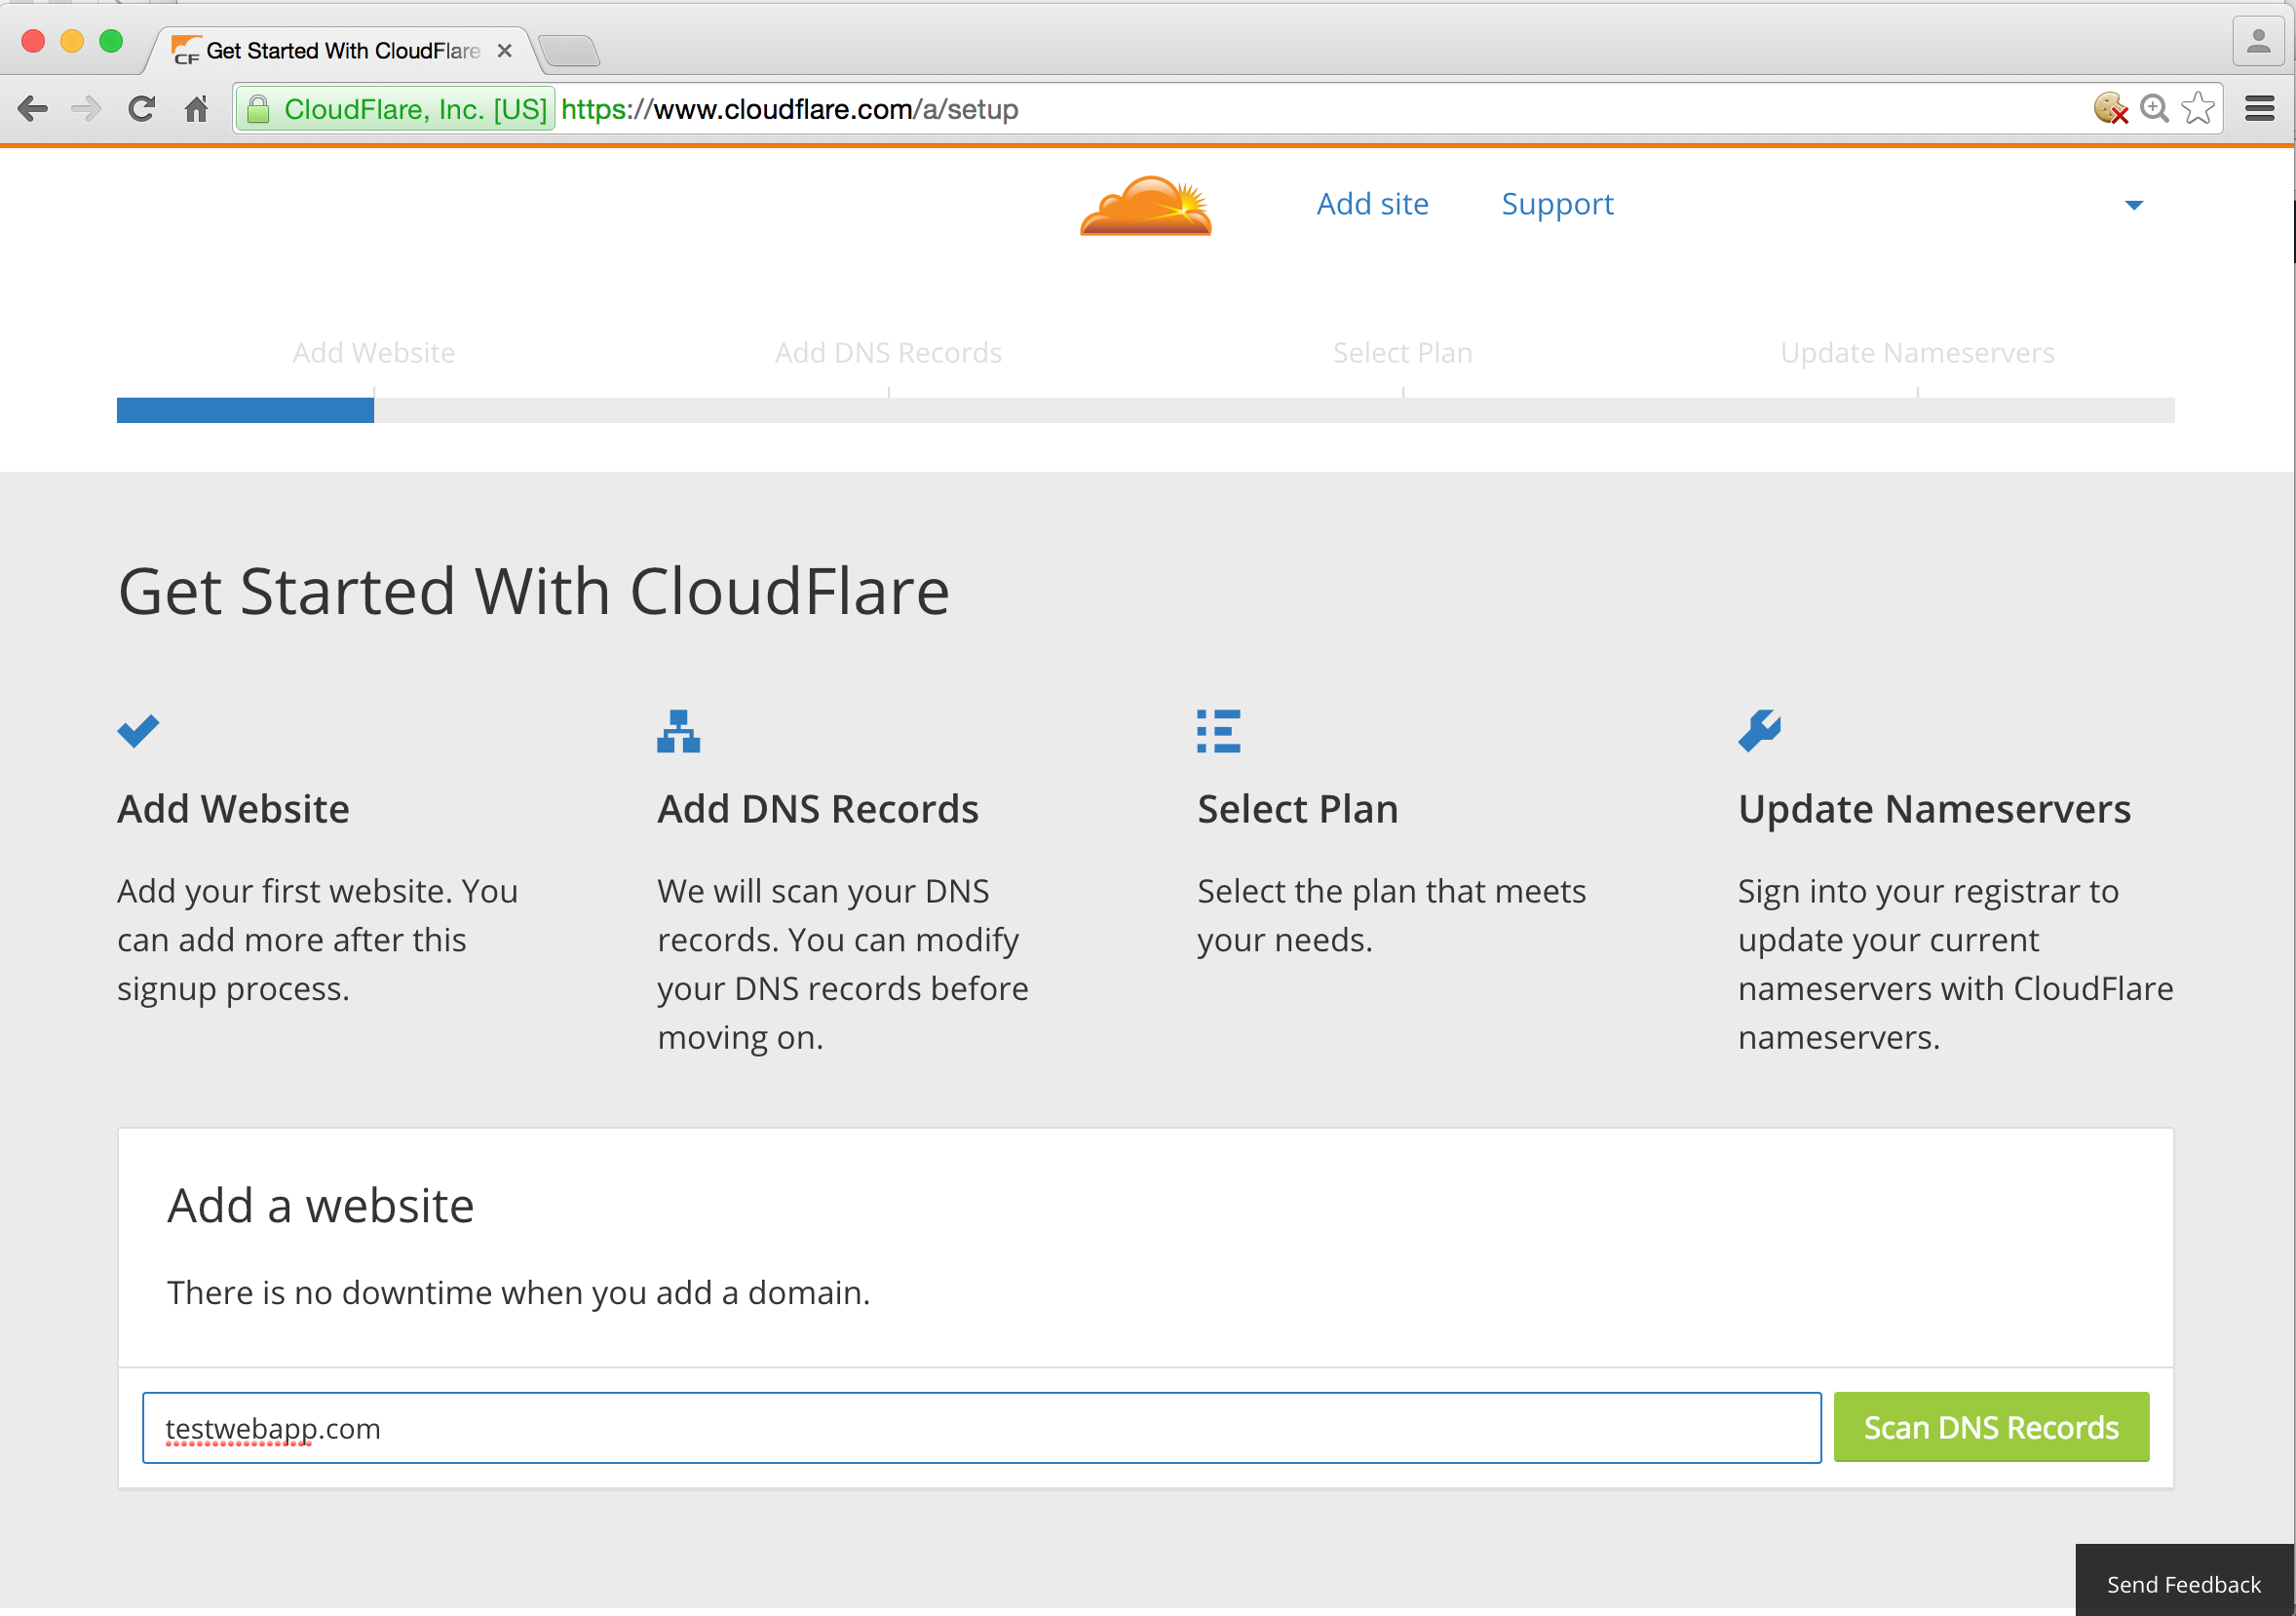
Getting Started With CloudFlare
It’s time to go to setup page, provide domain name and hit Scan DNS Records button.
After about a minute I got the following results:
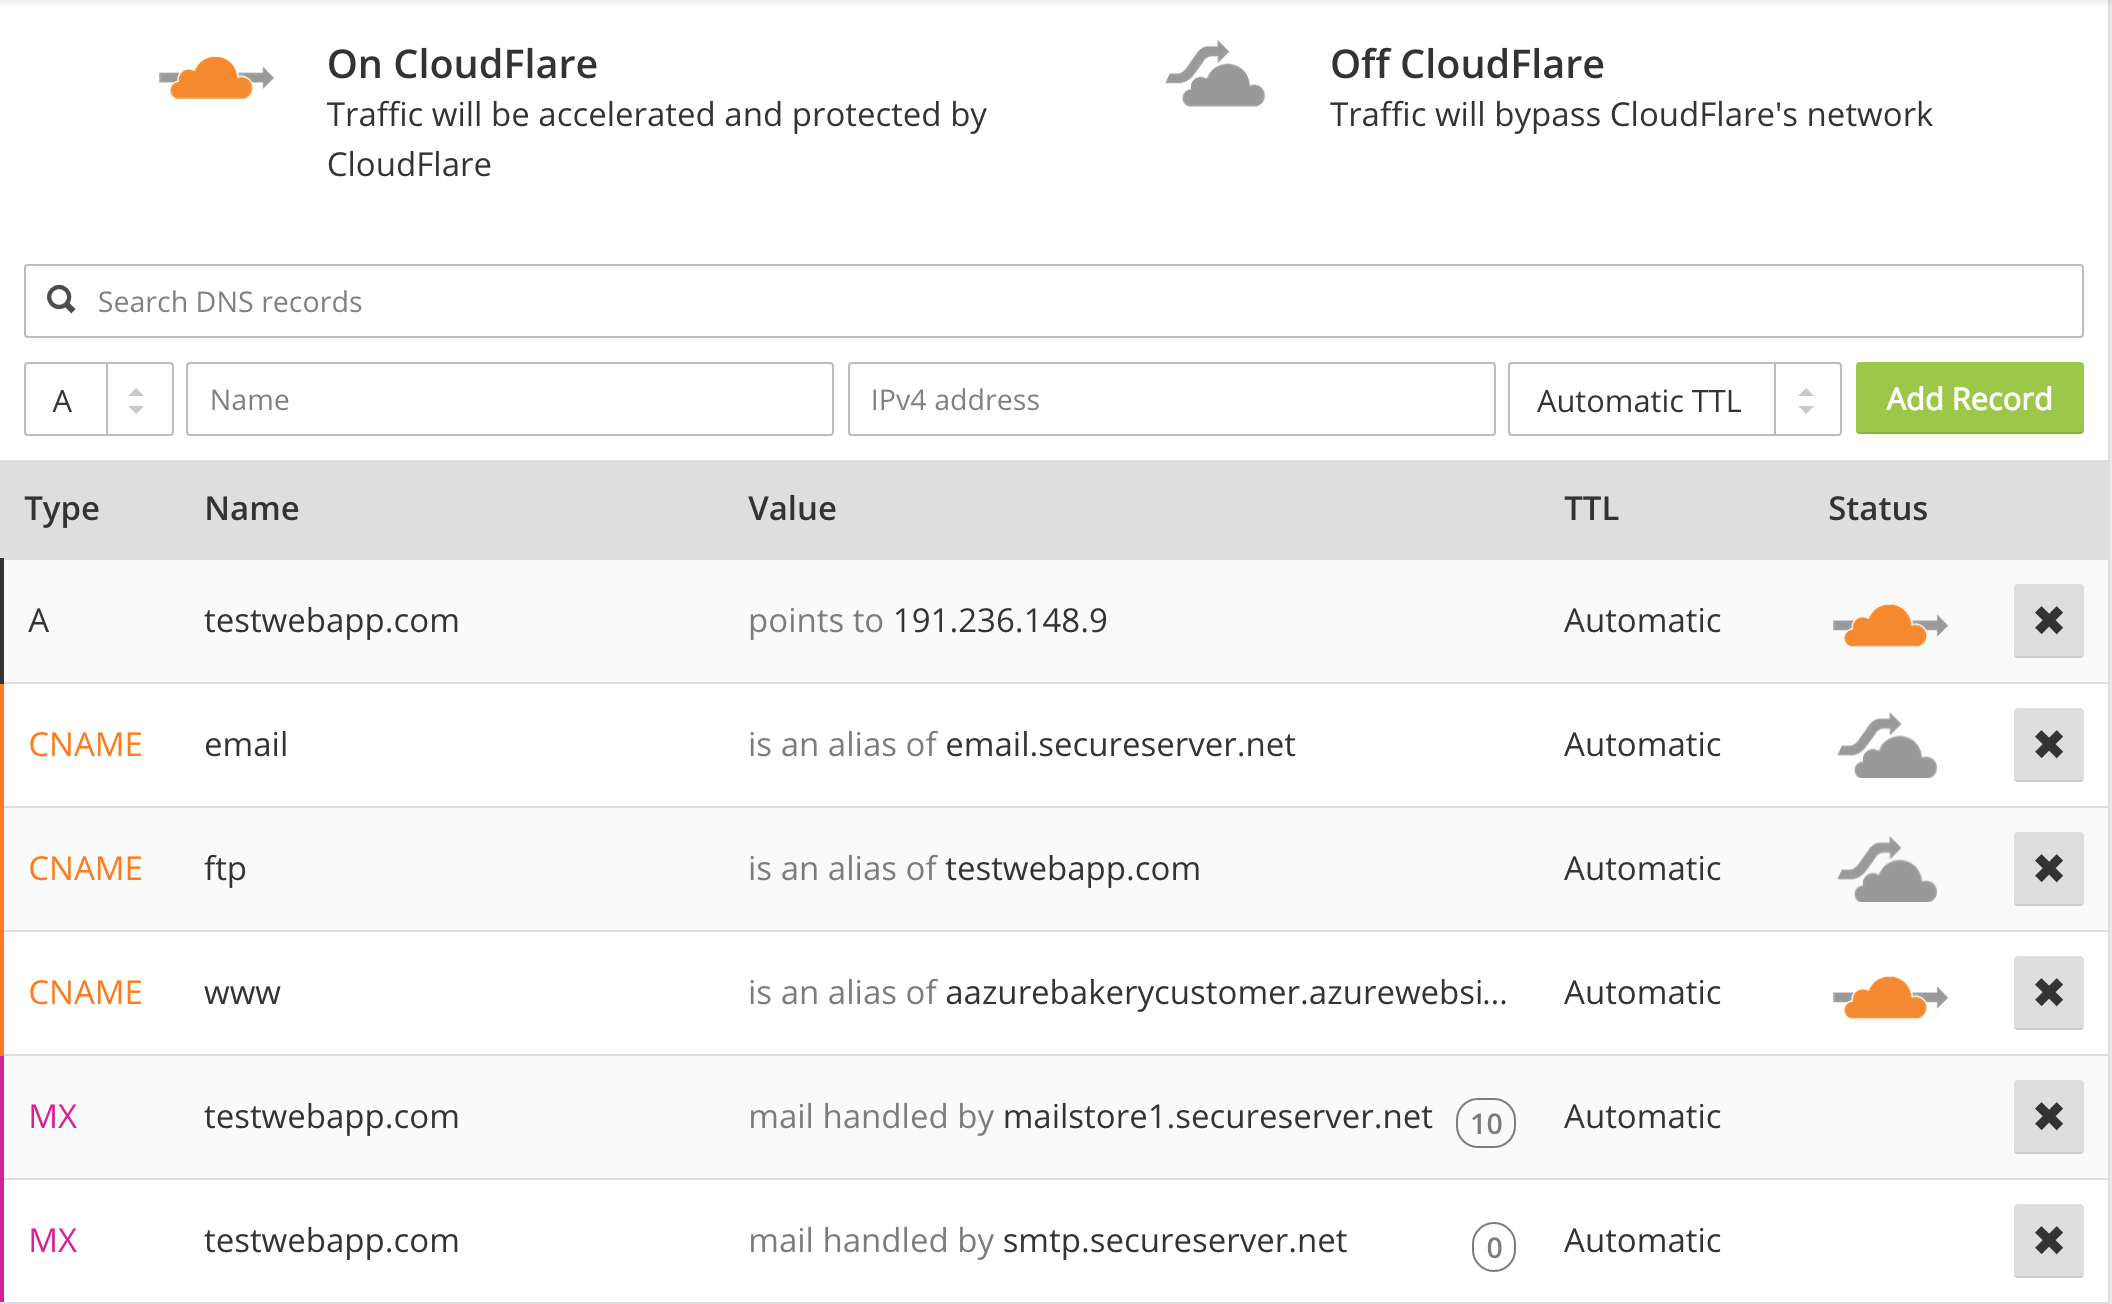
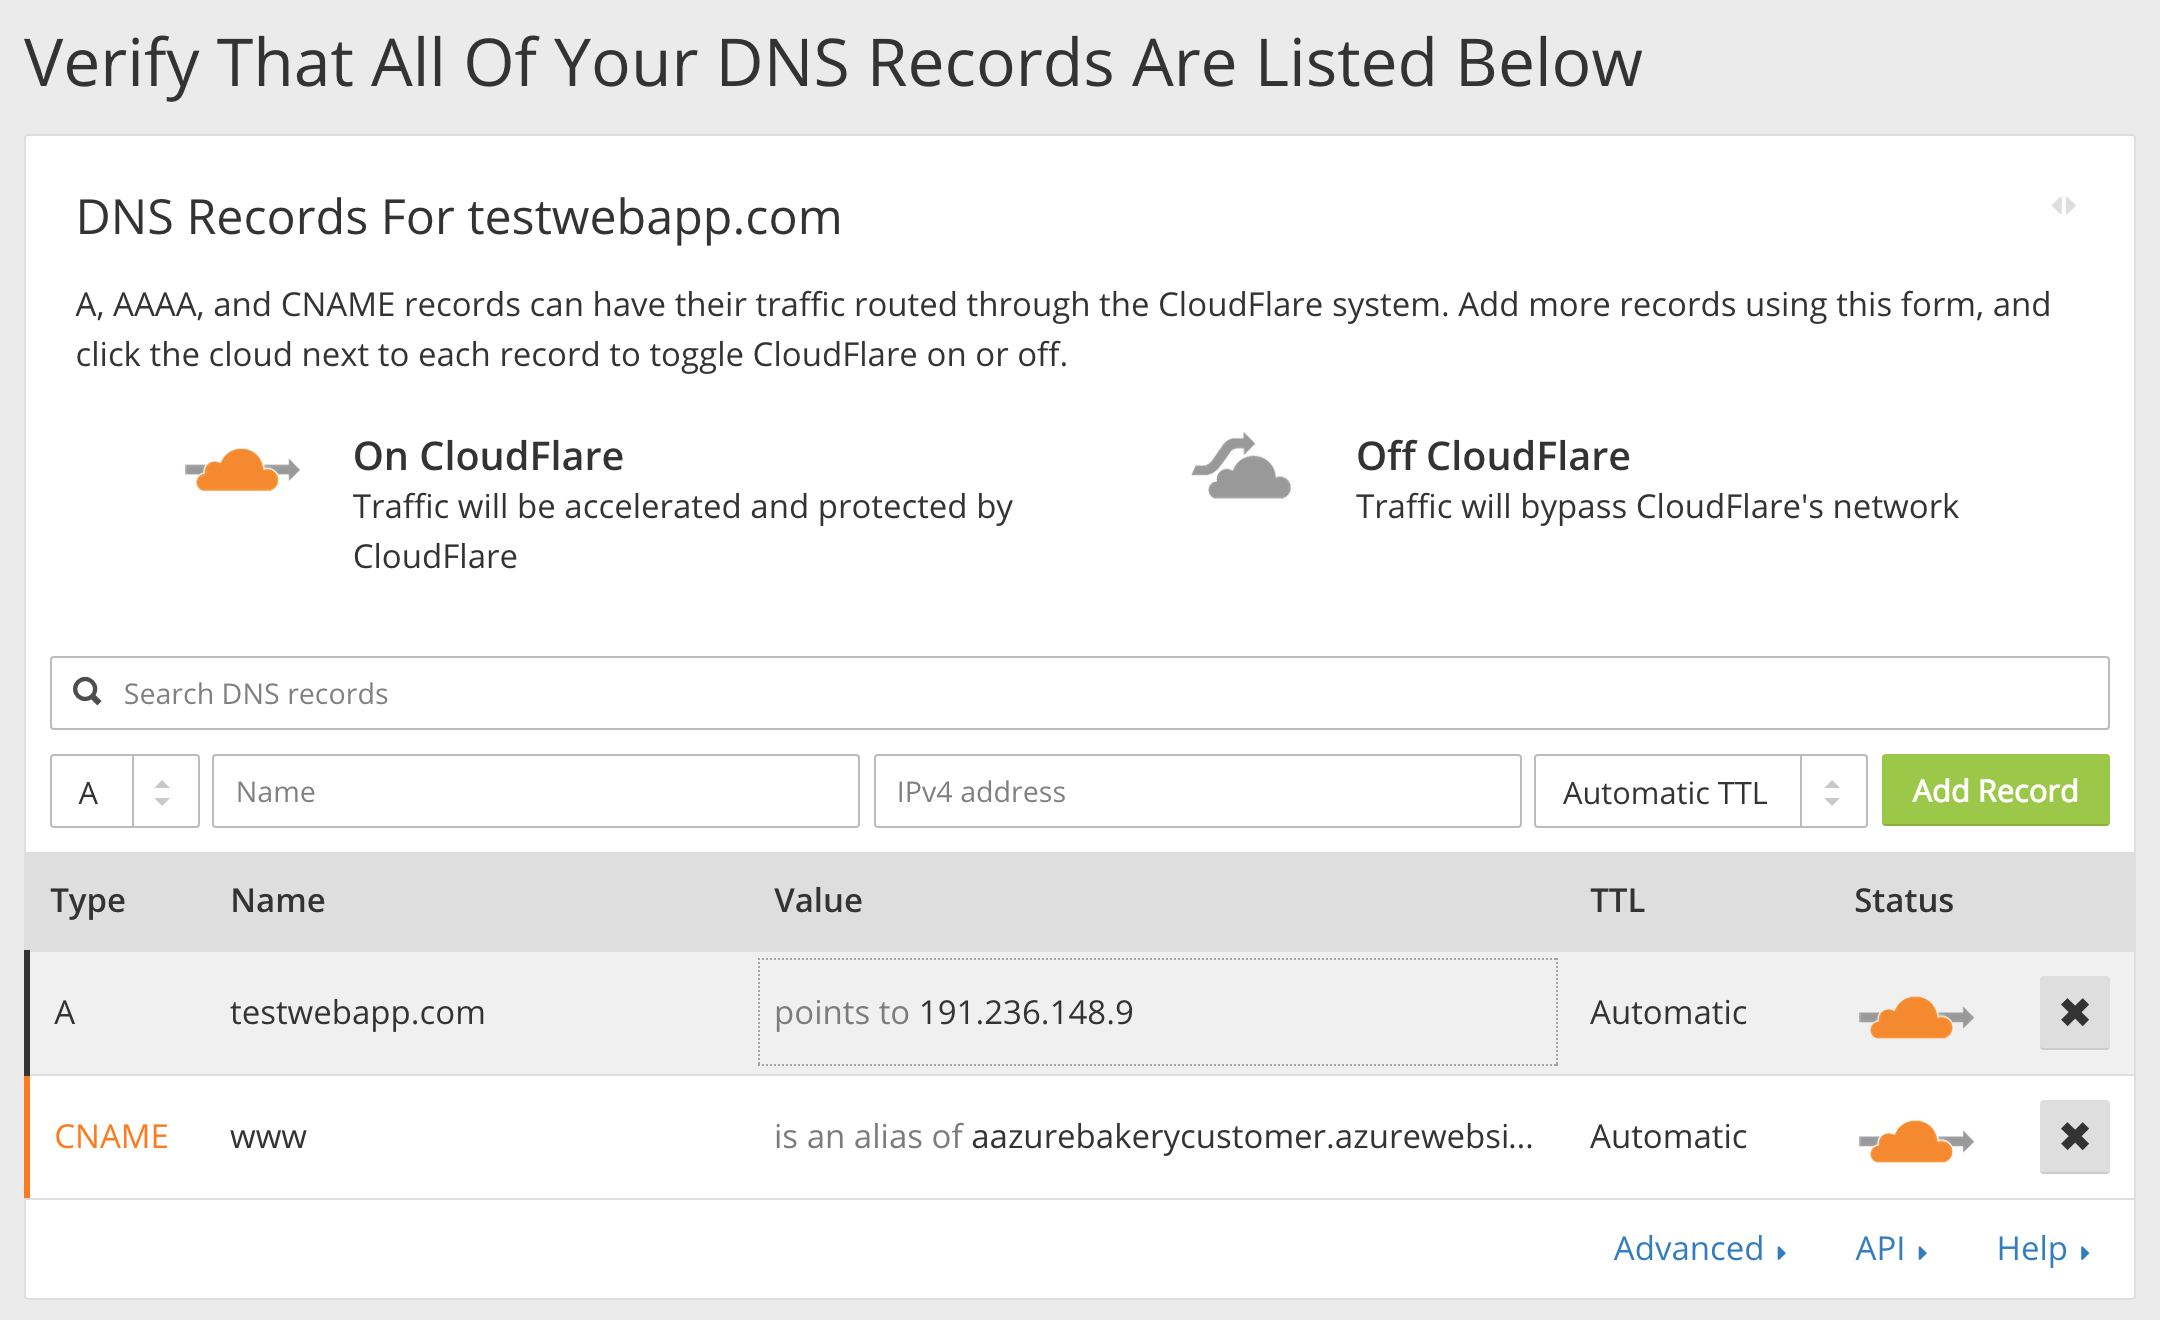
As this is my test website I really do not care about mail or ftp services, so I’m going to delete those settings and leave only A and CNAME records I care about. Here’s the final screenshot:
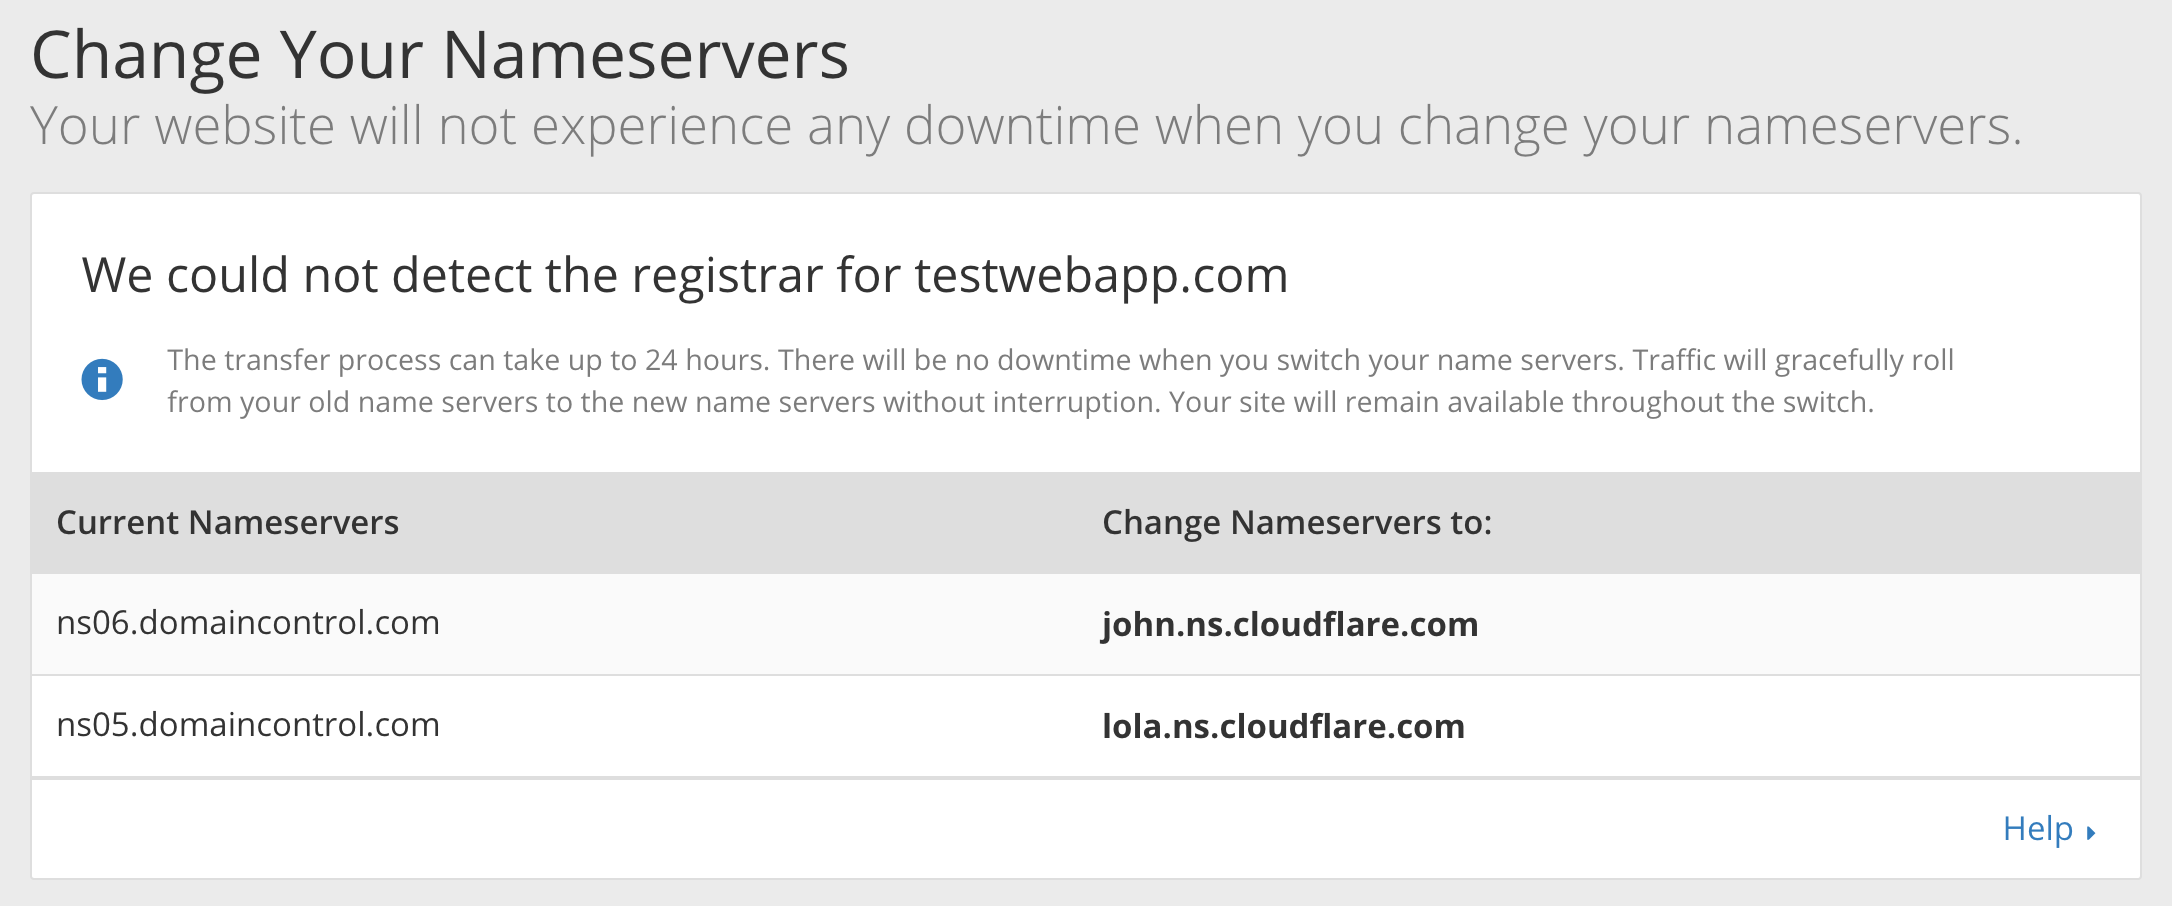
Hit Continue button, select Free plan that features Basic security protection, SSL (limited browsers), Fast website performance and Always online. After I hit Continue button, I’ve got the names of the new nameservers I need to update my GoDaddy records to.
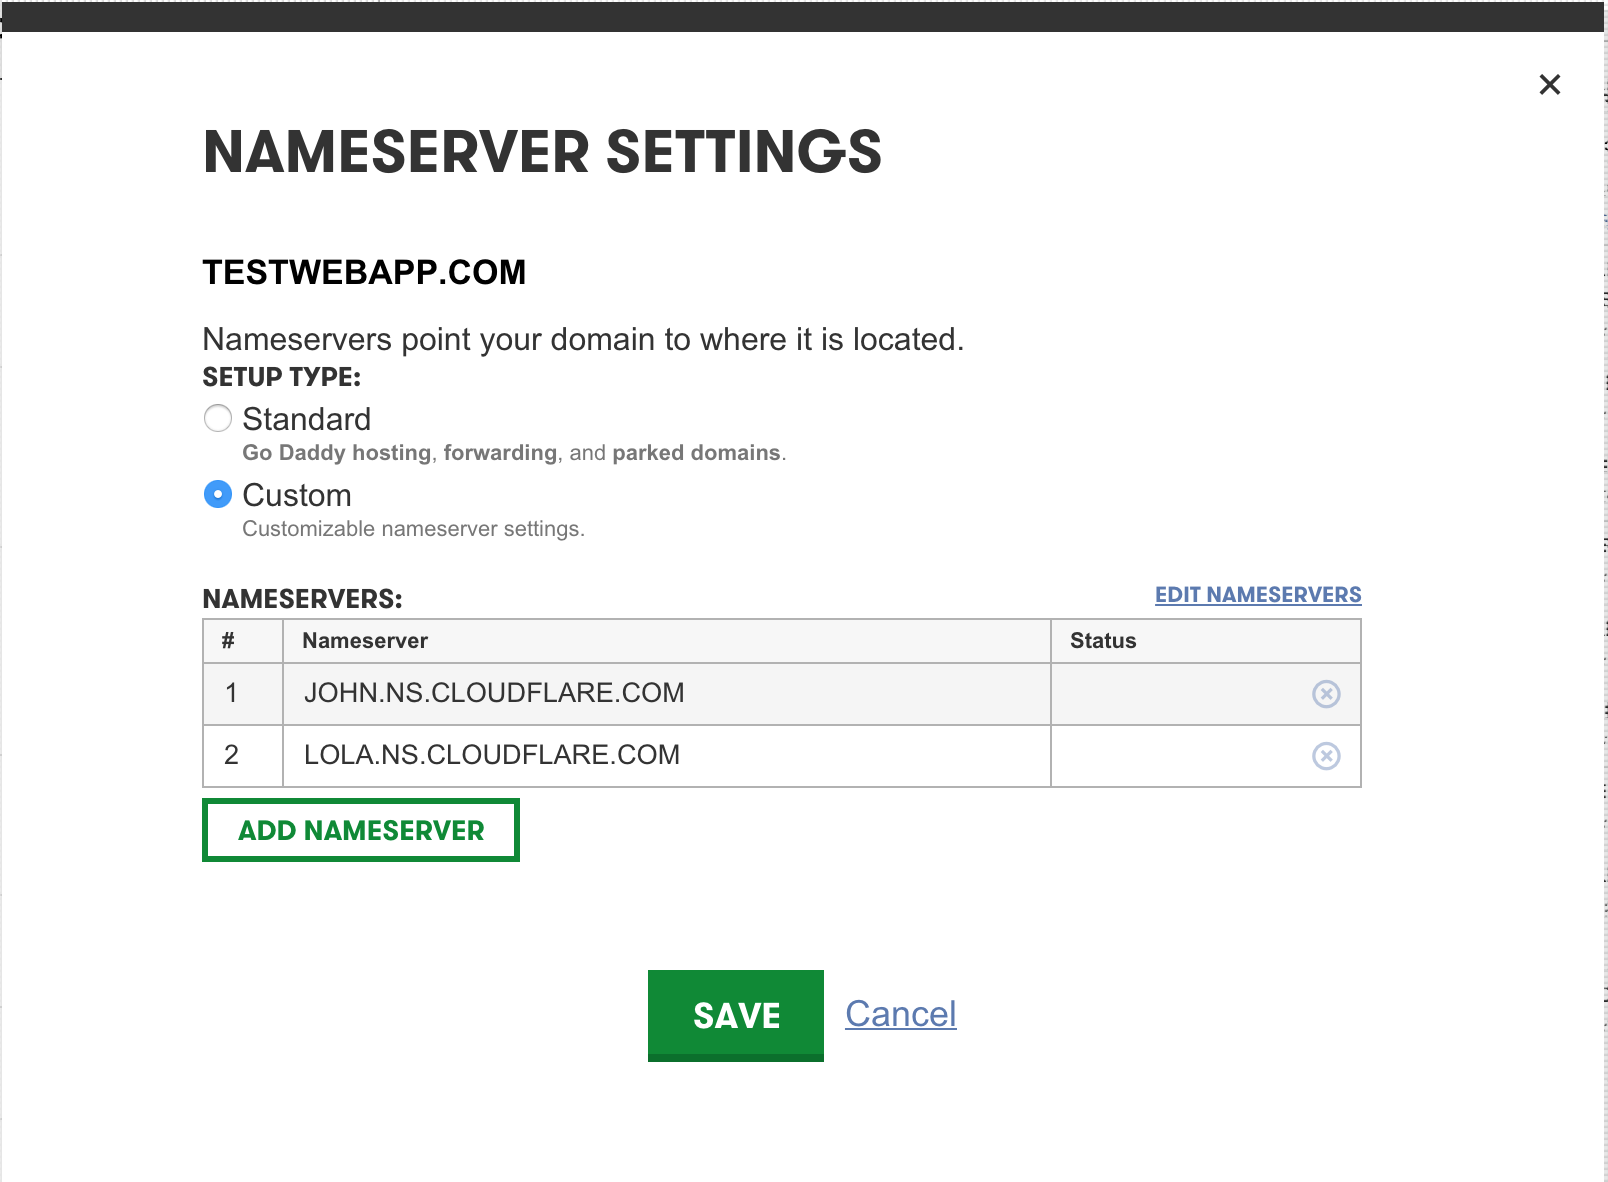
I went back to GoDaddy portal and updated the nameserver records.
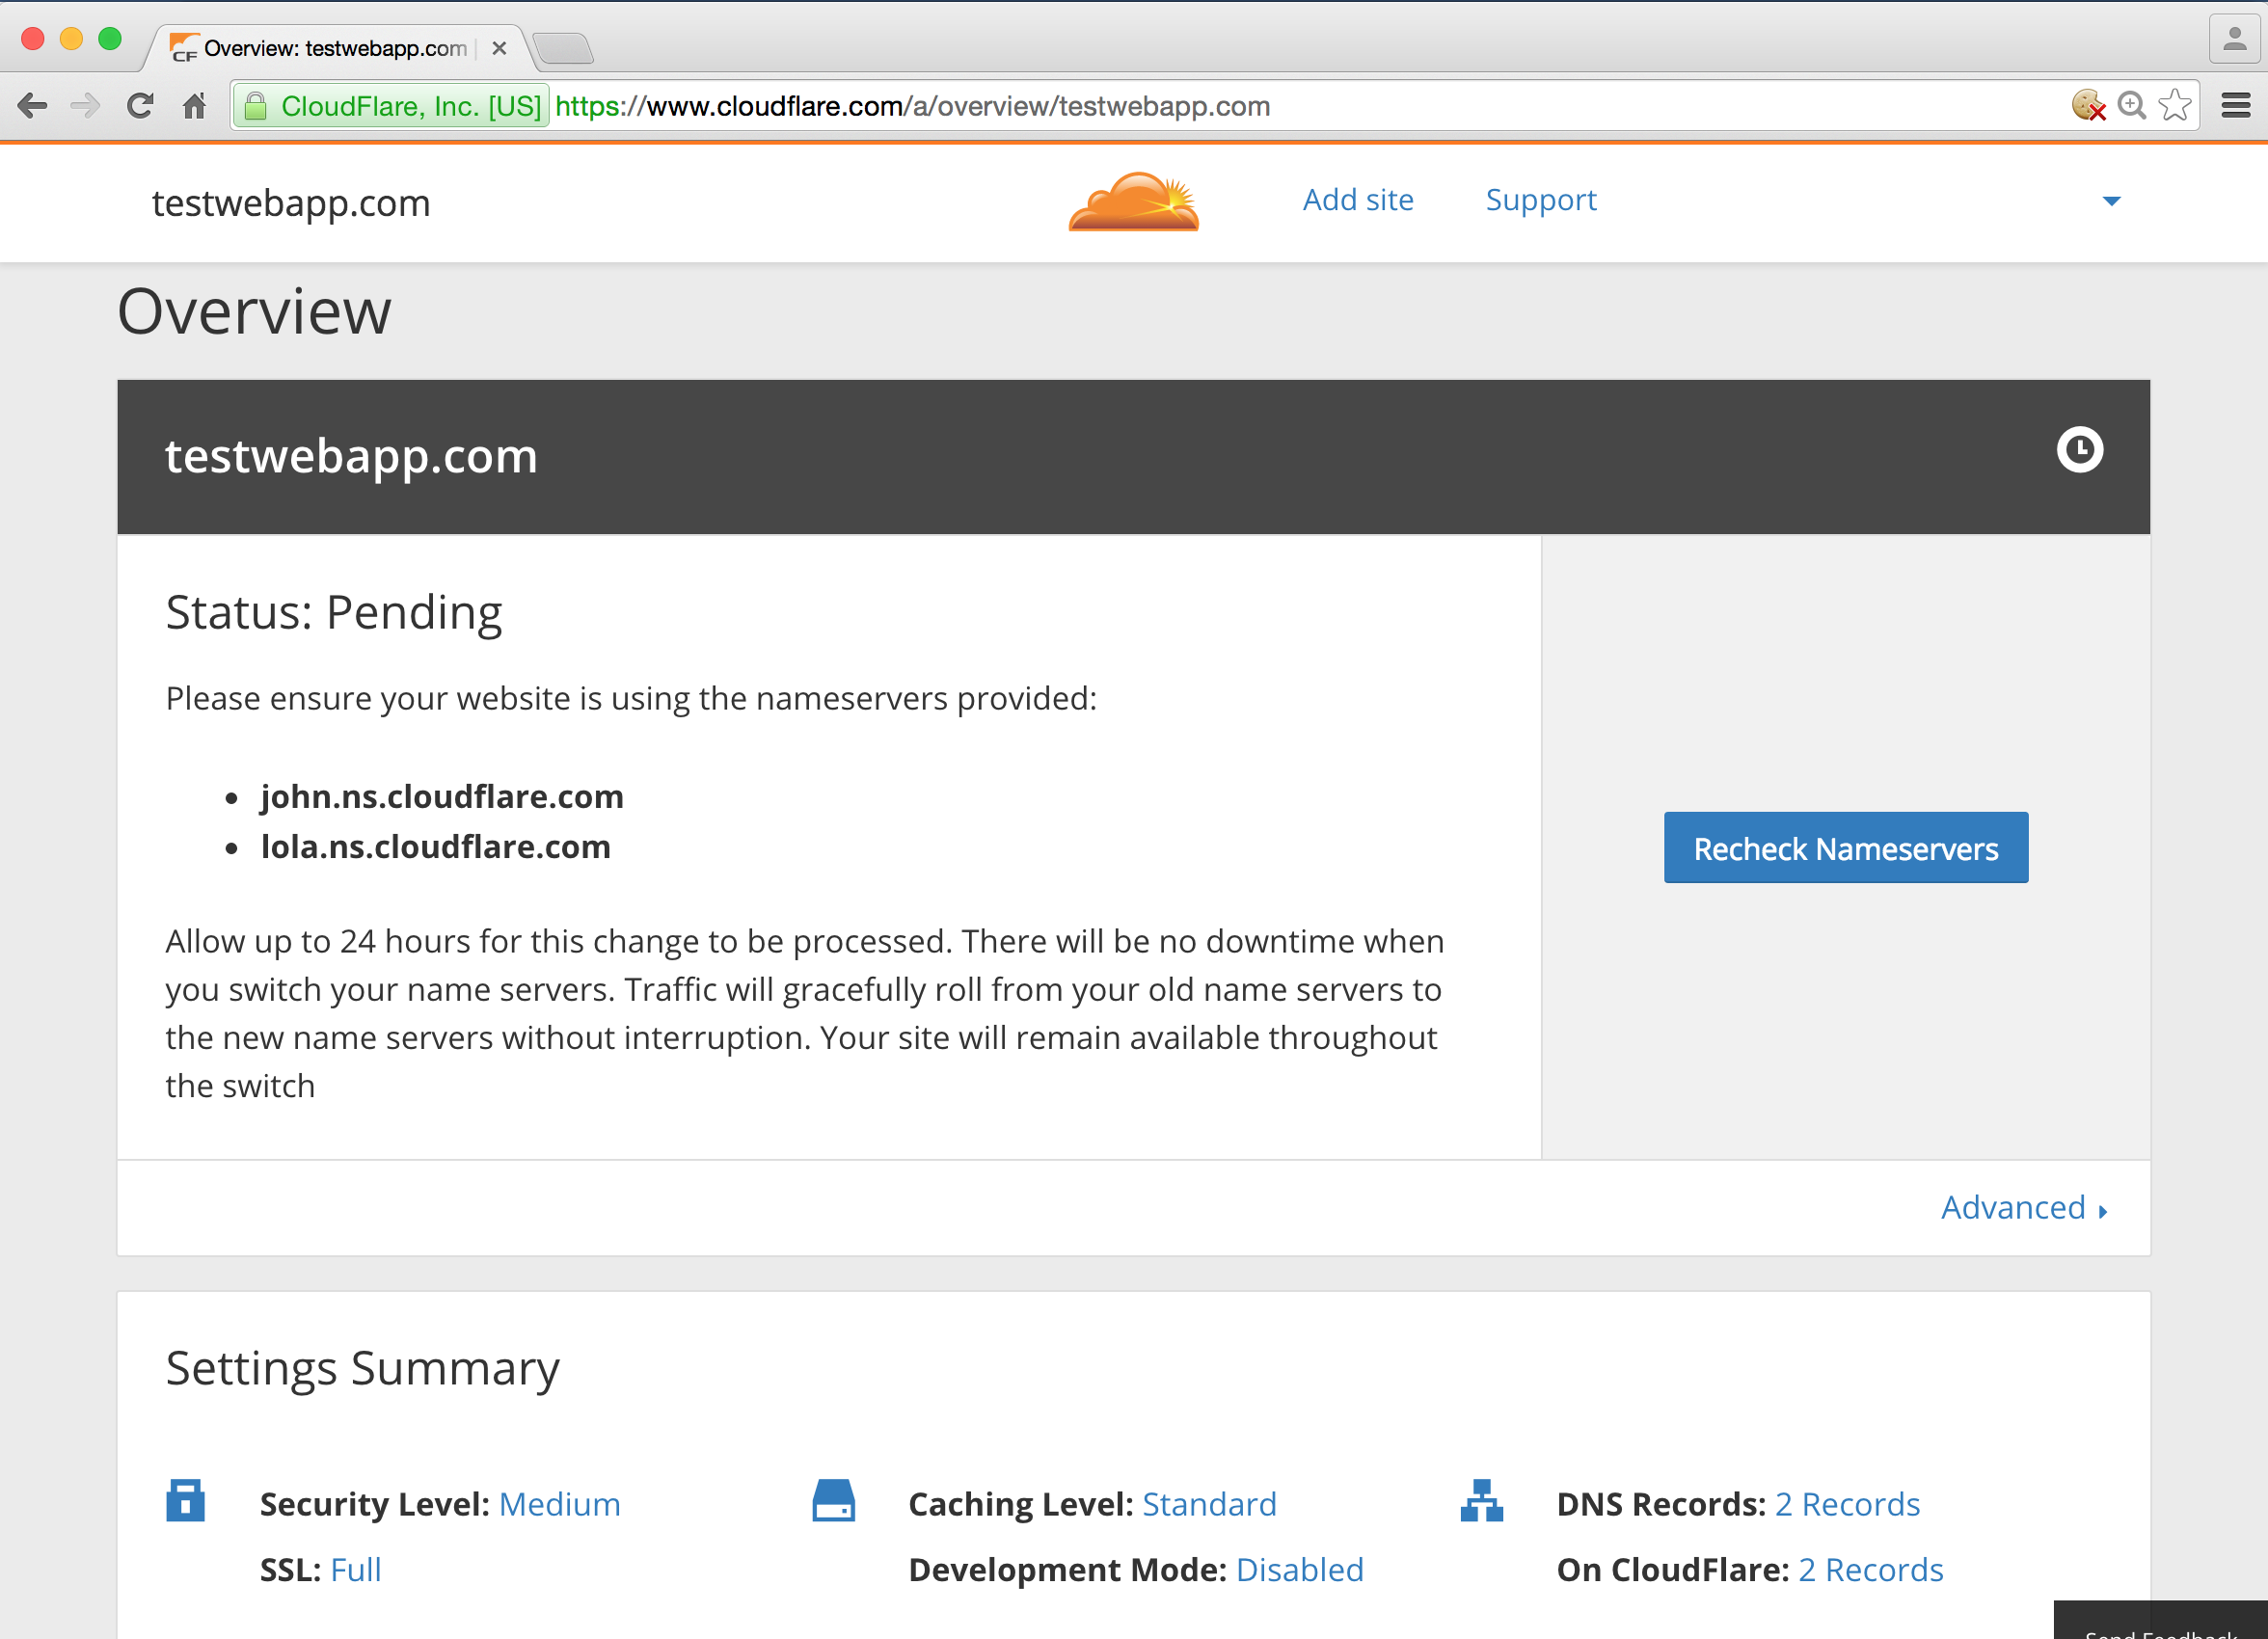
After I saved nameserver settings, I went back to CloudFlare portal, hit Continue and got to the Overview page:
It’s time to wait for the DNS to propagate around the world.

Finally, in about two hours DNS records got propagated globally. Time to check if the DNS records on my Mac got propagated as well.
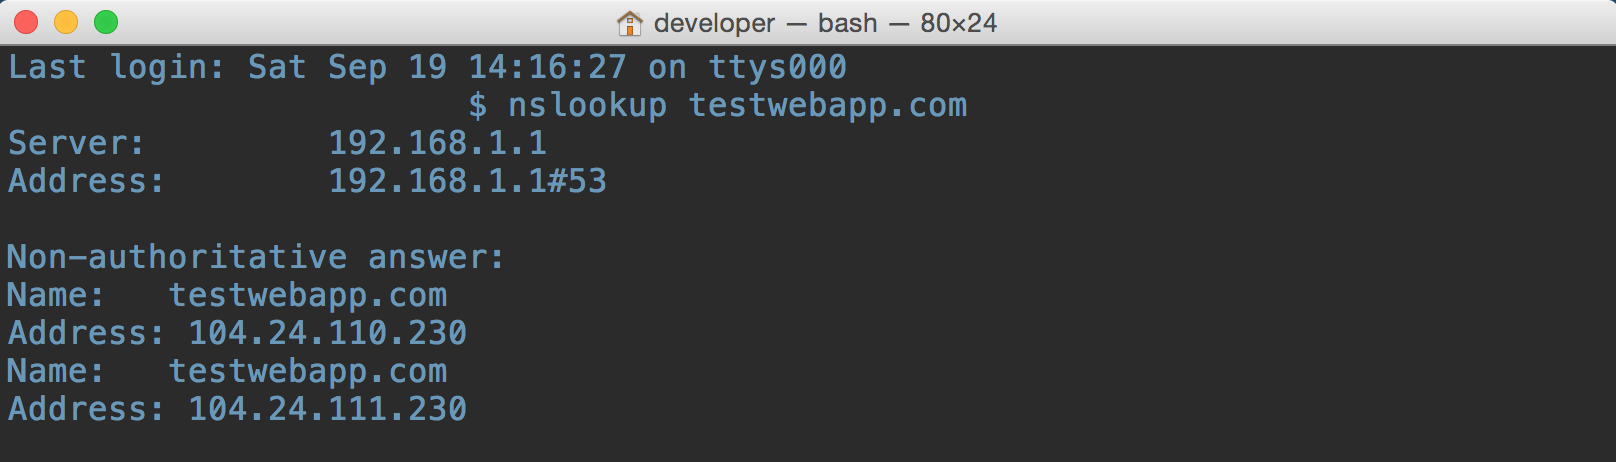
Yes, they did. Now, I need to clear host cache in Google Chrome. Navigate to chrome://net-internals/#dns and hit Clear host cache button.
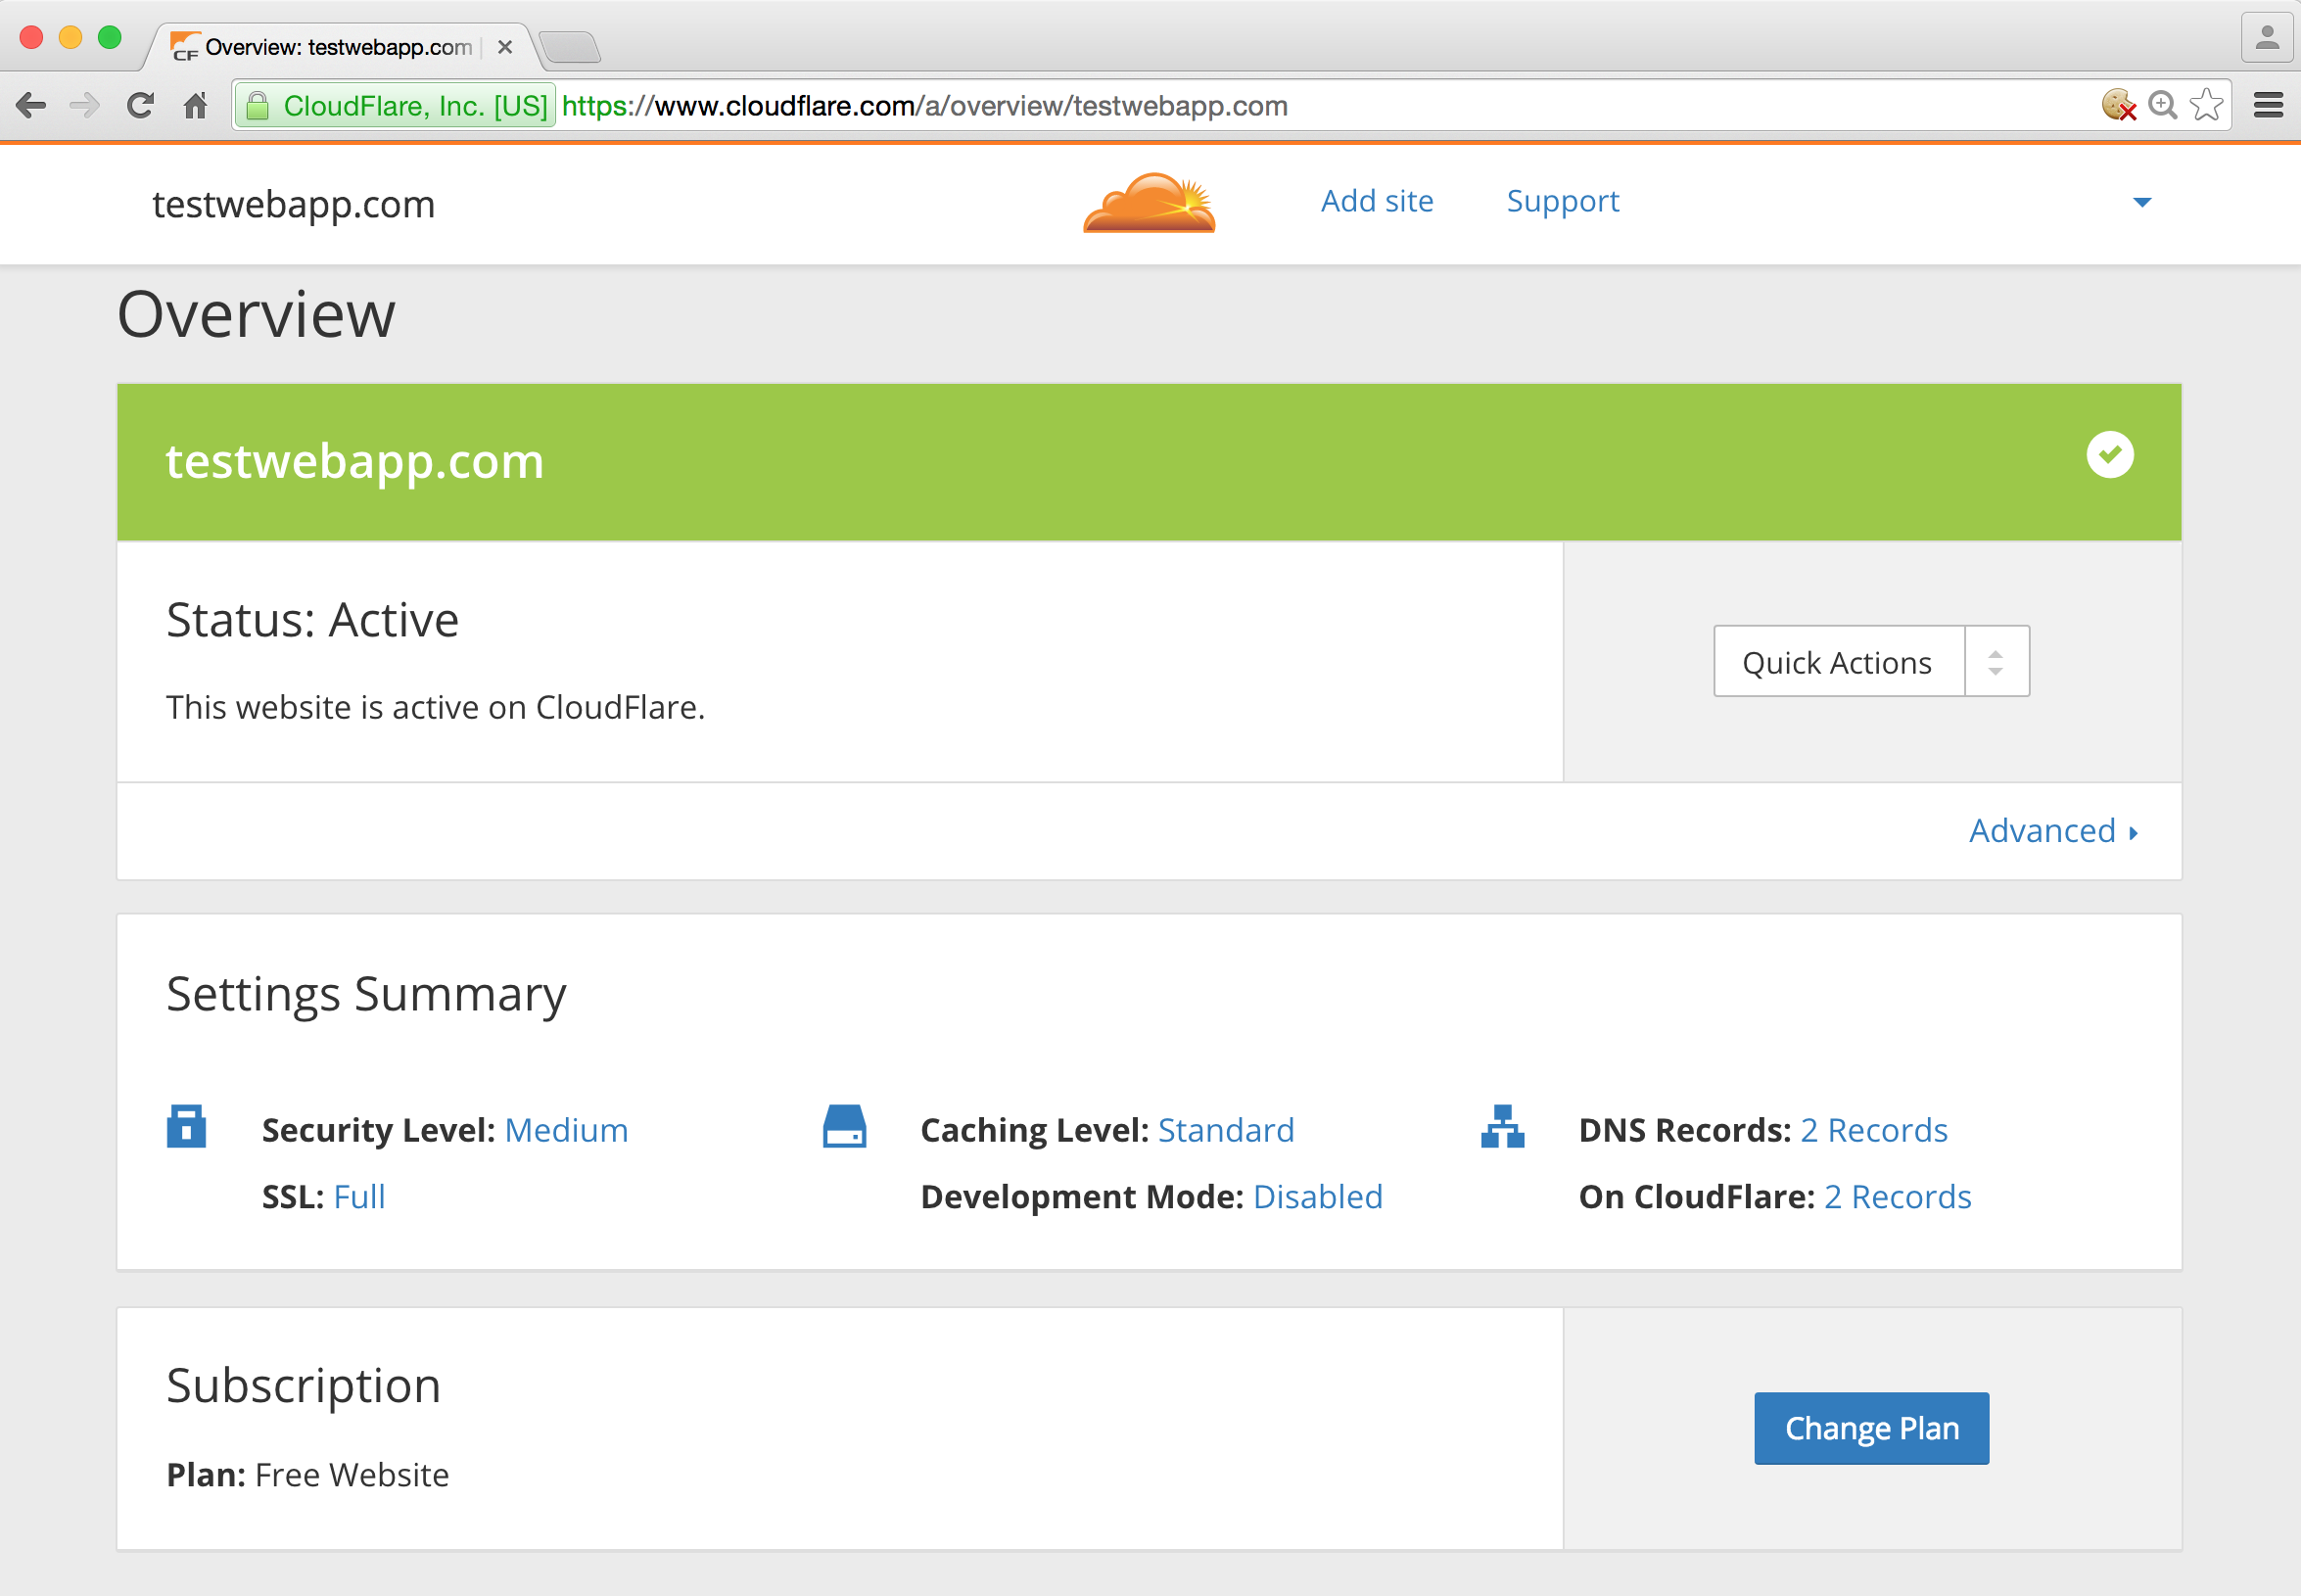
The Overview page in the CloudFlare portal now shows active status.
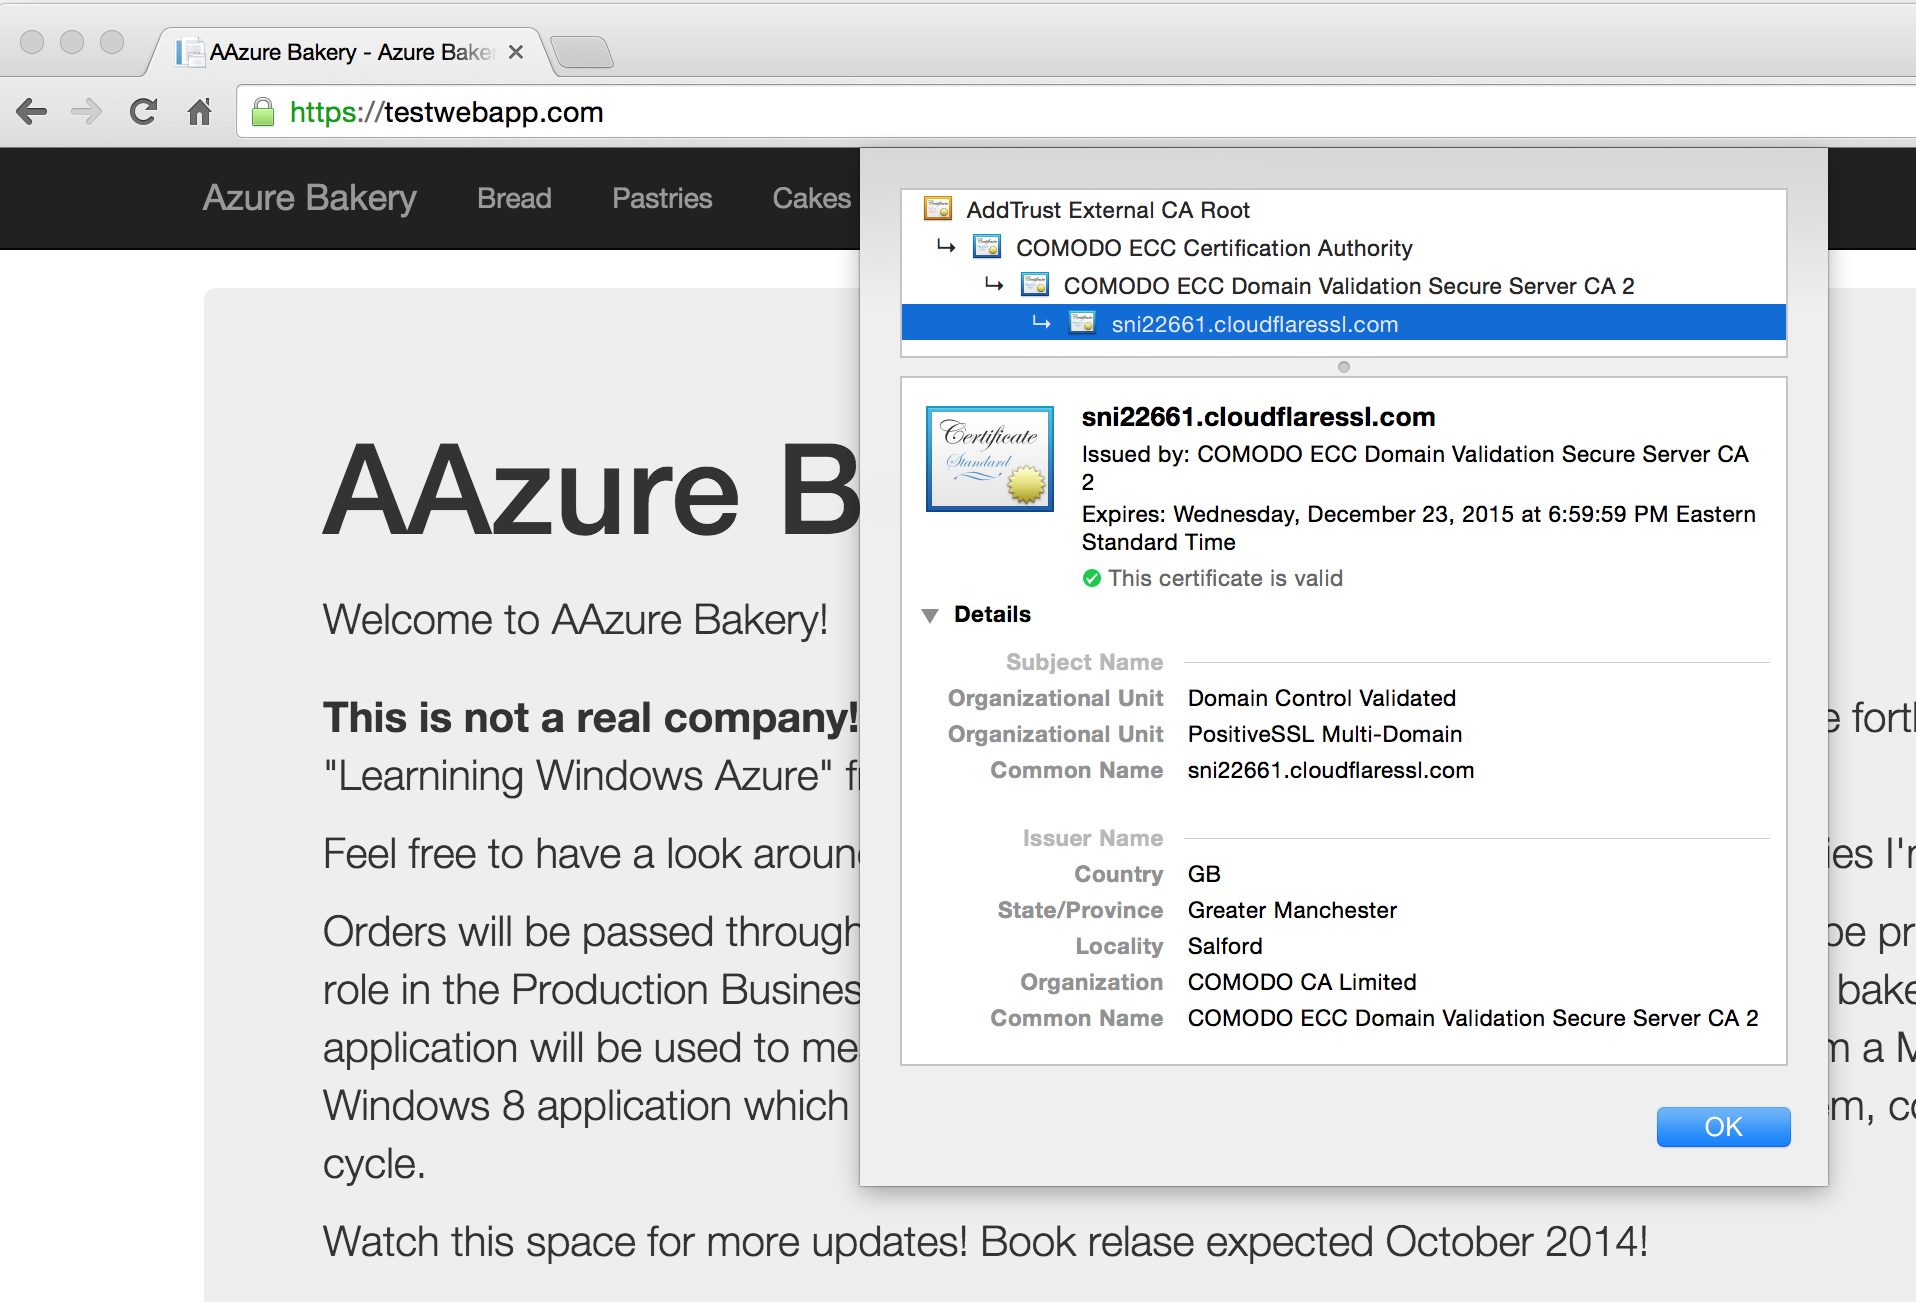
Let’s navigate to the site. Because my site had origin domain SSL certificate, CloudFlare initially set the SSL settings into Full, meaning that communication between visitor and CloudFlare was protected with CloudFlare SSL certificate and from CloudFlare to my site – with mine that I got from GoDaddy. The browser now shows that the SSL certificate was issued to sni22661.cloudflare.com, not testwebapp.com (as was seen on the second image).
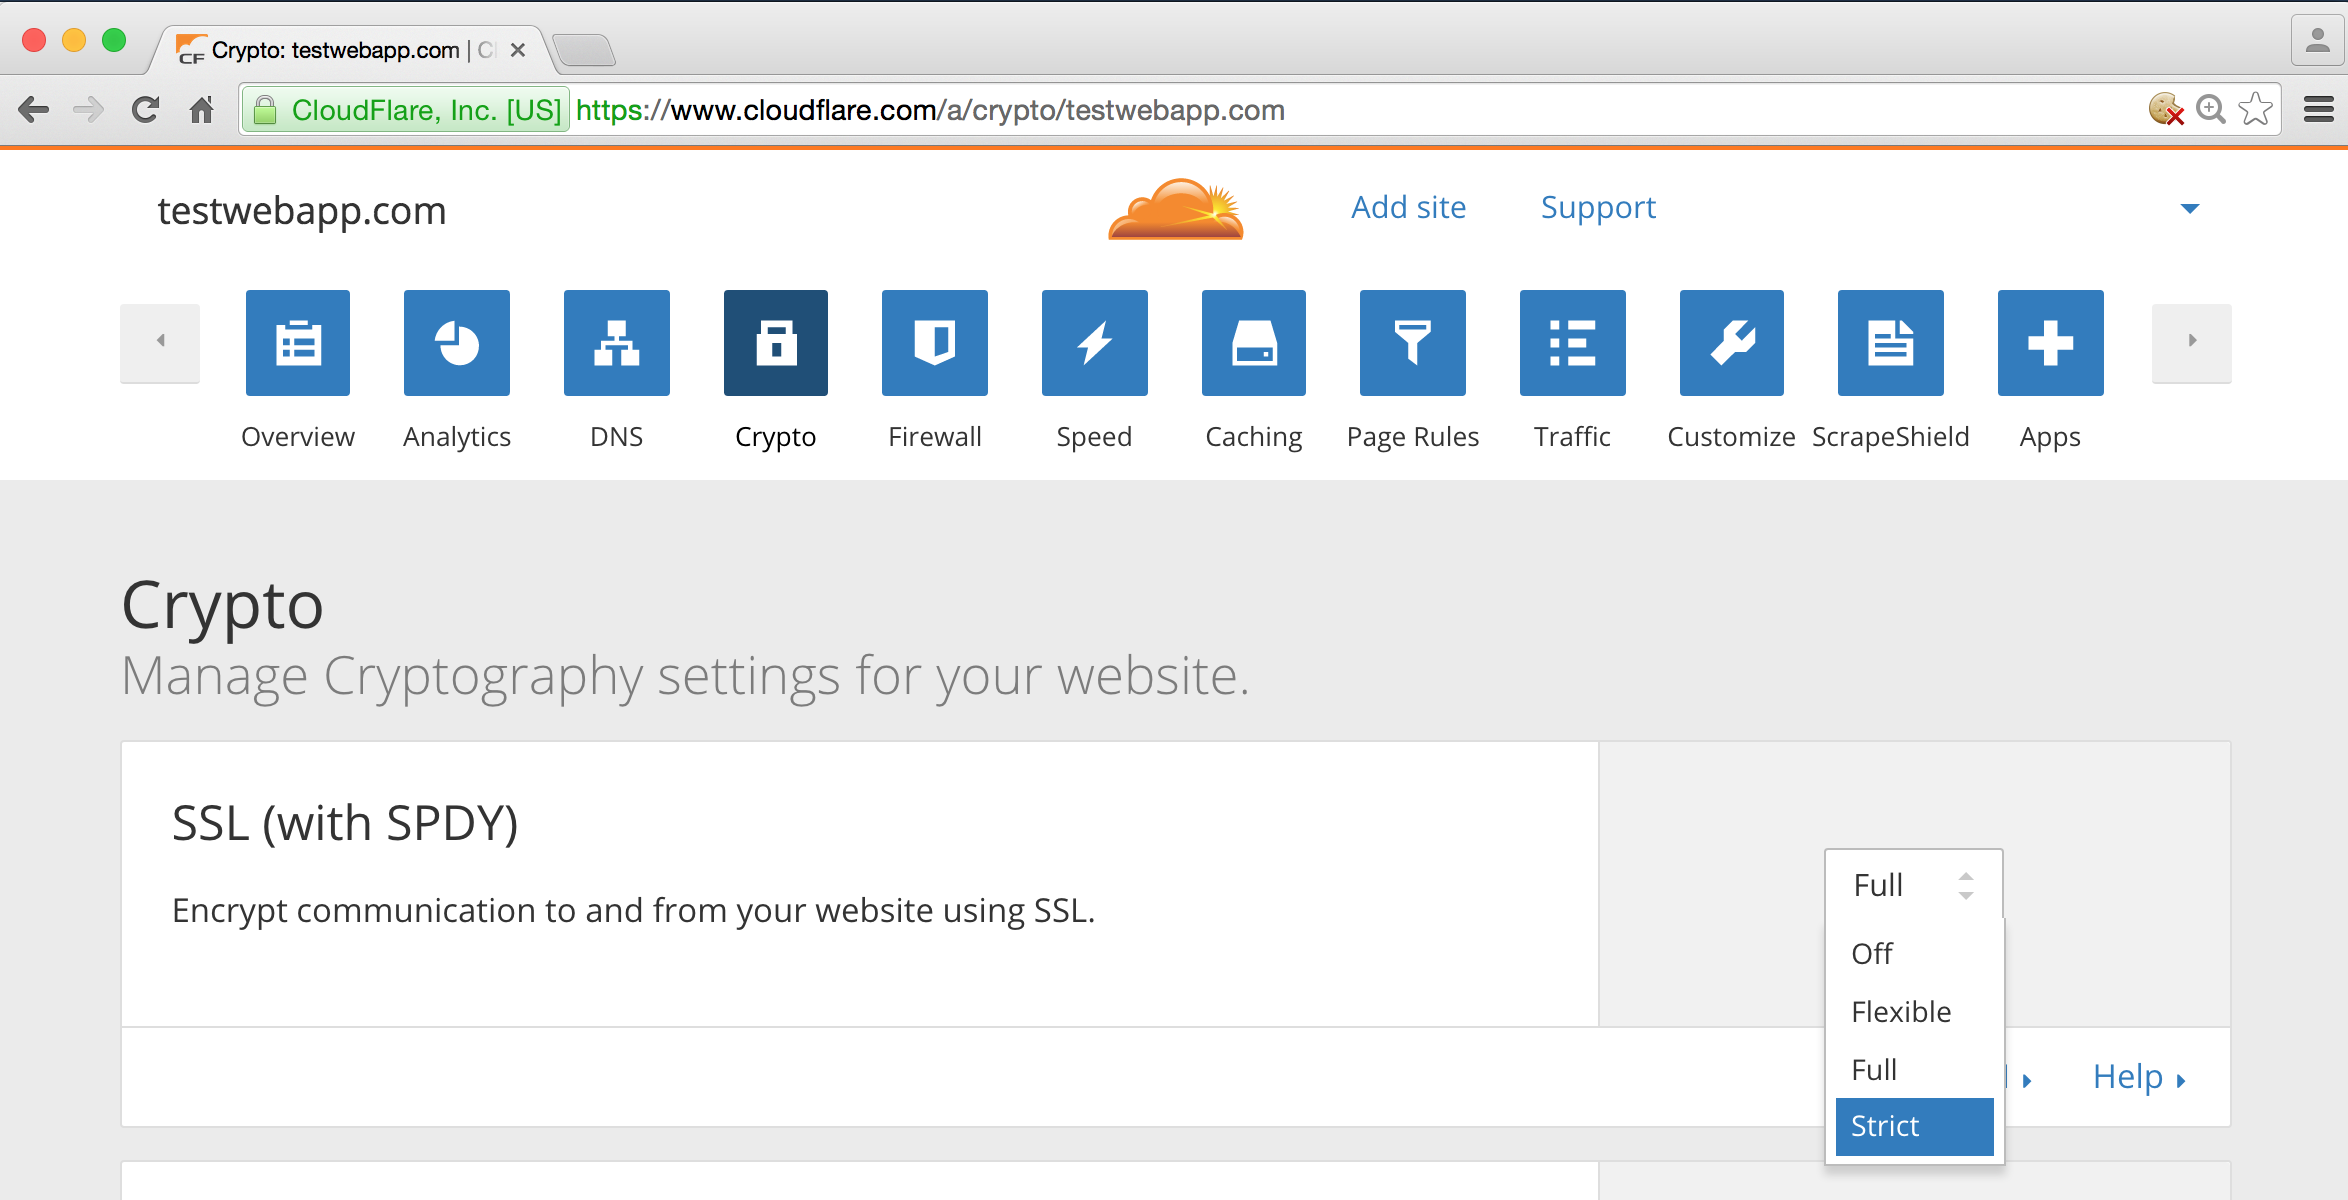
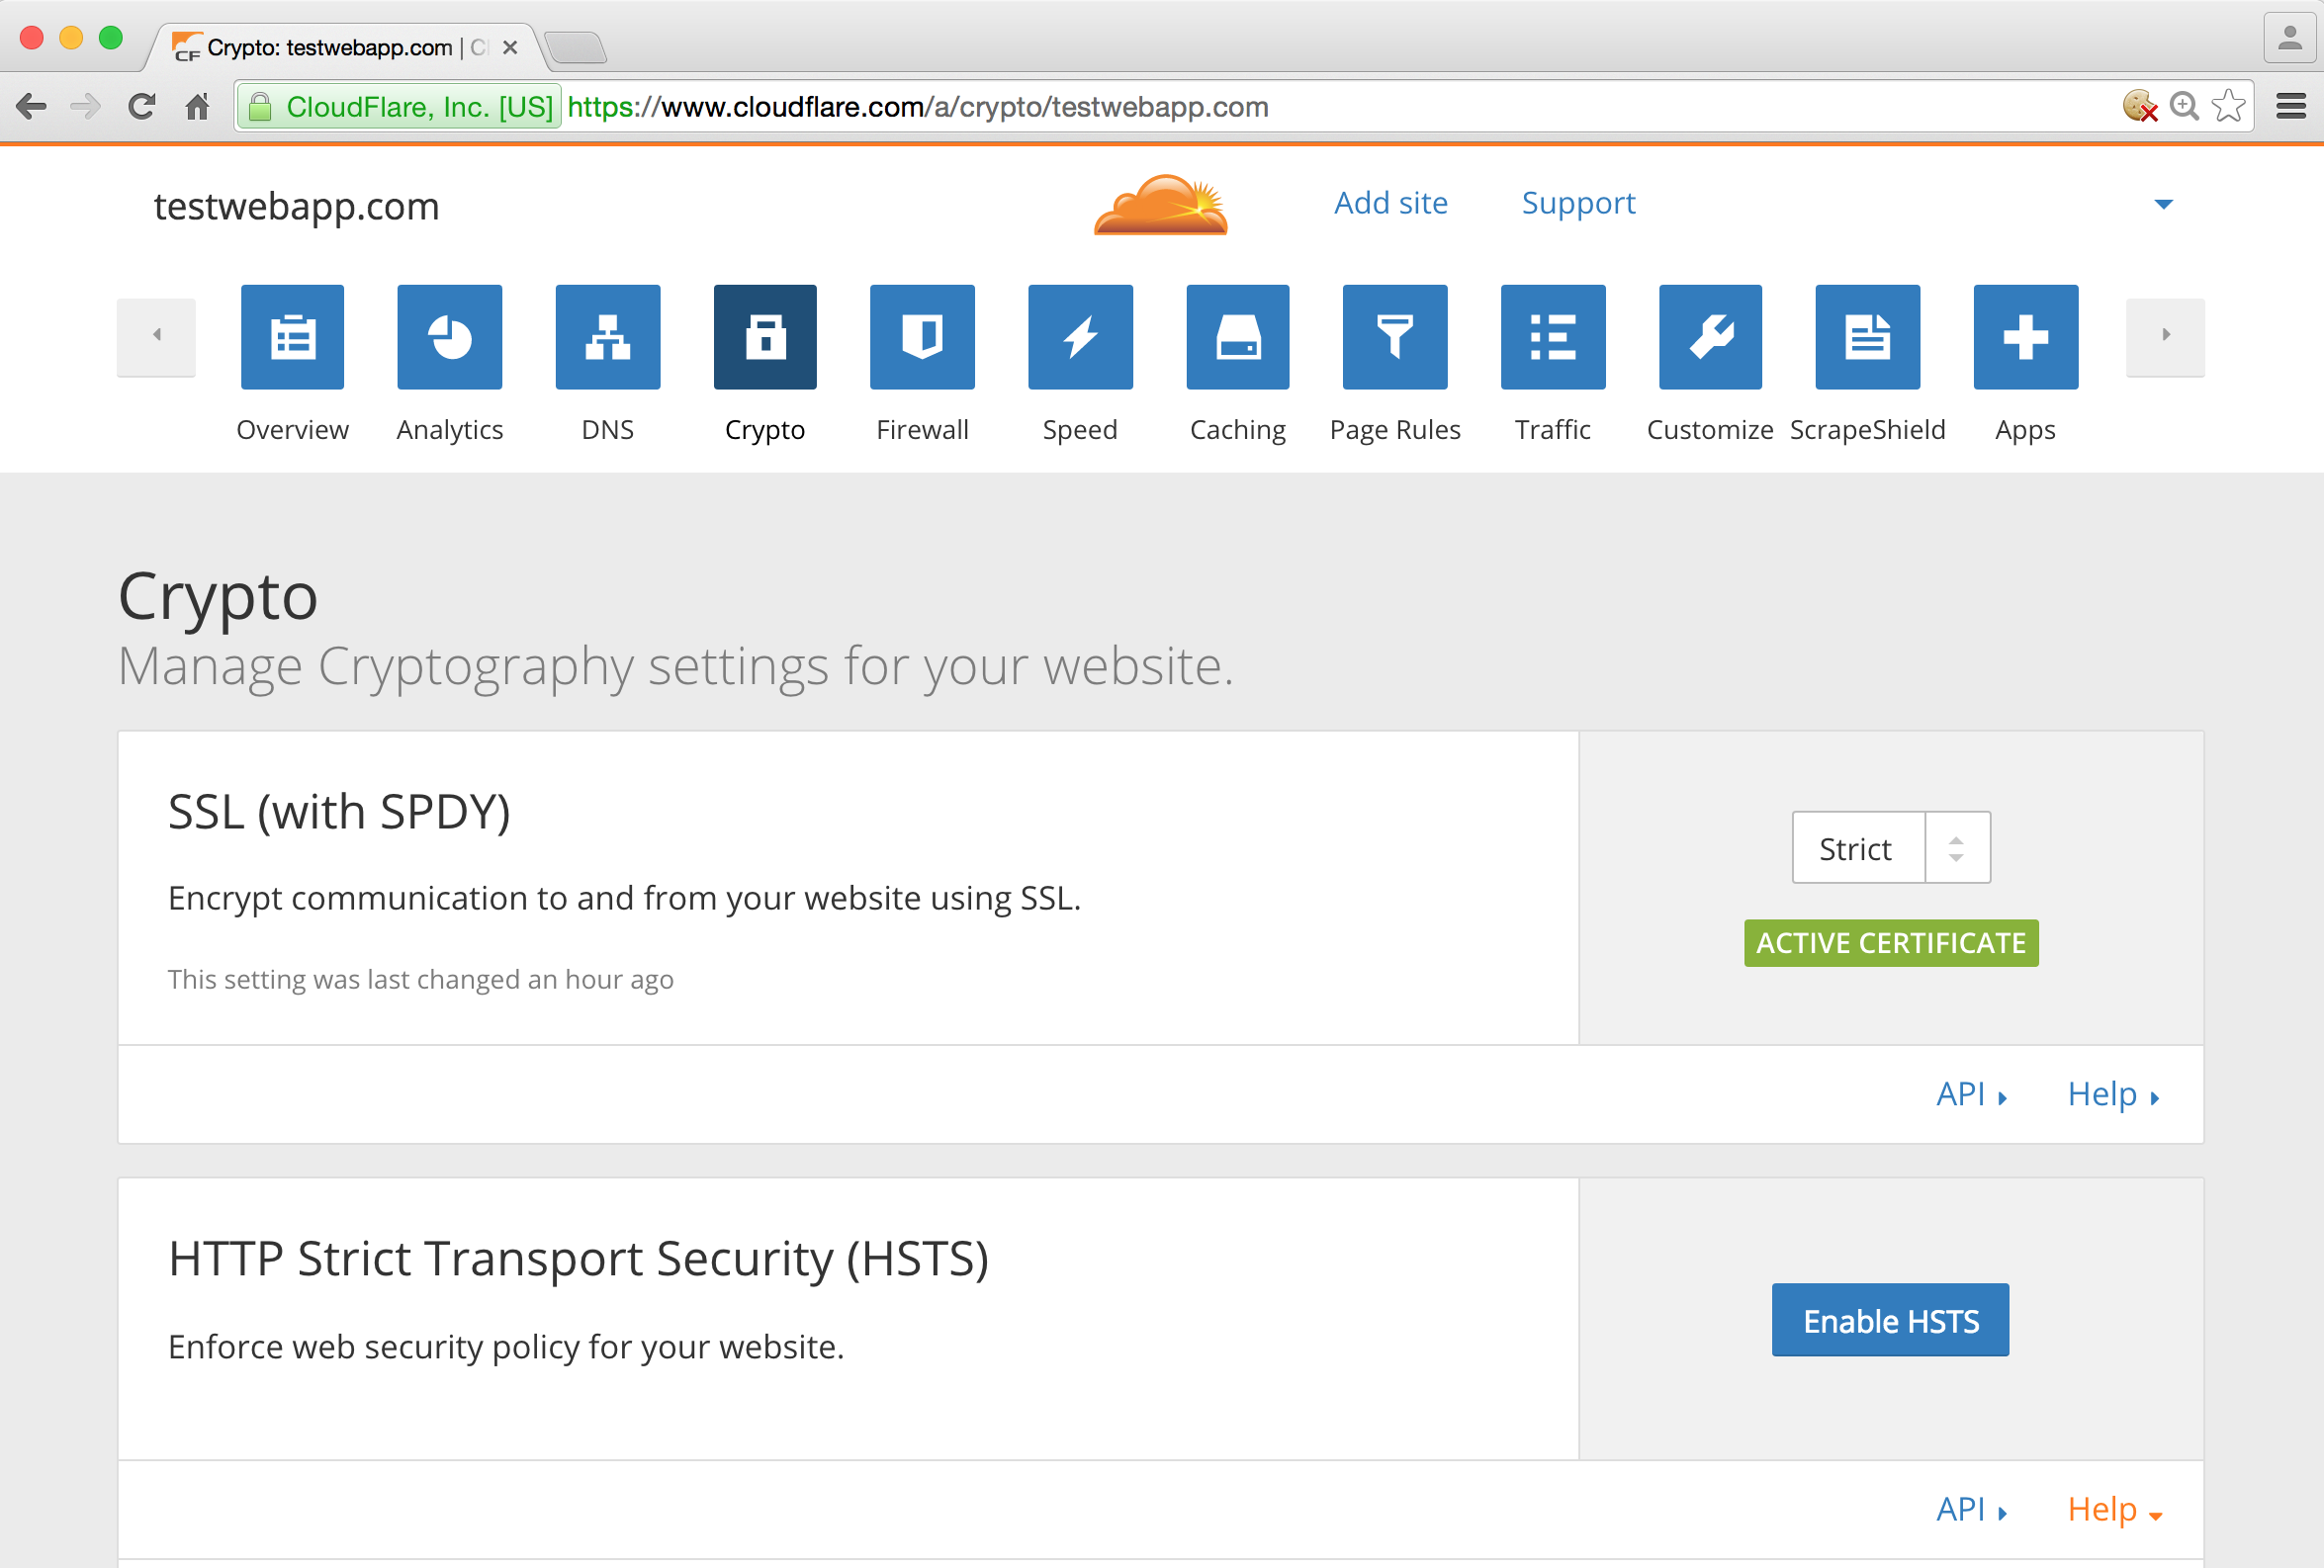
Switching to SSL Strict Mode
To switch from Full SSL mode to Strict, go to Crypto and select Strict
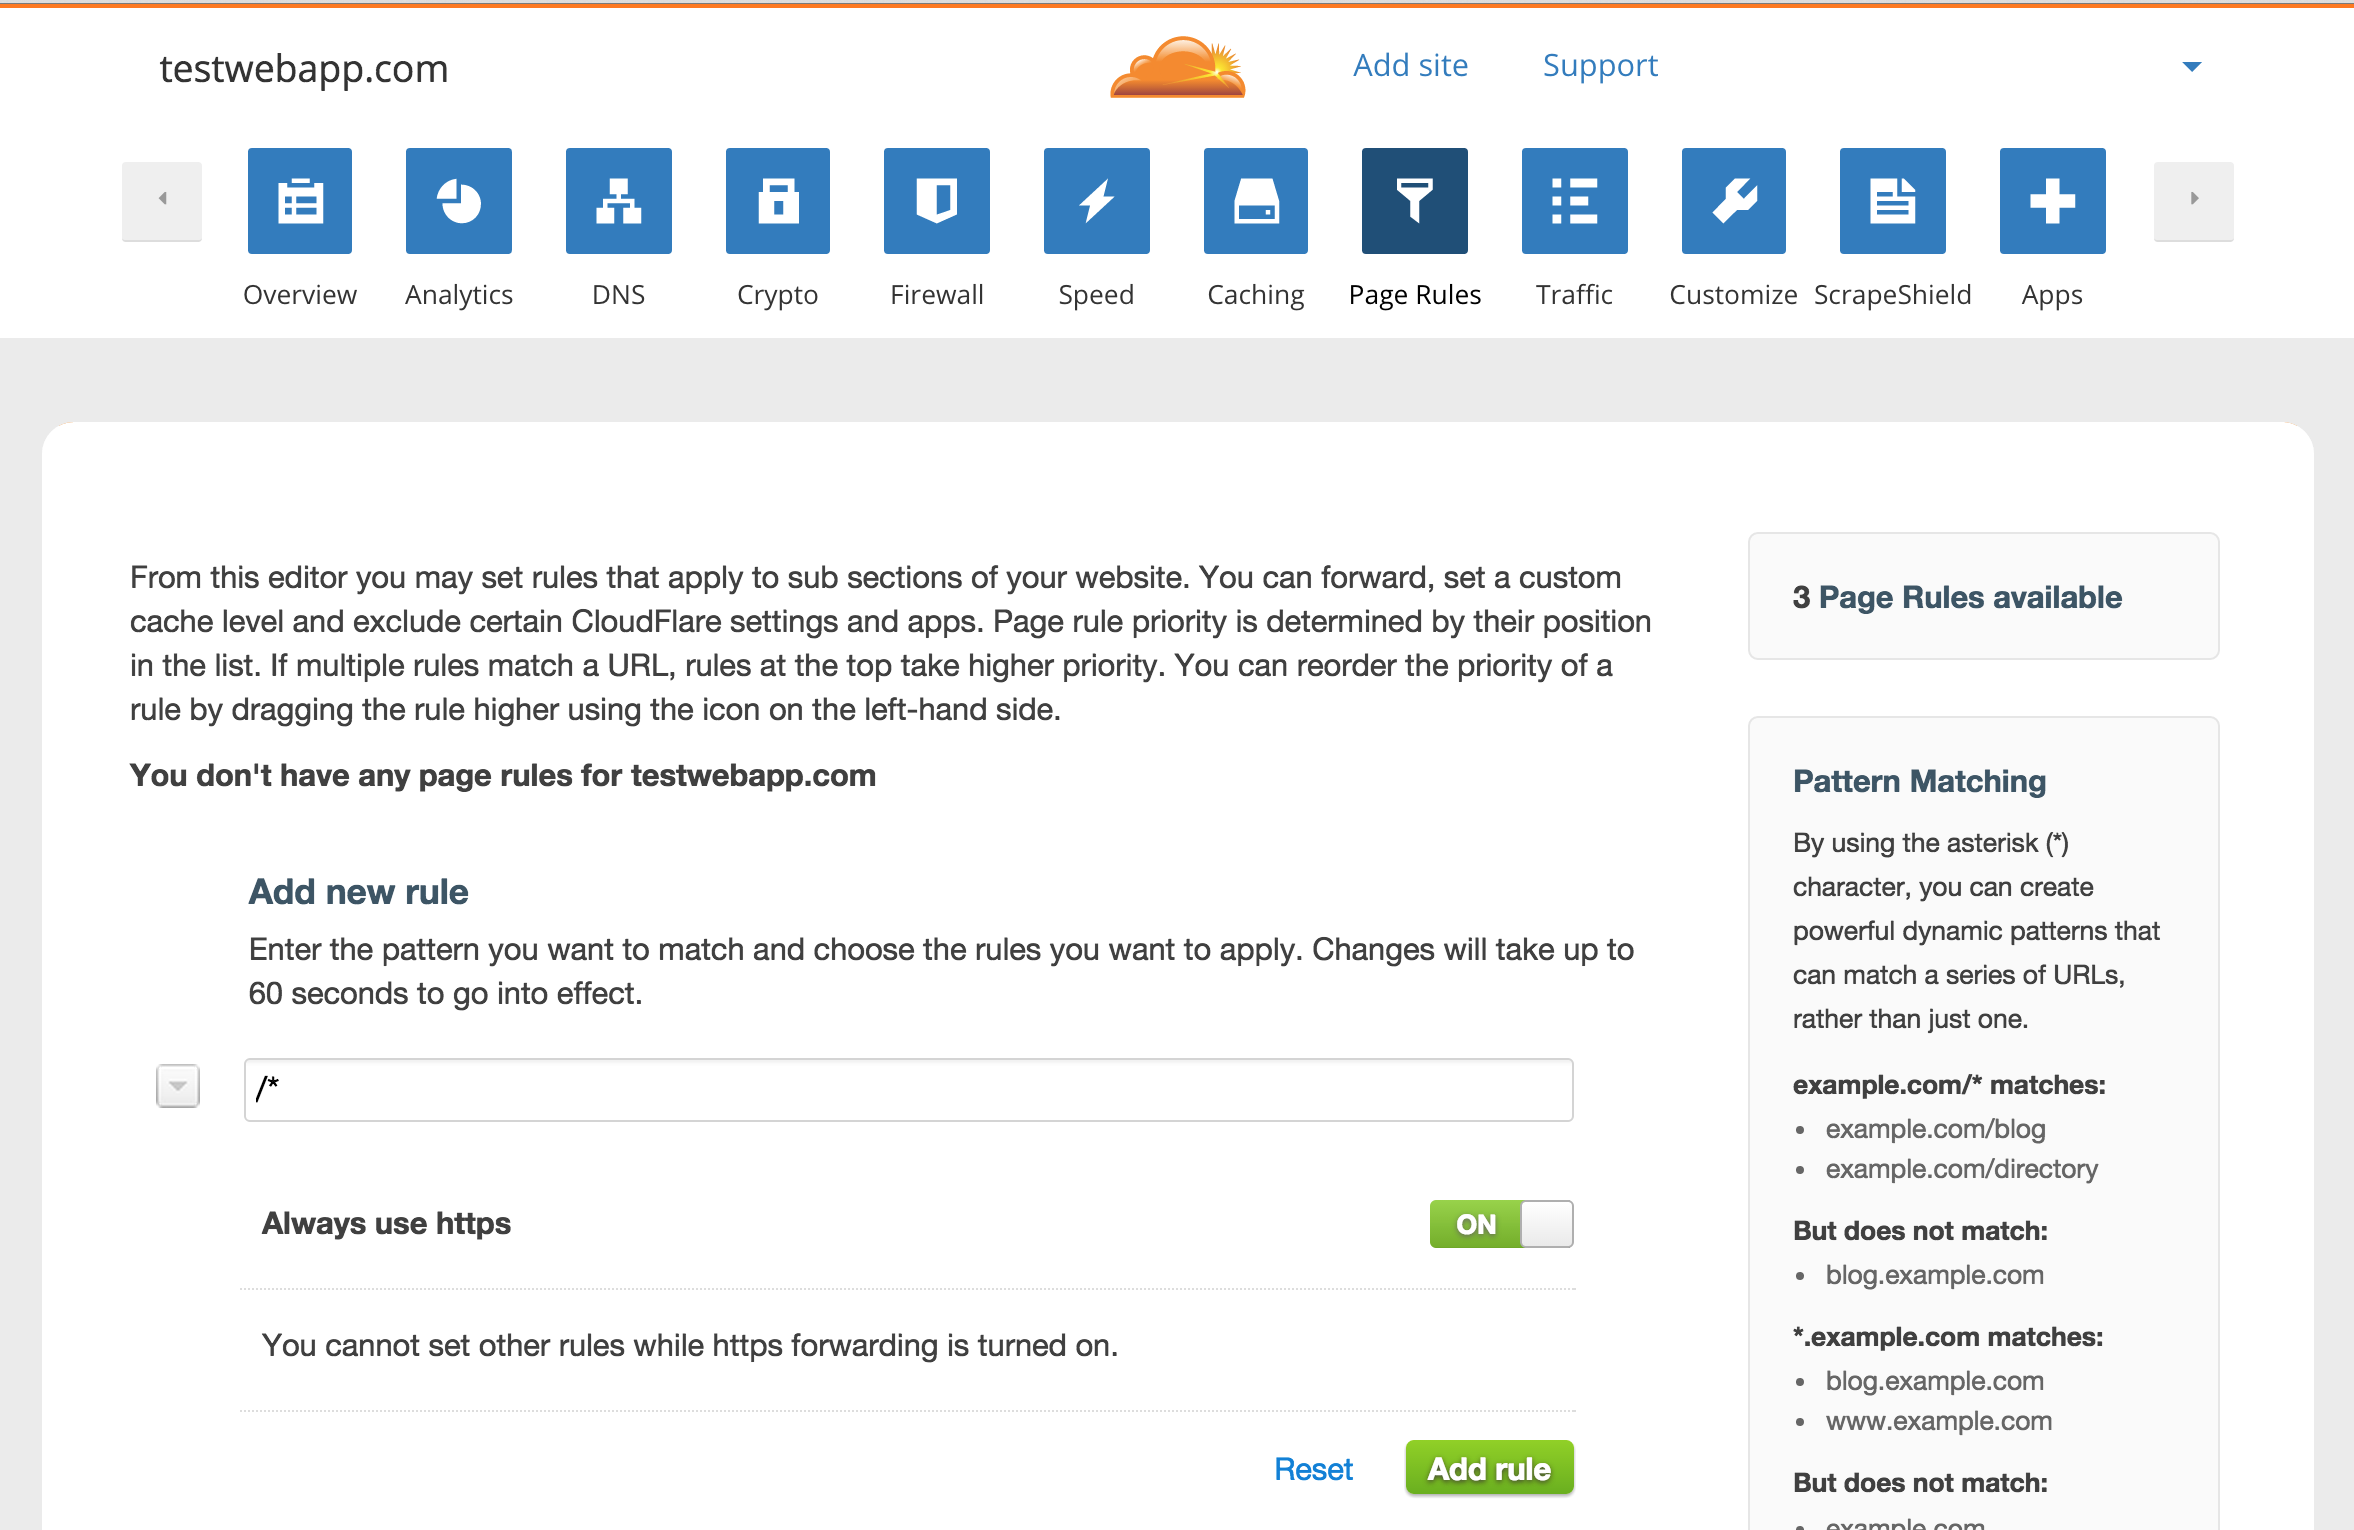
Redirect to HTTPS
My site already has redirection to HTTPS from HTTP, but if yours is not – you can enable that by going to Page Rules and add the following rule:
Pattern: /*
Always use HTTPS: ON
HTTPS Strict Transport Security (HSTS)
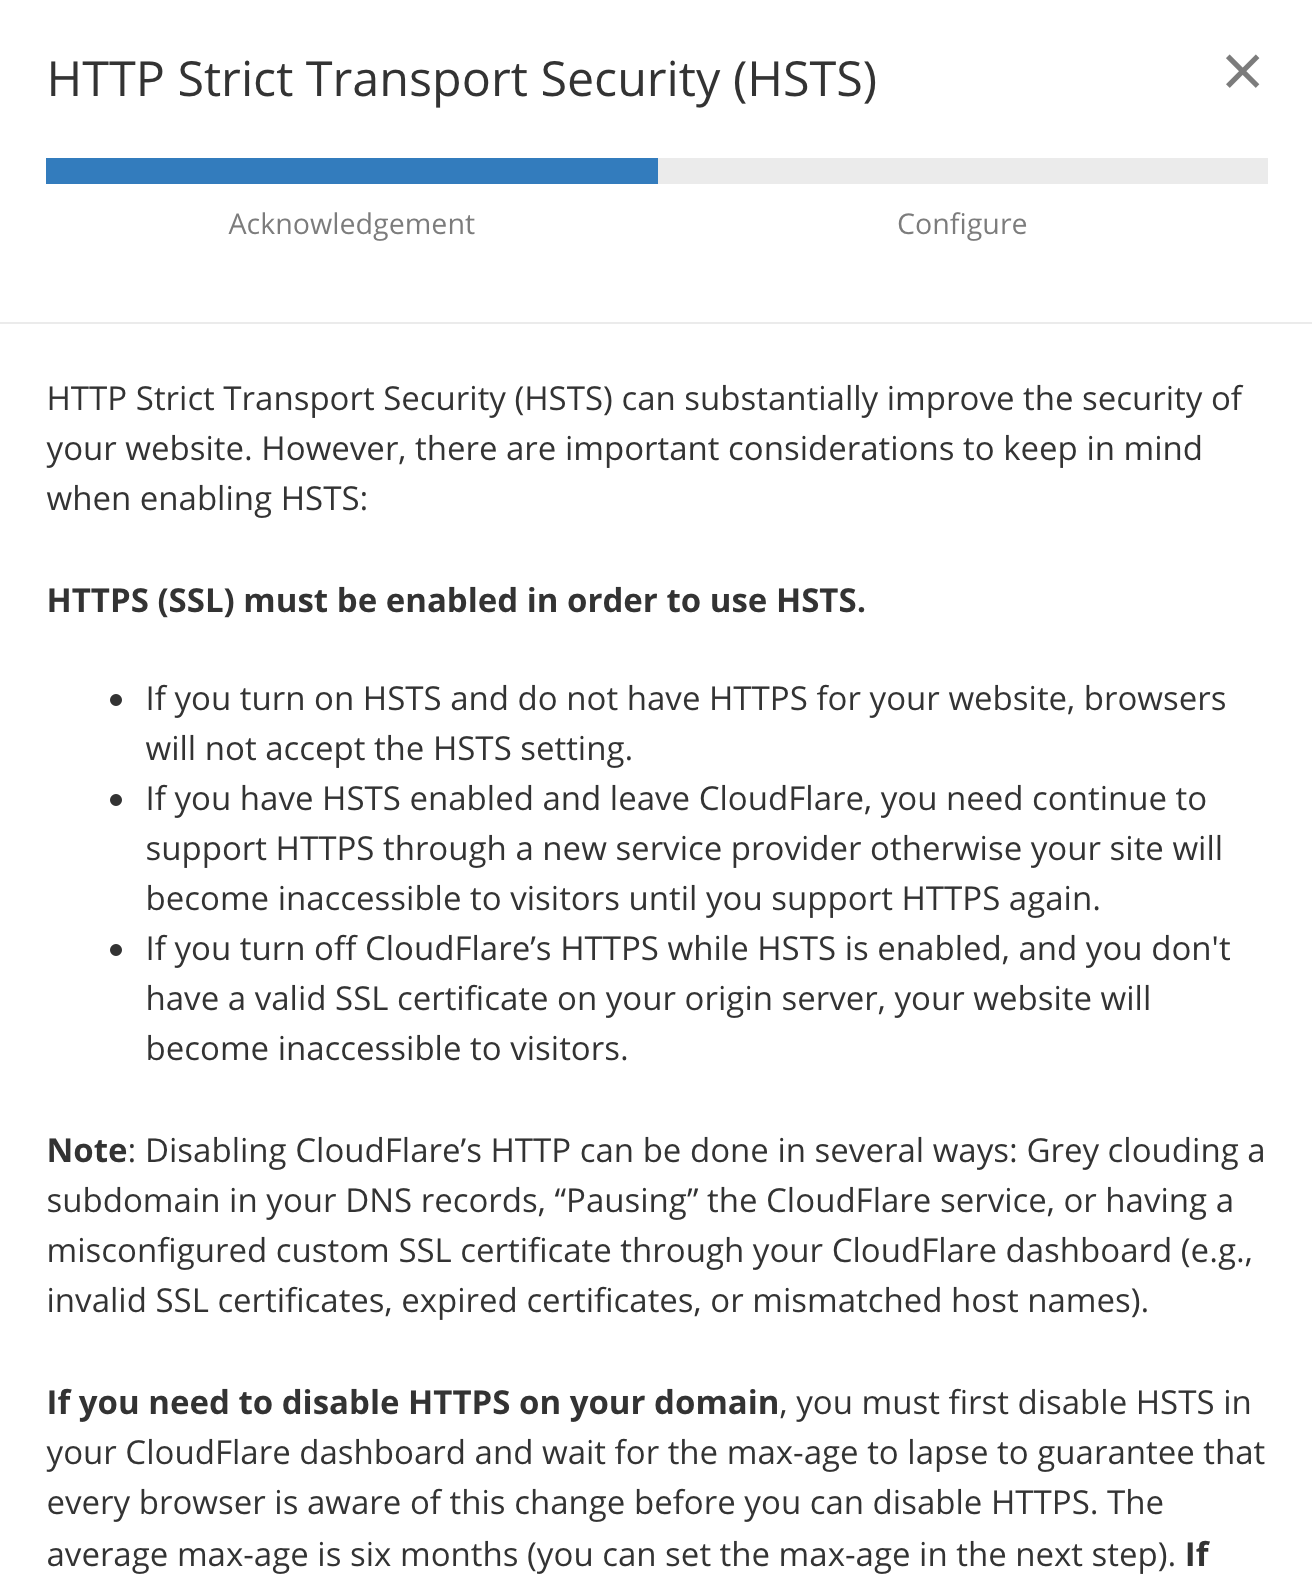
If you are interested in enabling HSTS (in short, after the first request from the site, your browser gets instructions to always make HTTPS requests until these instructions expire, even if you type HTTP in the address bar) you can go to Crypto and hit Enable HSTS.
But you should read and understand all of the warnings before turning it on. After your browser gets those instructions – visitors will not be able to request the site via HTTP, in case you remove SSL certificate, until those instructions expire.
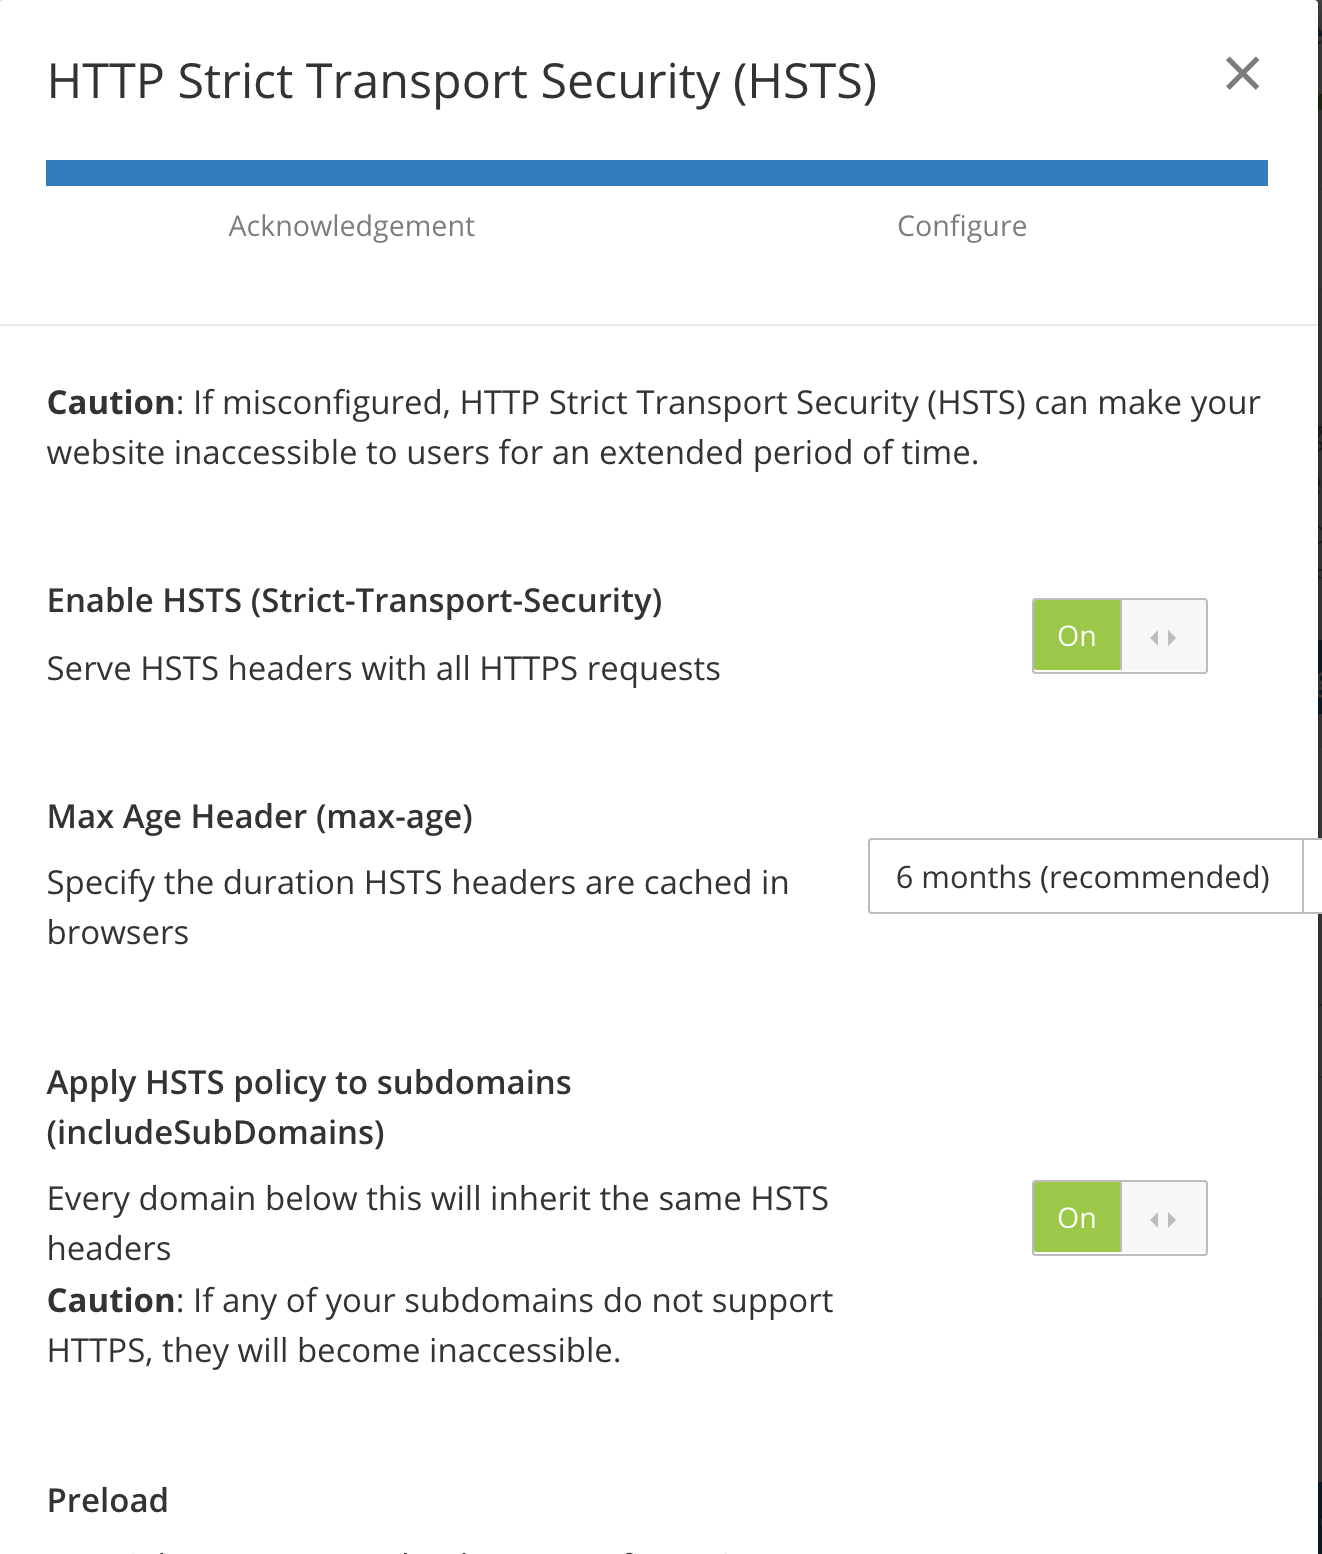
My certificate will be valid for a year, and I am going to set Max Age Header to the recommended 6 months.
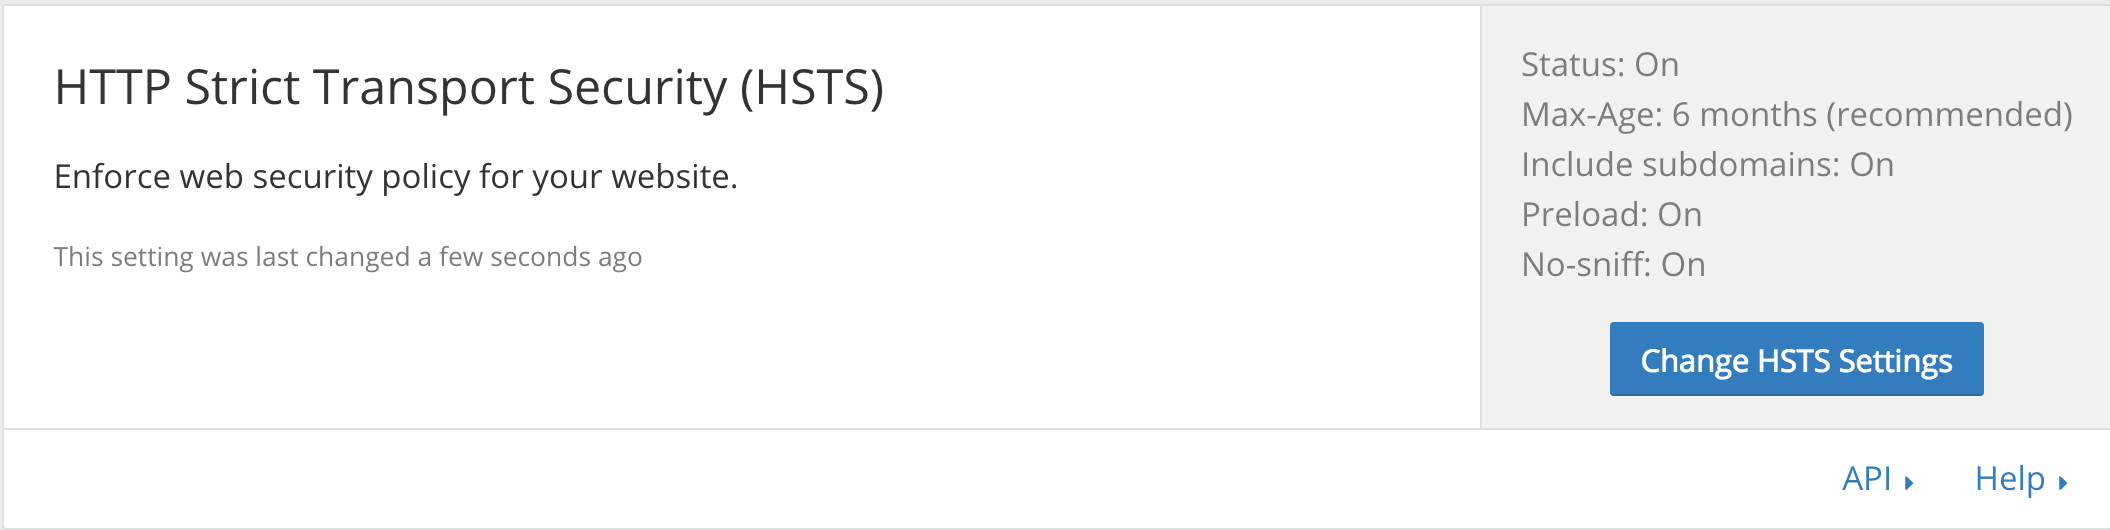
Now, when I load the website in Chrome and open Developer Tools I can see strict-transport-security response header being sent to the visitor.

Final SSL Report
Now, let’s see what Qualys SSL Labs thinks about the security on this website:
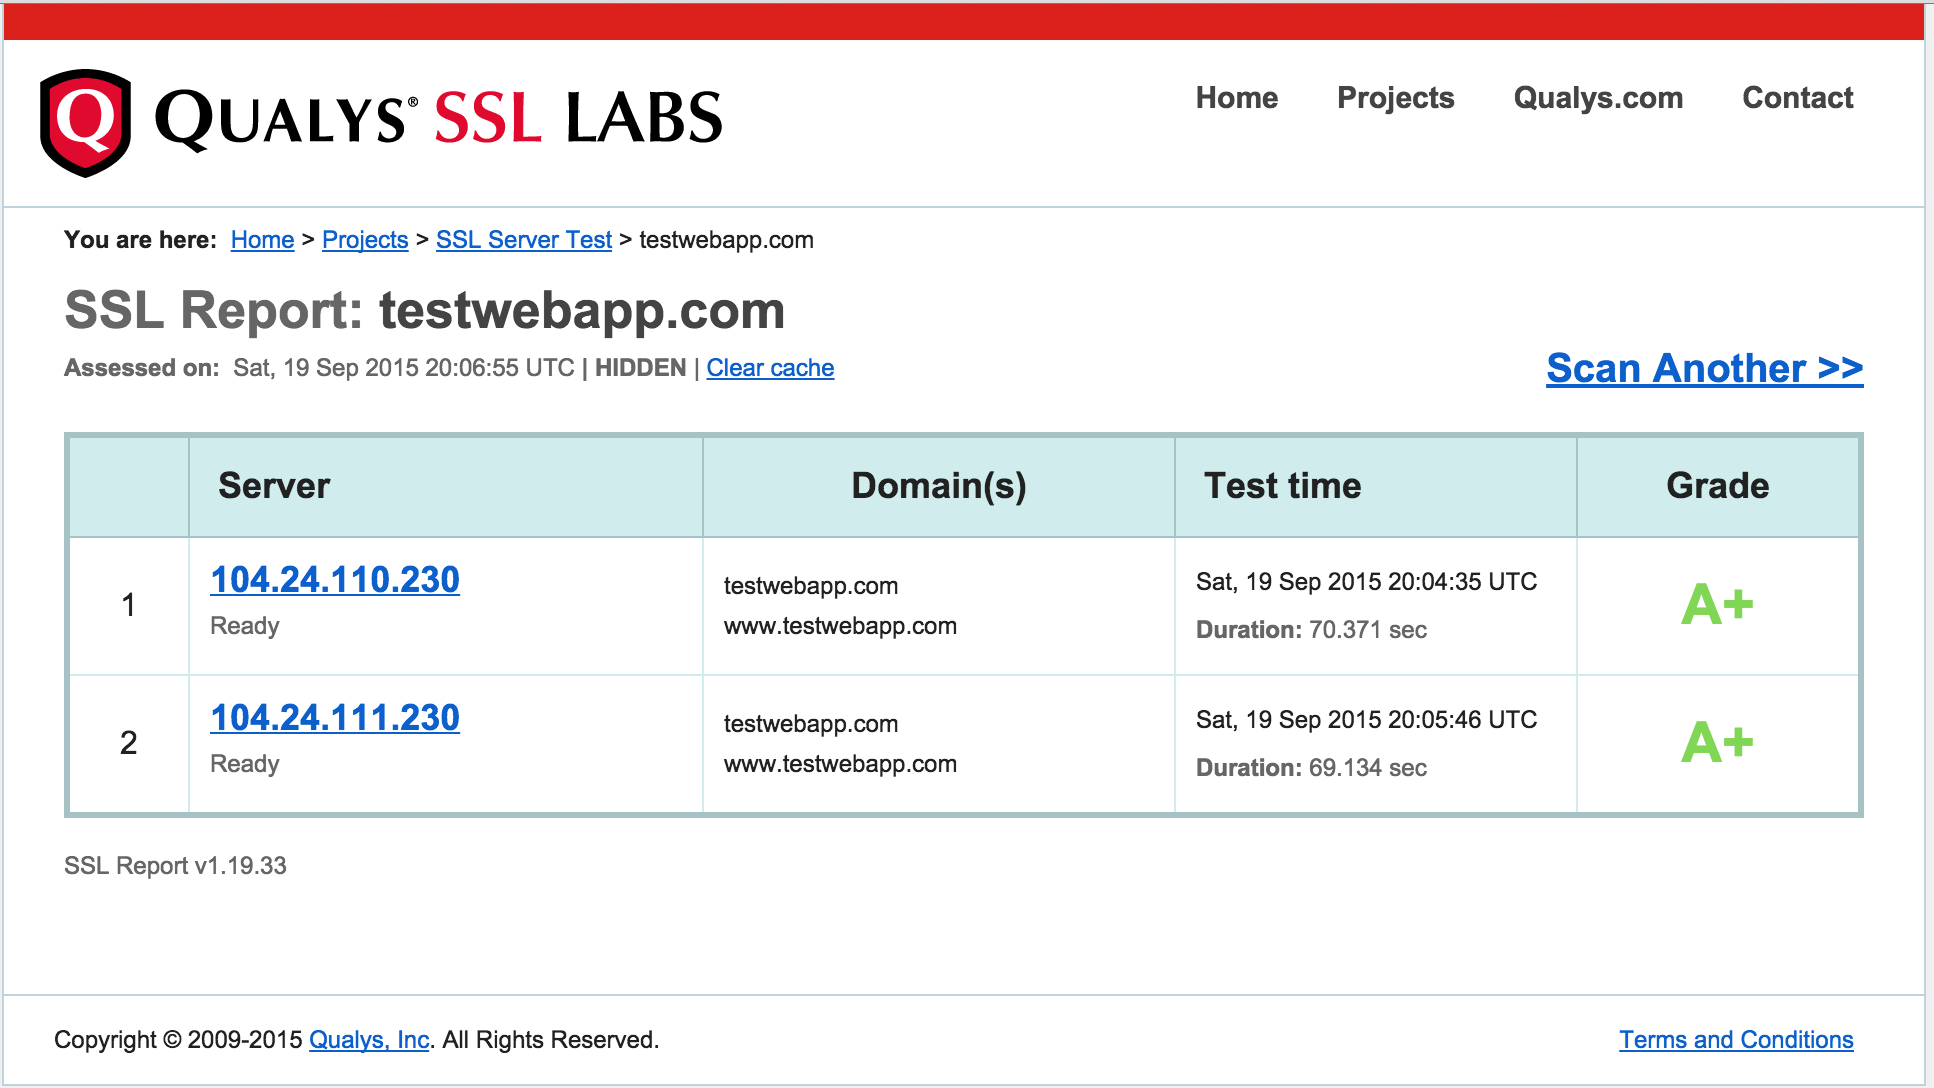
A+! So, what made it happy? HTTP Strict Transport Security.

Making Web App Faster… for FREE
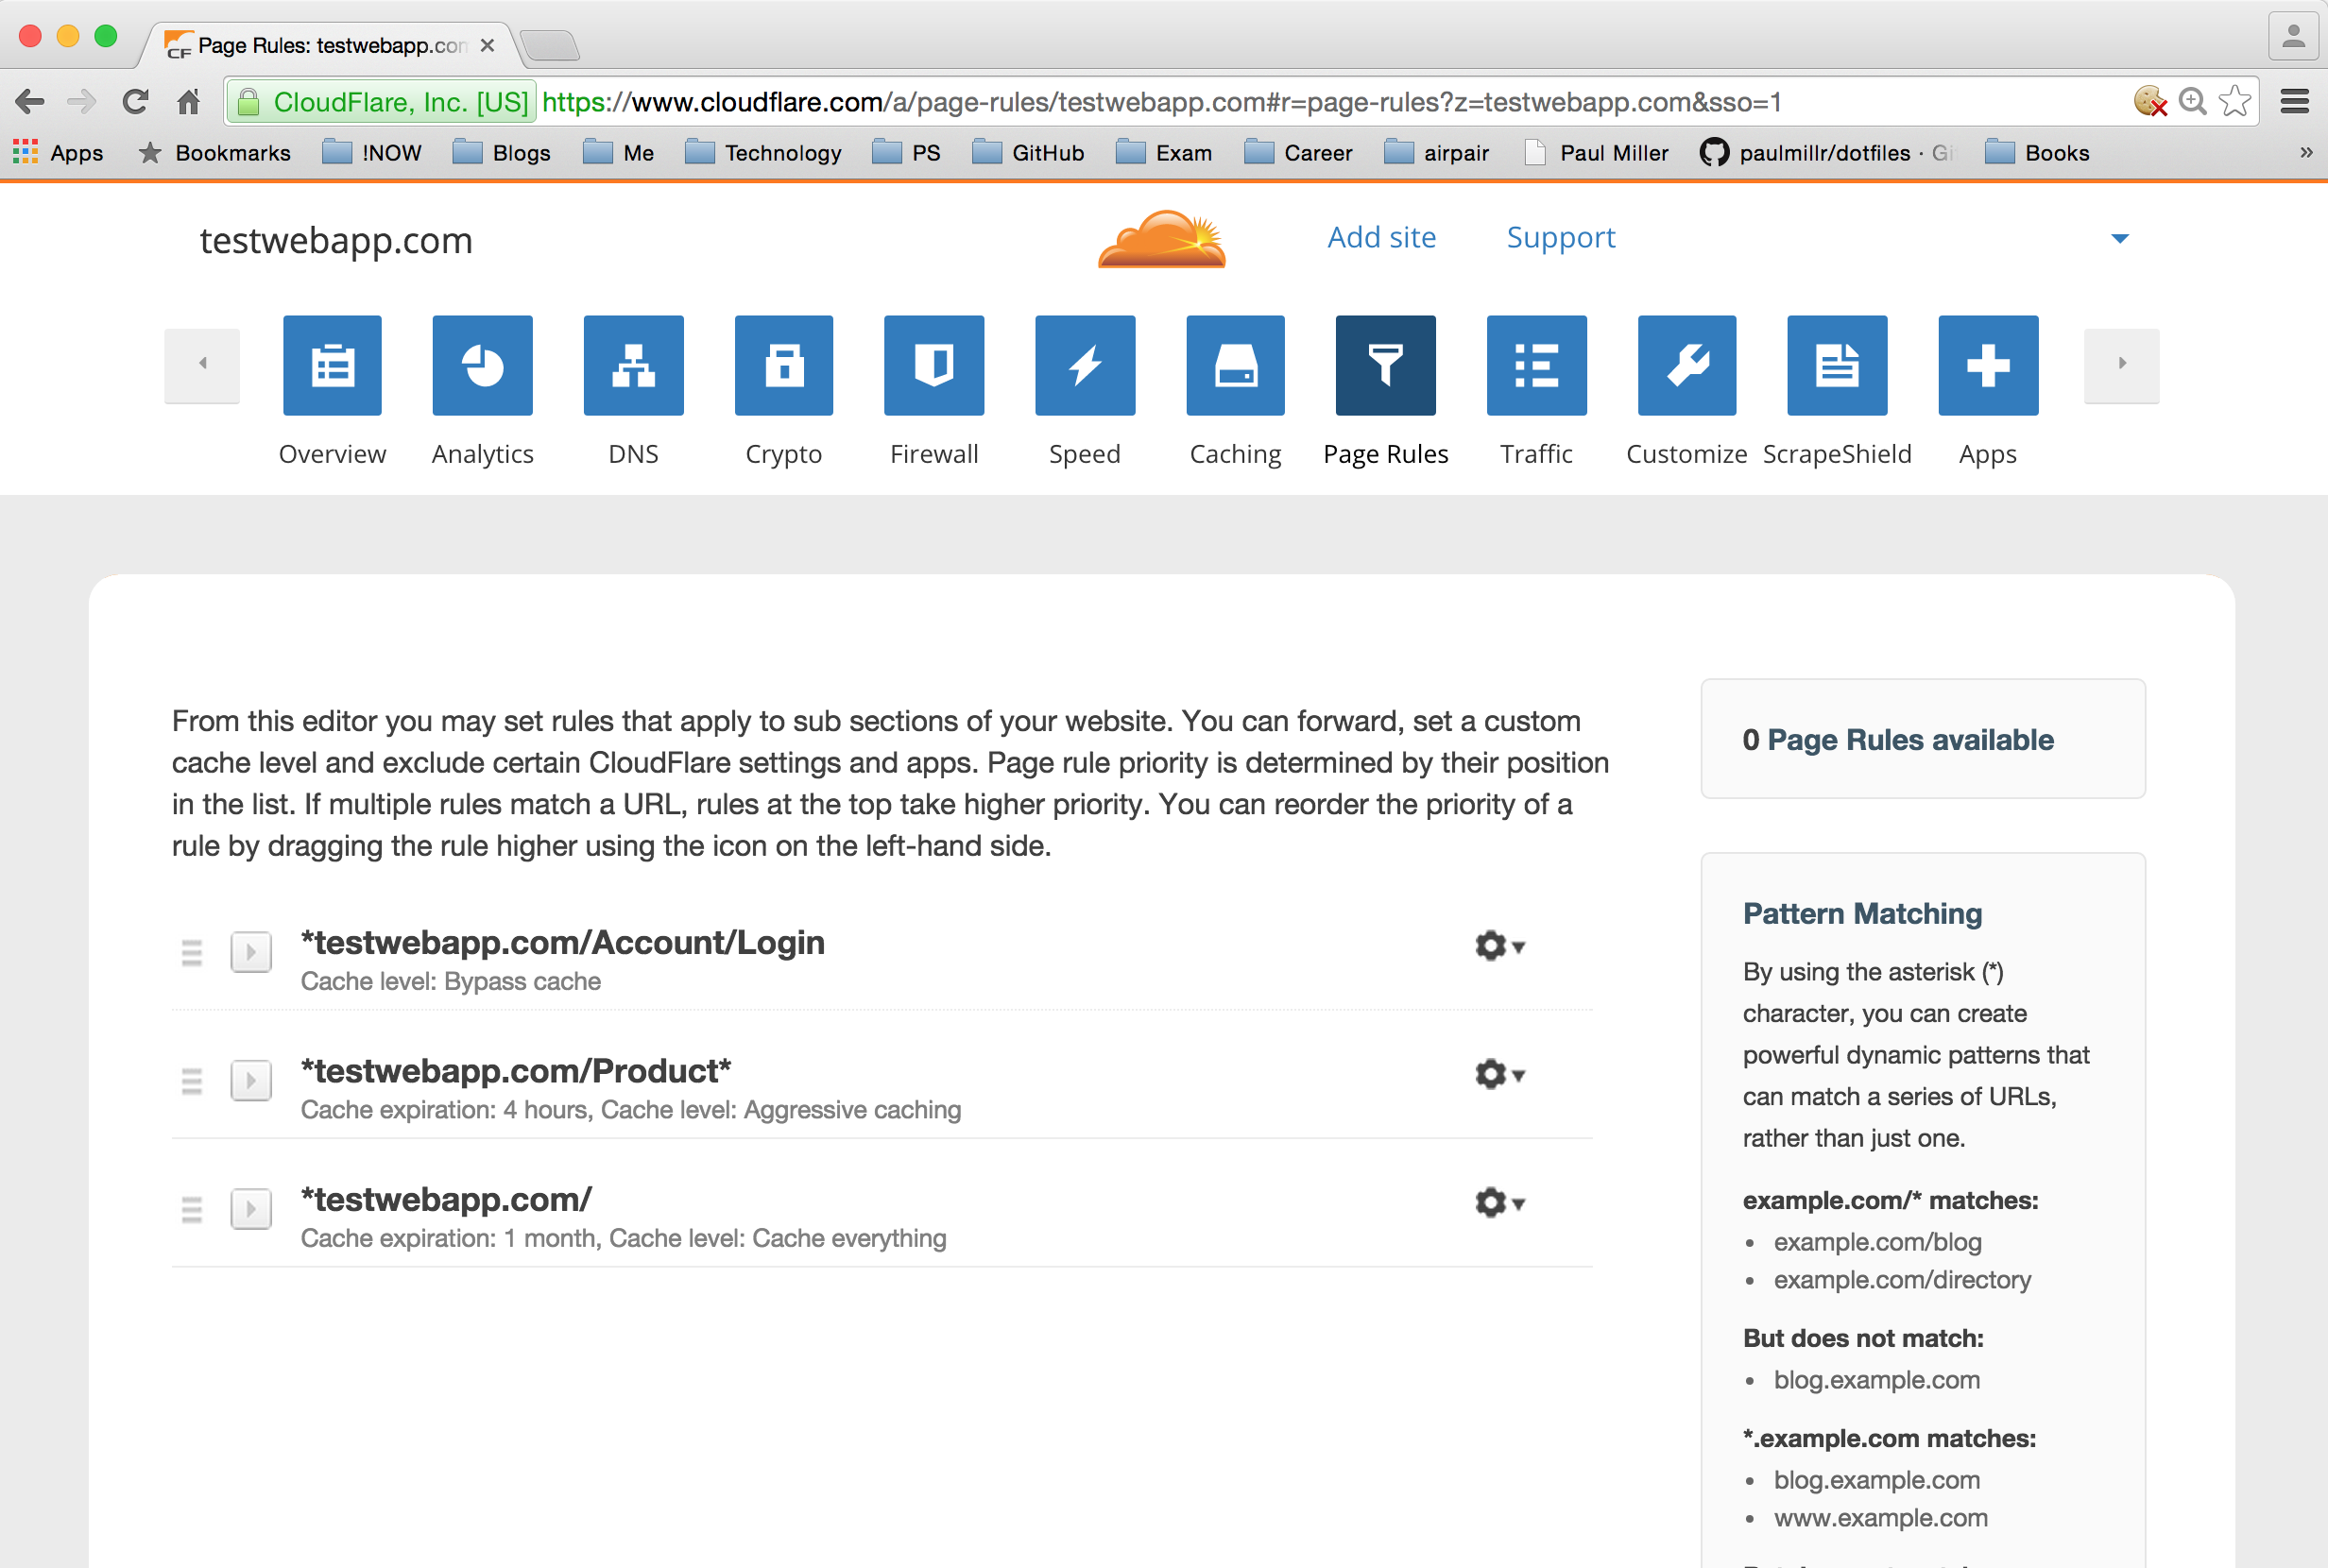
First, we need to set up a few Page Rules. Here is a nice tutorial.
“We recommend that you create a Page Rule to exclude the admin section of your website from CloudFlare’s performance features. Features such as Rocket Loader and Auto Minification may inadvertently break backend functions in your admin section. Creating a Page Rule to disable , so setting a PageRule should fix the problem.”
Custom Page Rule #1
The first rule will prevent caching on Login page
Pattern:*testwebapp.com/Account/Login
Cache level: Bypass cache
Custom Page Rule #2
I’m going to assume that the product selection does not change that often and will set aggressive caching on it.
Pattern: *testwebapp.com/Product*
Cache expiration: 4 hours, Cache level: Aggressive caching
Custom Page Rule #3
The landing page is not going to change frequently at all. I’ll cache everything for 1 month.
Pattern: *testwebapp.com/
Cache expiration: 1 month, Cache level: Cache everything
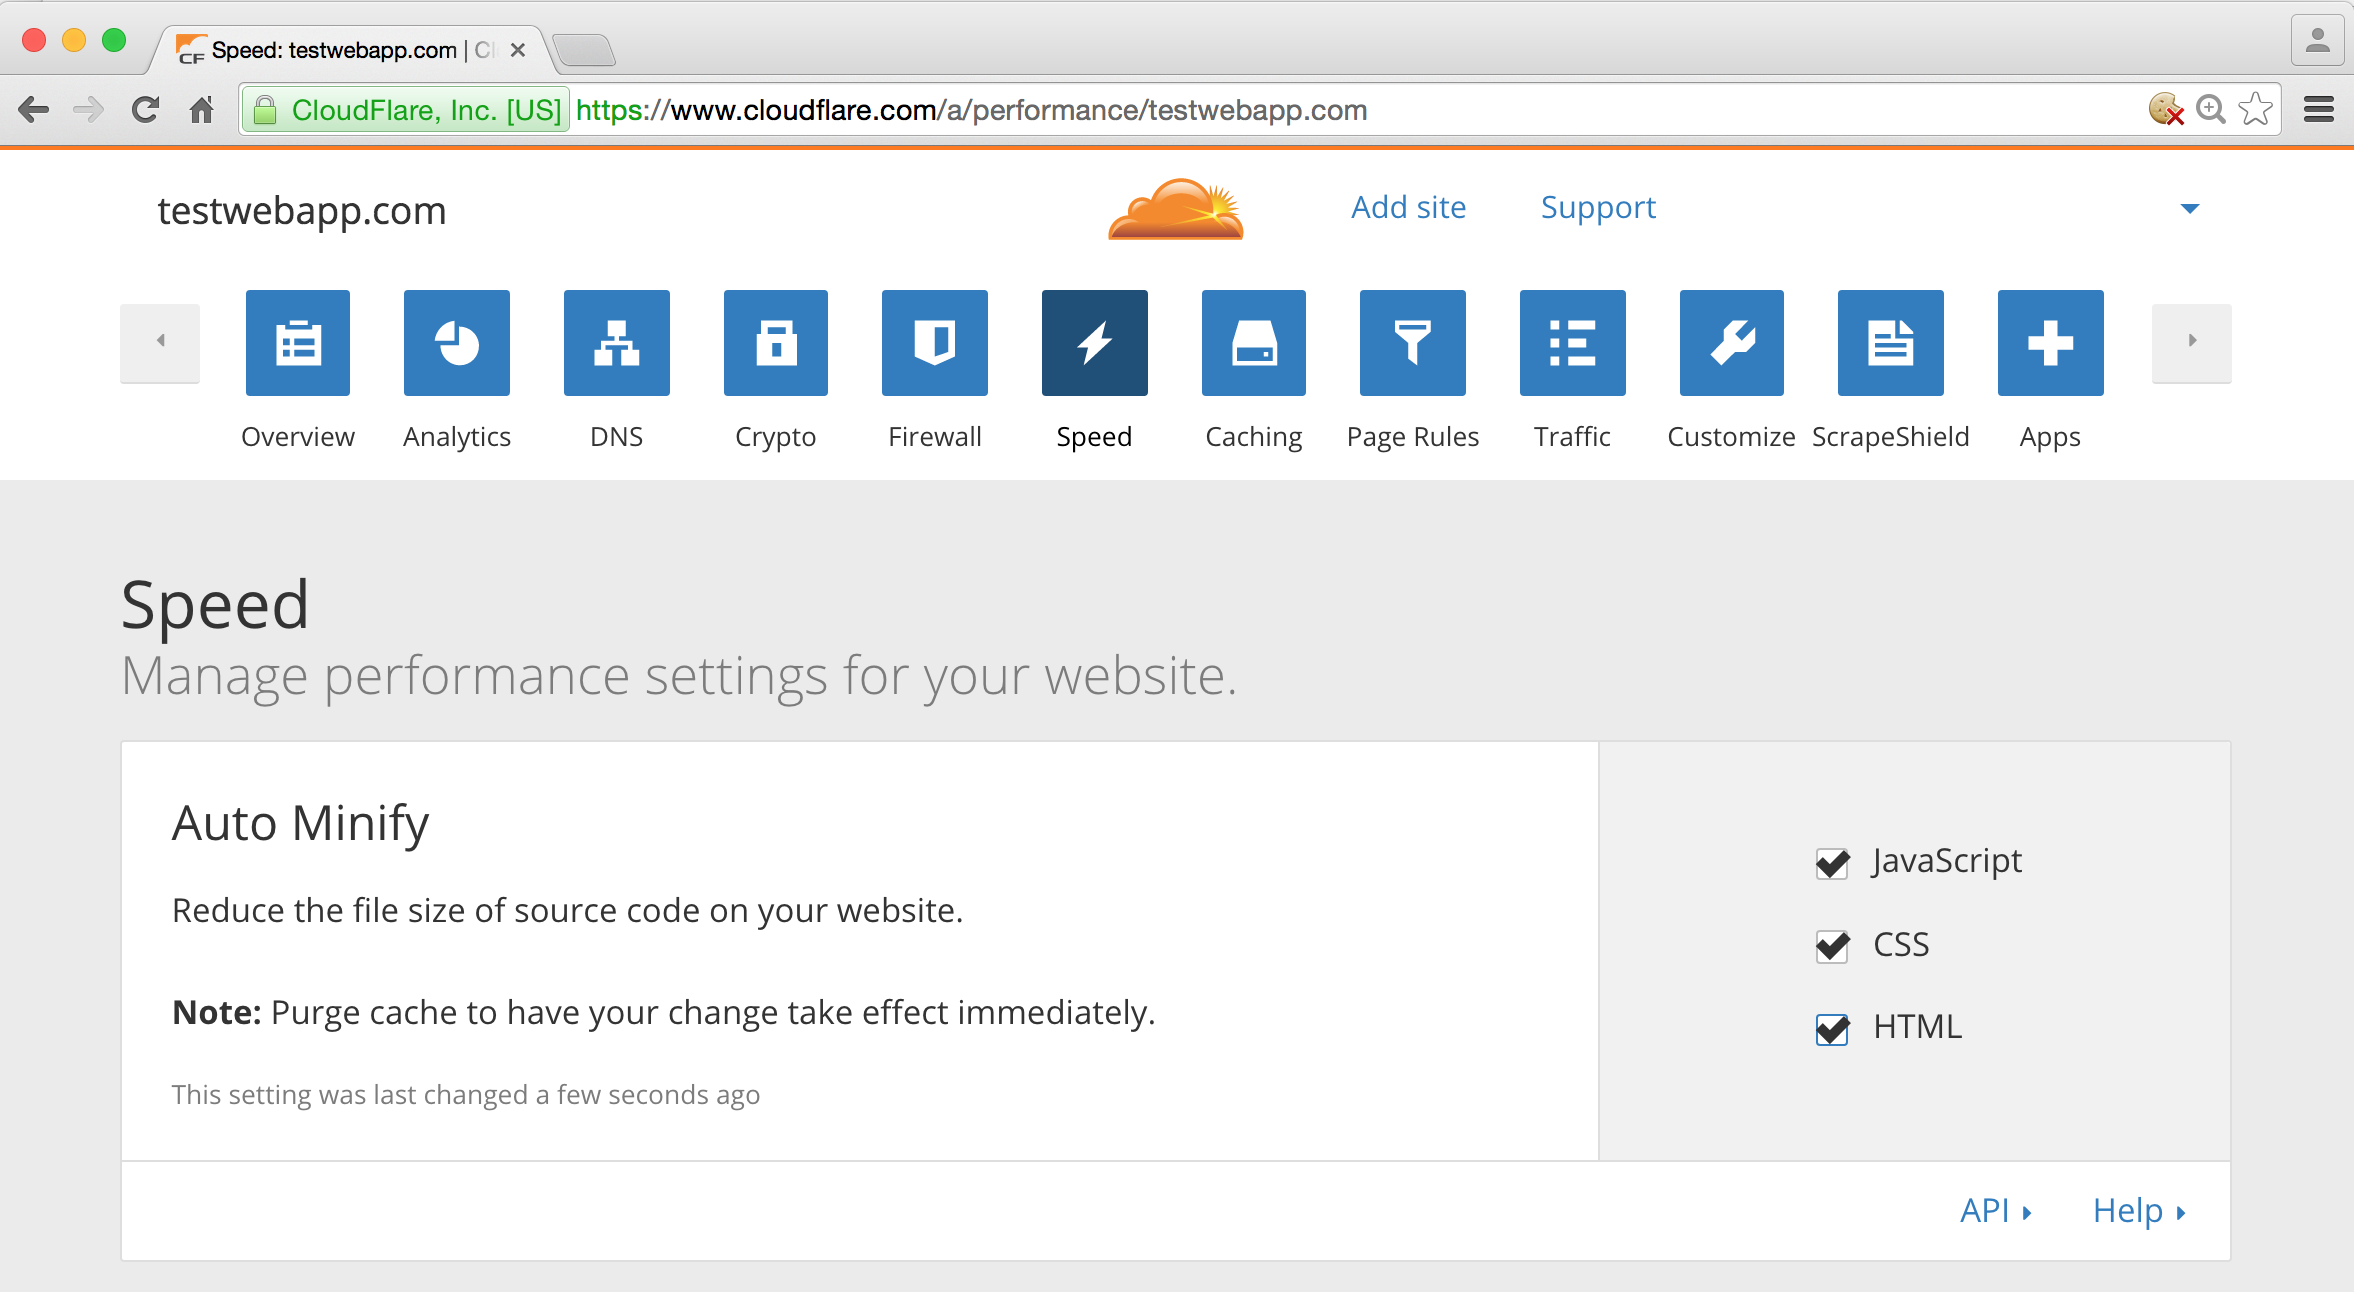
Auto Minify
The last thing I’m going to do is to auto minify HTML, CSS and JavaScript. This is done in Speed section.
And… we are done!

You must be logged in to post a comment.