In this post I will share how to create and minimally configure a Virtual Machine on VirtualBox.
Note: this post is a part of the series of posts about my experience using Ubuntu Desktop for software development.
Creating And Configuring Virtual Machine
After starting VirtualBox application you will be greeted with Oracle VM VirtualBox Manager. As you can see on the following image – I already have Ubuntu Desktop 16.04 created but we’ll create a new one from scratch.

Hit the New button on VirtualBox Manager and in Name and operating system provide the following information:
Name: Ubuntu 16.04 Desktop Blog (or choose your own)
Type: Linux
Version: Ubuntu (64-bit)
Memory size: 2048MB (you can keep the default 768MB and increase the size later)
(*) Create a virtual hard disk now
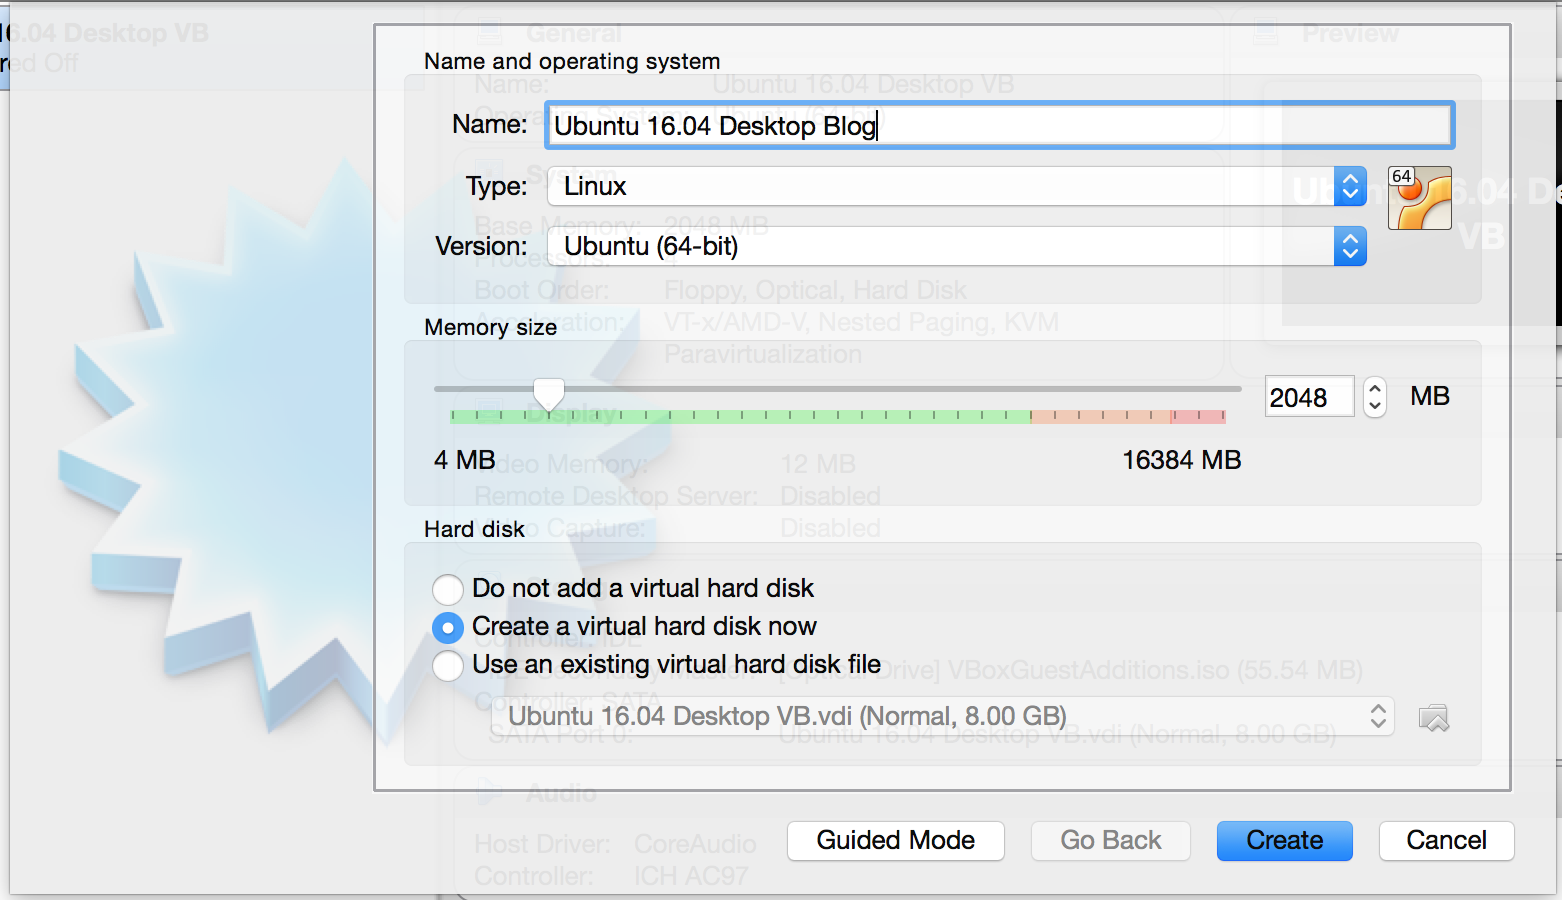
Hit Create button.
In File location dialog accept the default values and hit Create button.

You will be presented with a newly created virtual machine (VM) named Ubuntu 16.04 Desktop Blog.

If you install a guest operating system (Ubuntu Desktop) into this VM it will be completely isolated from your host operating system (Mac OS X). If you want to share clipboards and folders between these operating systems – you need to configure a few settings.
Make sure that this VM is highlighted and hit Settings button on VirtualBox Manager.
Select General category, then Advanced tab and in Shared Clipboard select Bidirectional.

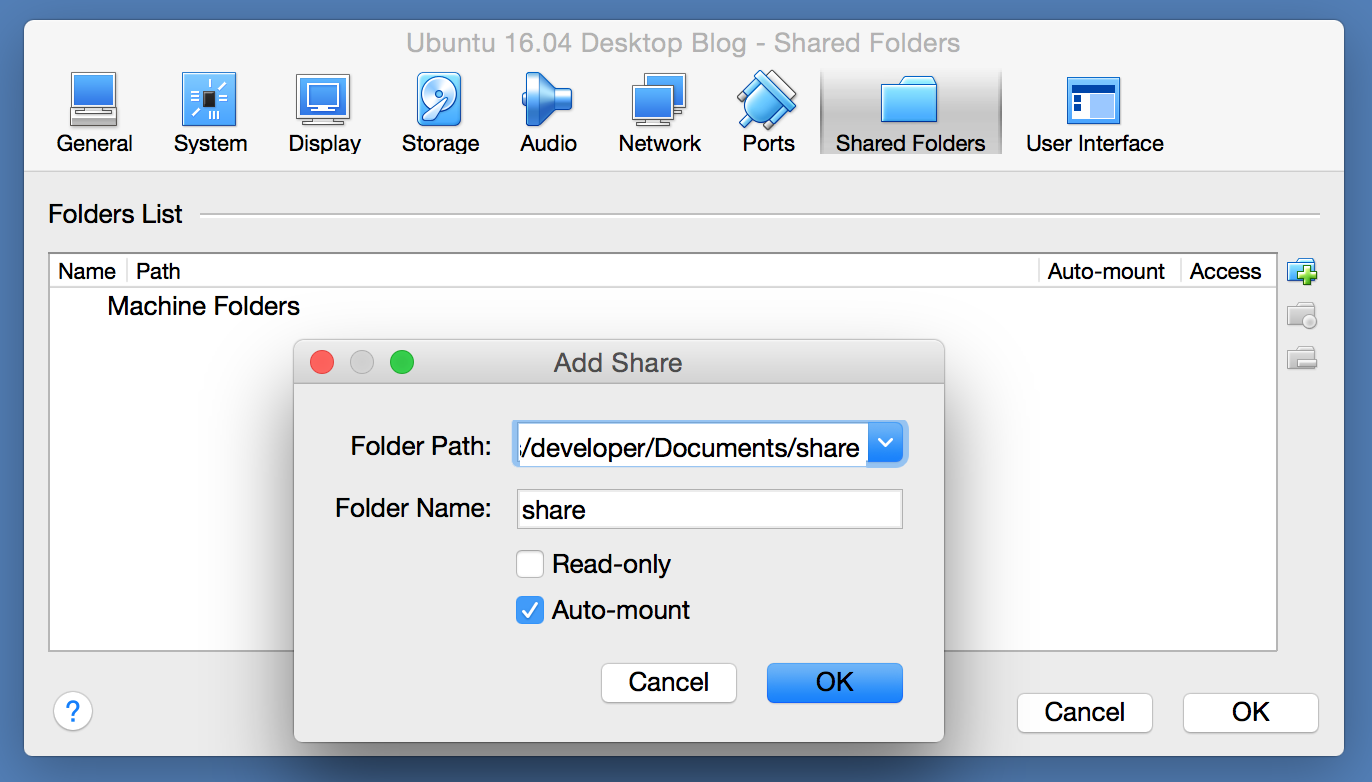
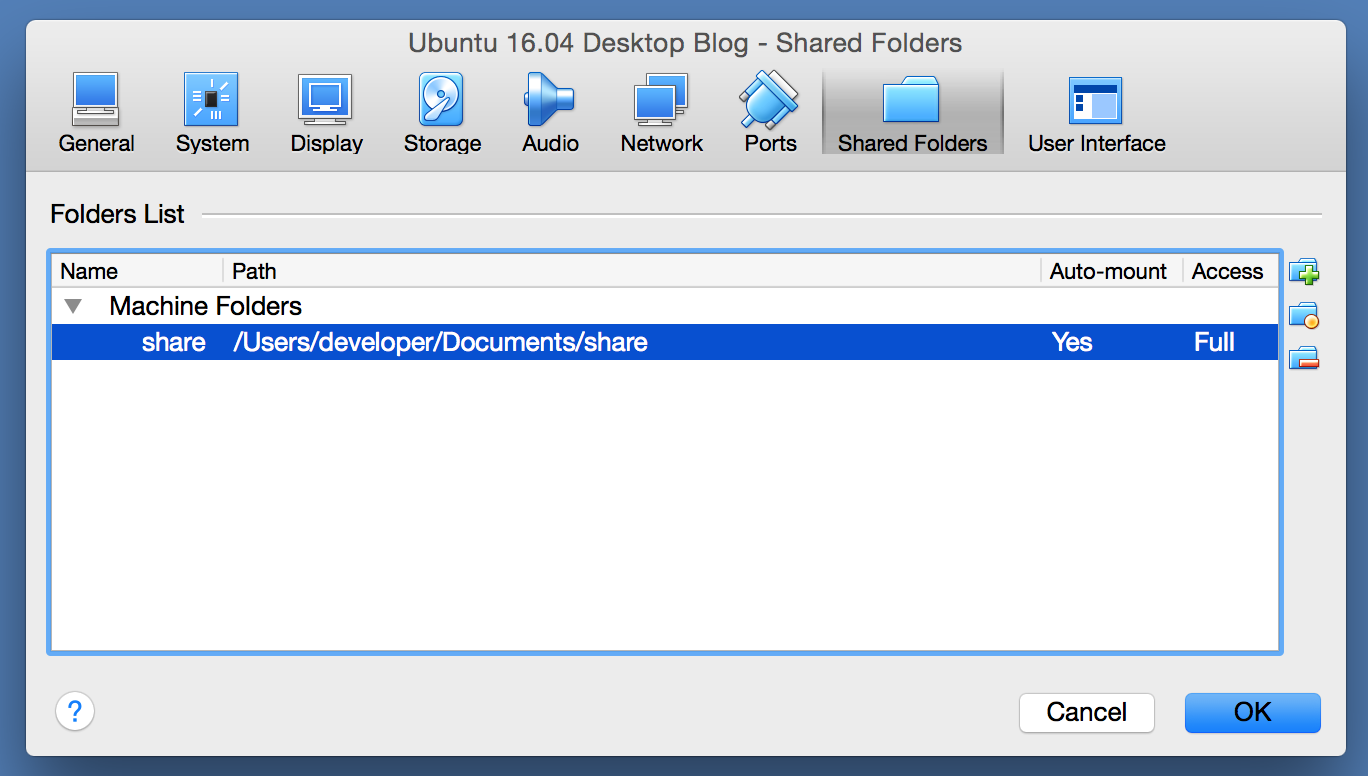
Create a folder on the host operating system that will be shared between it and the guest operating system. I named mine share and it is located at /Users/developer/Documents/share

Select Shared Folders category, then hit a small button with a folder and green plus and provide the location to your folder. Make sure Auto-mount is checked. Hit OK.
And as a final setup – you might want to increase the number of CPUs that will be available for this VM. I tend to set to 4. Go to System category and then select Processor tab. Hit OK.

At this point you’ve got configured VM and is ready to install a guest operating system into it.
See Also

[…] Creating a Virtual Machine […]